|
Translated into
English by Márcinha
SUPLIES: 1 Main Tube of your choice 1 Misted Landscape of your choice NarahsMasks Other Materials by CidaBen
PLUGINS: VM Instant Art > Three Corners. It@lian Editors Effect > Effetto Fantasma. Filter Factory Gallery A > Weave.
Tutorial created in PSP 2022 Tested and reviewed by Márcinha in PSP 2020.
I would like to thank the
tube and mask artists, without whom this project would not have been
possible. Feel free to adjust the
Blend Modes to match the colors you are using.
TUTORIAL
*Delete the watermarks from all
materials.
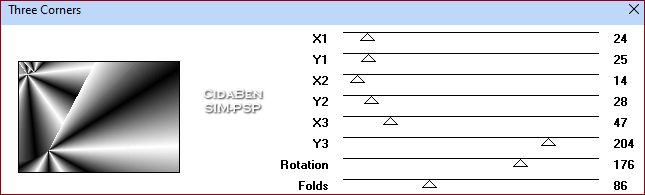
2 - Open a new transparent image, 800 x 550 px. Effects > Plugins > VM Instant Art > Three Corners.
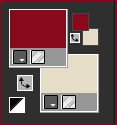
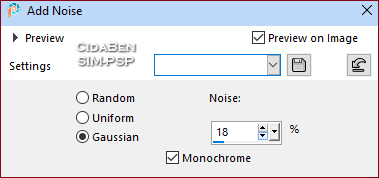
3 - Layers > New Raster Layer. Paint with the Foreground color (#890415). Layers > Properties > General > Blend Mode: Overlay > Opacity: 80% Adjust > Add/Remove Noise > Add Noise.
Layers > Merge > Merge All (Flatten).
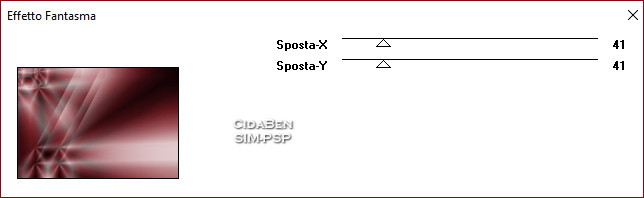
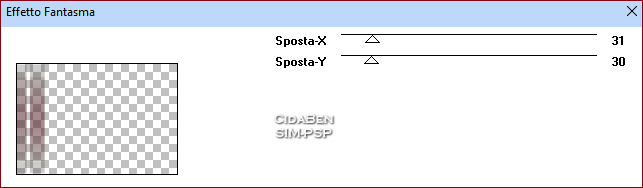
4 - Effects > Plugins > It@lian Editors Effect > Effetto Fantasma.
Image > Mirror > Mirror Horizontal. Layers > Promote Background Layer.
5 - Layers > Duplicate.
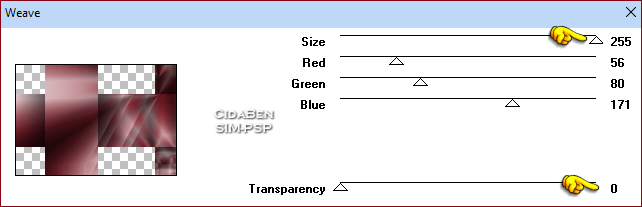
6 - Effects > Plugins > Filter Factory Gallery A > Weave.
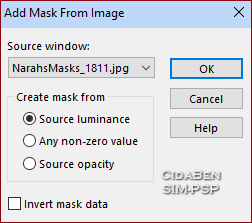
7 - Layers > New Raster Layer. Paint with the Background color (#e5ddc6). Layers > New Mask Layer > From Image: NarahsMasks_1811.
Layers > Merge > Merge
Group.
8 - Turn off the visibility of the Raster 1 layer. Activate the Copy of Raster 1 layer.
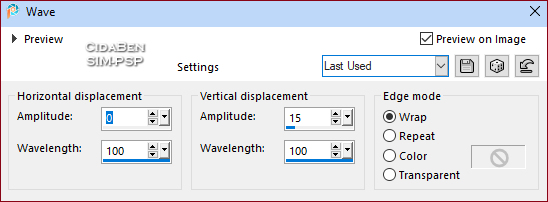
9 - Effects > Distortion Effects > Wave.
10- Edit > Copy
from the
file
Decor30_CBen1. Pick Tool: Position X: 439,00, Position Y: 176,00. In the second version, I used
Blend Mode: Luminance (L) for the color I chose. Adjust > Sharpness > Sharpen.
11 - Turn on the visibility of the Raster 1 layer. Activate the Copy of Raster 1 layer. Selections > Load/Save Selections > Load Selection From Disk: 30_CBen1. *Press the Delete key on the keyboard or use Edit > Cut. Selections > Select None.
12 - With the layer Copy of Raster 1 active... Selections > Load/Save Selections > Load Selection From Disk: 30_CBen2.
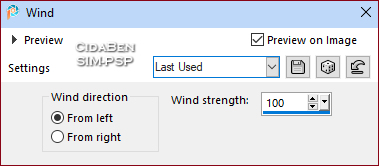
13 - Effects > Distortion Effects > Wind.
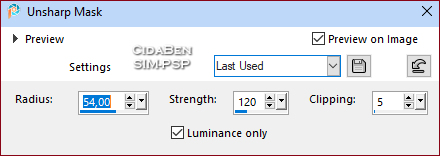
14 - Layers > New Raster Layer. Edit > Copy from the file Misted30_Flowers_CBen. Edit > Paste Into Selection. Adjust > Sharpness > Unsharp Mask.
Effects > 3D Effects > Drop Shadow: 0, 0, 70, 50, Color: #000000 (black). Selections > Select None.
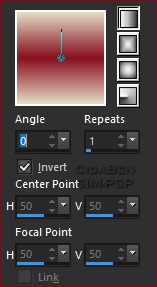
15 - Activate the Copy of Raster 1 layer. Layers > New Raster Layer. Selections > Load/Save Selections > Load Selection From Disk: 30_CBen3. Fill the selection with a Linear Gradient using the colors in use. Angle: 0 > Repeats: 1 > Invert checked.
Selections > Select None.
16 - Effects > Plugins > It@lian Editors Effect > Effetto Fantasma.
17 - Edit >
Copy from the file
Decor30_CBen2. Pick Tool: Position X: 37,00, Position Y: 56,00. In the second version, I used Blend
Mode: Luminance (L) for the color I chose. Adjust > Sharpness > Sharpen.
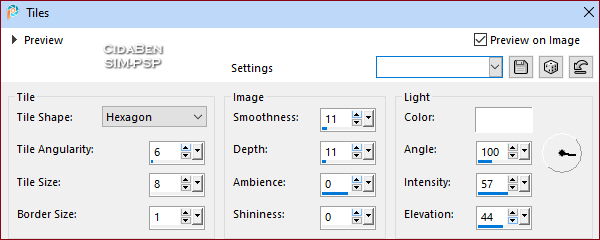
18 - Activate the Raster 4 layer. Selections > Load/Save Selections > Load Selection From Disk: 30_CBen4. Effects > Texture Effects > Tiles.
Effects > 3D Effects > Drop Shadow: 0, 0, 70, 50, Color: #000000 (black). Adjust > Sharpness > Sharpen. Selections > Select None.
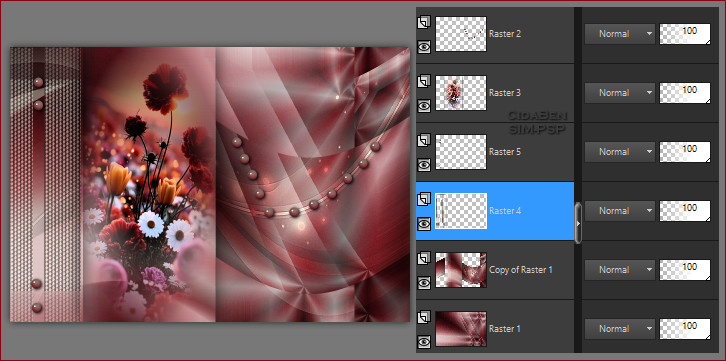
Layer Position:
19 - Image > Add Borders >
Symmetric: 1px - Color: Foreground: #890415
20 - Image > Add
Borders > Symmetric: 1px - Color: Foreground: #890415.
21 - Layers > New Raster Layer. Selections > Load/Save Selections > Load Selection From Disk: 30_CBen5. Fill the selection with the Gradient in use, or use the color or effect of your choice. Selections > Select None. Pick Tool: Position X: 547,00, Position Y: 2,00. Effects > 3D Effects > Drop Shadow: 1 / 1 / 100 / 0 > Color: #000000 (black).
22 - Edit > Copy
from the file Main Tube. Position
it on the right side.
Edit >
Paste As New Layer and position it wherever you prefer. File > Export > JPEG Optimizer...
Because every detail makes
a difference...
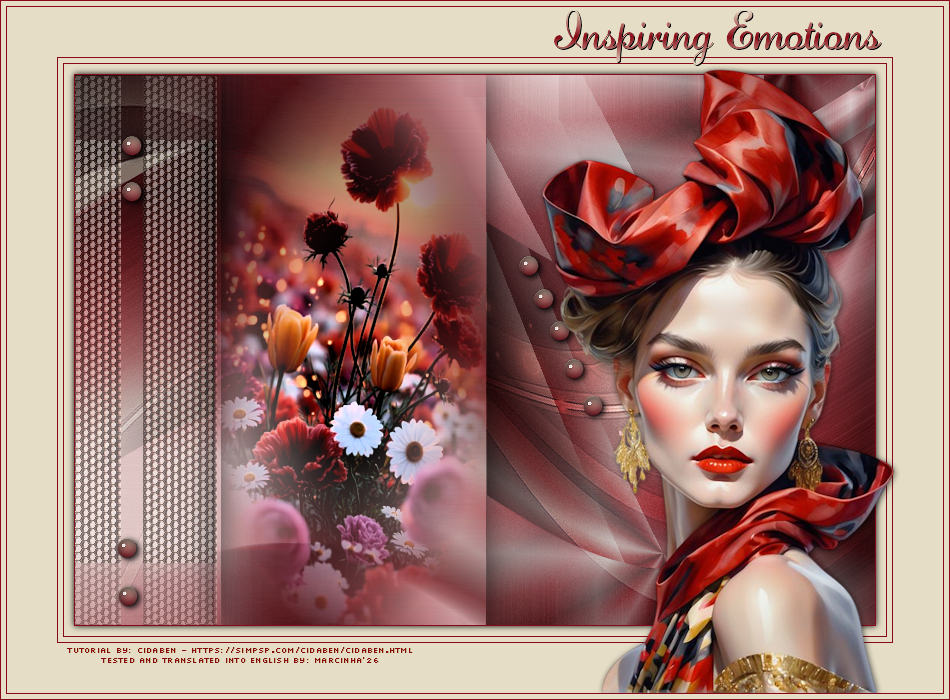
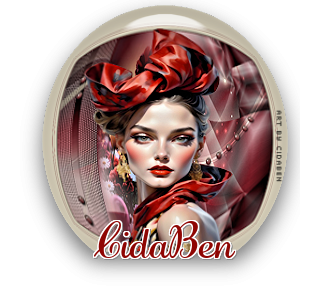
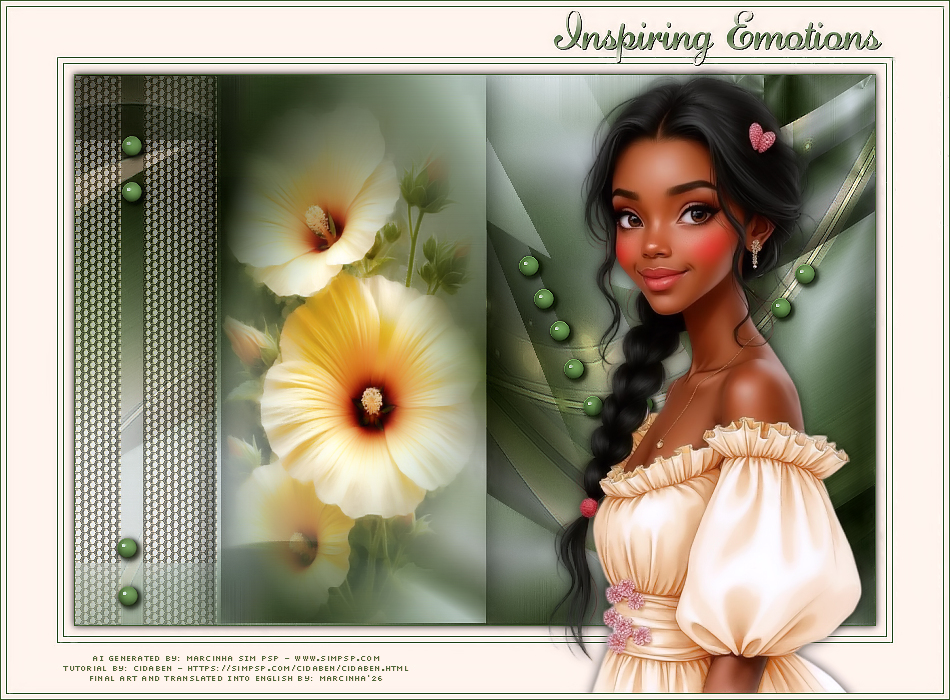
MY VERSION:
Credits: Formatting, Final Artwork, and English Translation by Márcinha Tutorial by: CidaBen - Main Tube: AI-generated by Marcinha (SIM PSP) Misted: Tubed by Pqna&Alice - Mask by NarahMask - Prints by CidaBen
Feel free to send in your own versions. It will be my pleasure to publish them on our site.
Send your version to this email:
CidaBen Social Media
SimPSP Social Media
|