Translated into English by Márcinha
Original Tutorial:

IMPORTANT:

Sim PSP and its tutorial authors wish to make the following request:

- Please keep the tutorial as originally written and refrain from adding effects that are not requested;
- The use of other images is allowed and encouraged; however, please do not alter the content of the original tutorial;
- Please acknowledge and give proper credit to those who write tutorials, create translations, and provide materials.

Note:

This tutorial was written by CidaBen and is her sole responsibility.

Any resemblance to other tutorials is purely coincidental.

Sim PSP only hosts and shares this content so that everyone can access and enjoy it.

Sincerely,

SIM PSP and CidaBen


SUPPLIES:
1 Main Tube of your choice.

1 Misted image of your choice.

Mask > Narah_Mask_1472.
Other supplies by CidaBen


PLUGINS:
Filter Factory Gallery C > Facet Offset.
Filters Unlimited 2.0 > &<Bkg Kaleidoscope > Tiler
Filters Unlimited 2.0 > Buttons & Frames > 3D Glass Frame 3.

Graphics Plus > Cross Shadow.


*********


Tutorial created in PSP 2022

Translated Into English by Márcinha in PSP 2020


*********

I would like to thank the tube artists for providing the tubes and masks, as this work would not have been possible without them.
When sharing or using them, please keep the Tubes intact and preserve the proper credits.


Feel free to adjust the blends according to the colors you are using.
Colorize the decorative elements whenever necessary to match your chosen colors.


********


TUTORIAL


1 -
Open the supplies in PSP, duplicate them, and close the originals.

*Remove the watermark from all supplied materials.
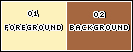
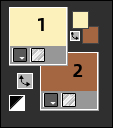
Choose 2 colors to work with.


Foreground: Color 1: #fdf1bc
Background: Color 2: #a56740


2 - Open a new transparent image 950x550px.
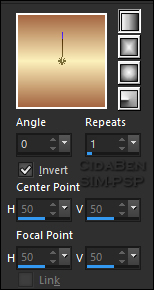
Flood Fill with a Linear Gradient using the chosen colors.


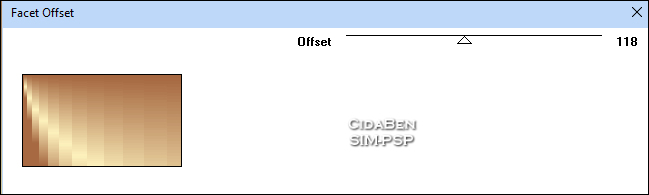
3 - Effects > Plugins > Filter Factory Gallery C > Facet Offset.


4 - Image > Mirror > Mirror Vertical.

Effects > Edge Effects > Enhance More.

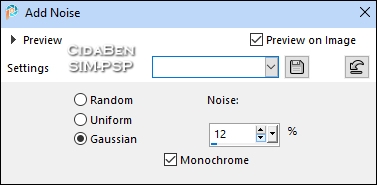
Adjust > Add/Remove Noise > Add Noise.


5 - Layers > New Raster Layer.

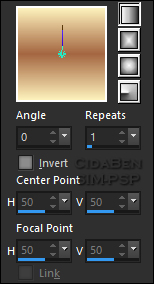
Flood Fill with a Linear Gradient using the chosen colors, with Invert unchecked:


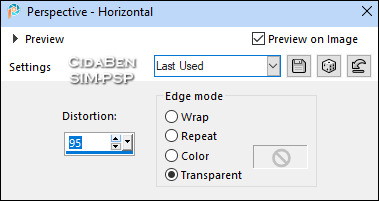
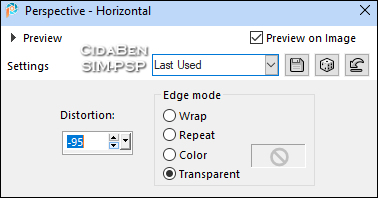
6 - Effects > Geometric Effects > Perspective Horizontal > 95.

Repeat > Effects > Geometric Effects > Perspective Horizontal > -95.

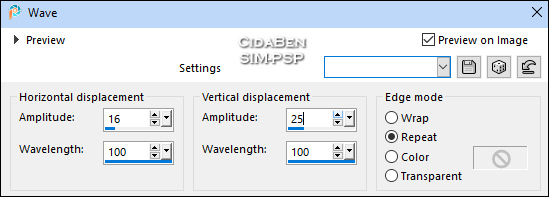
Effects > Distortion Effects > Wave.


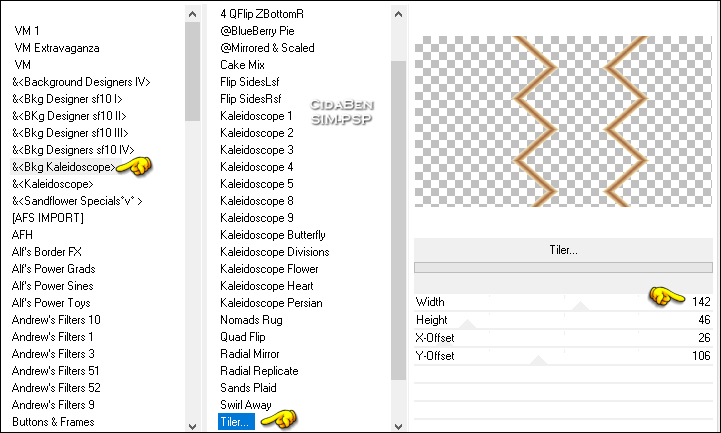
7 - Effects > Plugins > Filters Unlimited 2.0 > &<Bkg Kaleidoscope > Tiler

Objects > Align > Right.

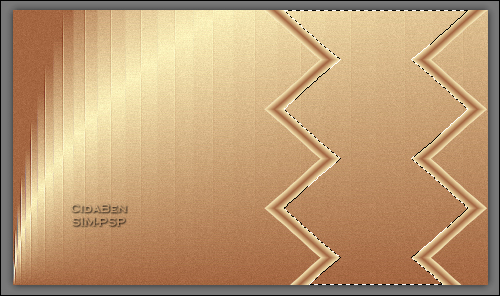
Activate the Magic Wand tool > Tolerance 0 > Feather 0

Click inside the effect area, as shown in the example:


8 - Edit > Copy Misted_Niver7AnosSIMPSP_CBen26.
Go back to your work...
Edit > Paste Into Selection.
Layers > Duplicate.
Selections > Invert.
Effects > 3D Effects > Drop Shadow: 1, 1, 100, 30 > Color: Color 1 Foreground: #fdf1bc
Layers > Merge > Merge Down.
Selections > Select None.


9 - Activate the Raster Raster 1.

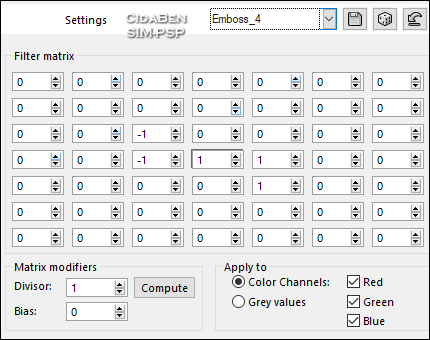
Effects > User Defined Filter > Emboss_4.

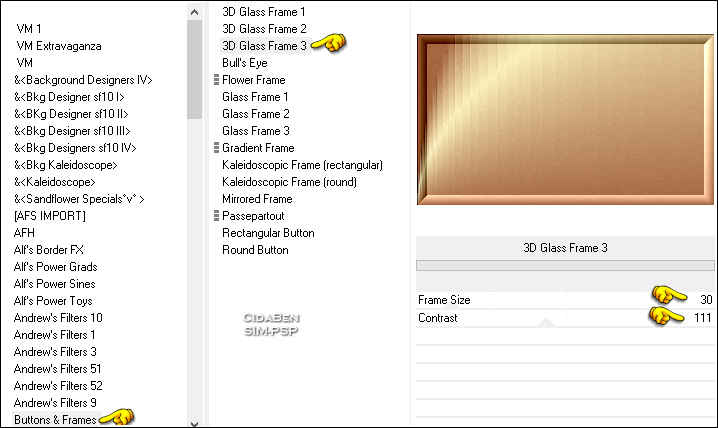
Effects > Plugins > Filters Unlimited 2.0 > Buttons & Frames > 3D Glass Frame 3.


10 - Activate the Raster Raster 2.

Image > Resize > 88% > All Layers unchecked

Pick Tool > Position X: 522 > Position Y: 33.


11 - Layers > New Raster Layer.

Flood Fill with Color 1 Foreground #fdf1bc

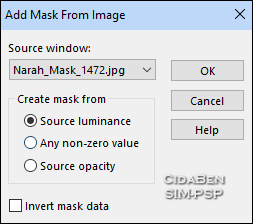
Layers > New Mask Layer > From Image: Narah_Mask_1472.

Layers > Merge > Merge Group.

Image > Mirror > Mirror Vertical.

Layers > Properties > General > Blend Mode: Luminance(L) > Opacity: 40%

Adjust > Sharpness > Sharpen More.


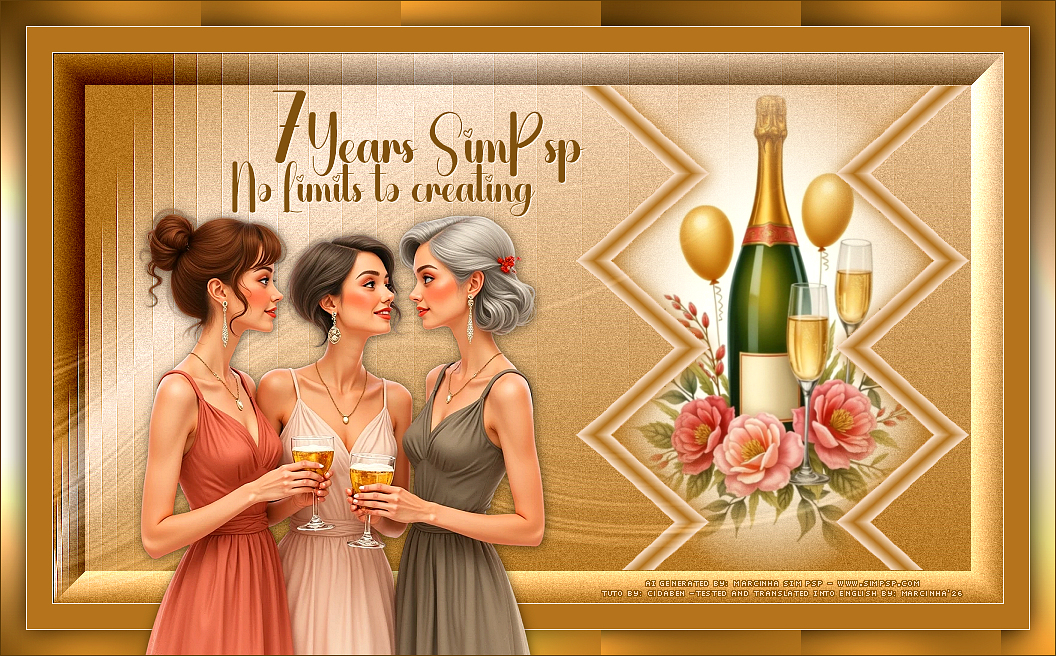
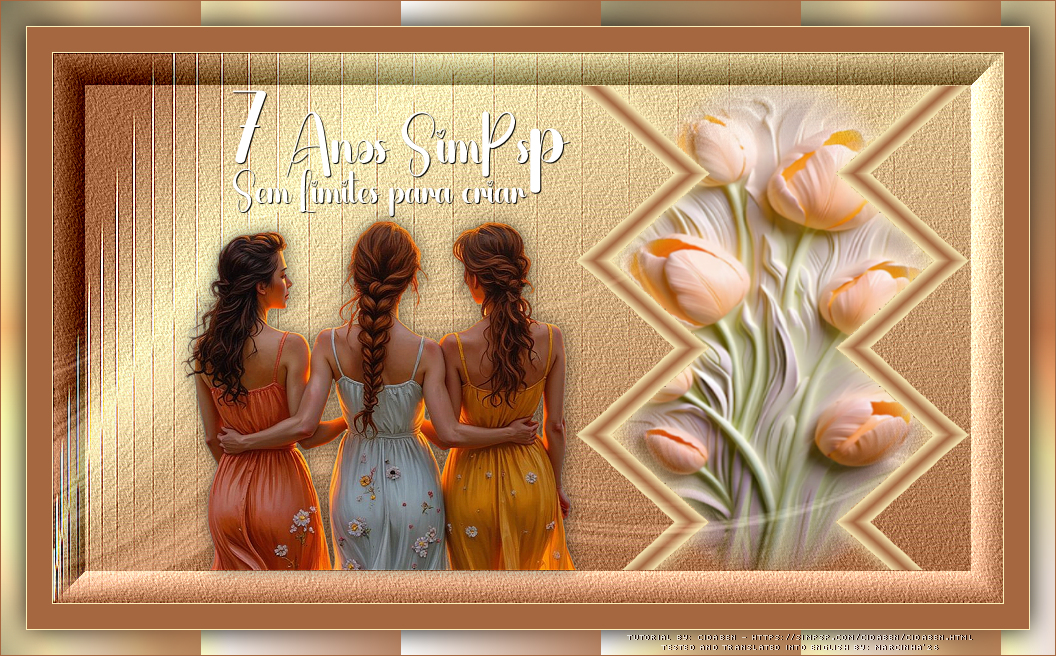
12 - Edit > Copy Titulo1_7AnosSimPsp or Titulo2_7yearsSimPsp.
Go back to your work...
Edit > Paste As New Layer.
Pick Tool > Position X: 179 > Position Y: 37.
Effects > 3D Effects > Drop Shadow: 1, 1, 100, 1 > Color: #000000 (Black)
or as you prefer.


13 - Image > Add Borders > Symmetric:
1px > Color 1 Foreground (#fdf1bc)
25px > Color 2 Background (#a56740)
1px > Color 1 Foreground (#fdf1bc)


14 - Selections > Select All
Image > Add Borders > Symmetric: 25px with any color.
Selections > Invert.
Flood Fill with a Linear Gradient using the chosen colors, with Invert unchecked:


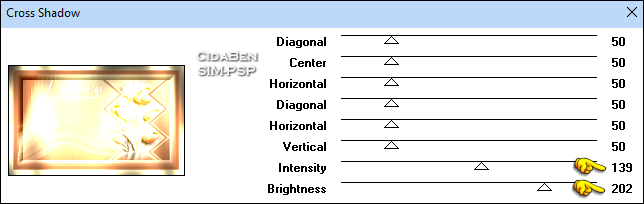
15 - Effects > Plugins > Graphics Plus > Cross Shadow.

Selections > Invert.

Effects > 3D Effects > Drop Shadow: 1, 1, 100, 40 > Color: #000000 (Black).

Selections > Invert.

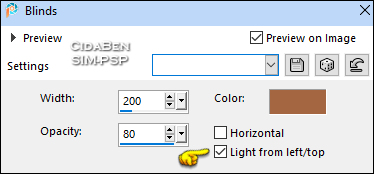
Effects > Texture Effects > Blinds > Color: Color 2 Background (#a56740).

Selections > Select None.


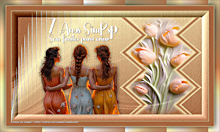
16 - Edit > Copy Tube_Amigas7anosSimPsp_CBen26_CBen.
Edit > Paste As New Layer.
If you are using the tube included in the materials, resize it to 65% with "All Layers" unchecked.
Pick Tool > Position X: 179 > Position Y: 217.
Effects > 3D Effects > Drop Shadow: 1, 1, 50, 25 > Color: #000000 (Black).
Adjust > Sharpness > Sharpen.


17 - Image > Add Borders > Symmetric: 1px Color 2 Background (#a56740).


18 - Edit > Copy Credit-Tutorial_byCidaBen.

Edit > Paste As New Layer.
Position as you prefer.
Apply your watermark or signature.
File > Export > JPEG Optimizer...


VERSION:

Credits:

Formatting, Final Artwork, and English Translation by Márcinha

Tutorial by: CidaBen - Main Tube and Misted: AI Generated by Marcinha SIM PSP

Prints: by CidaBen


Feel free to send your versions.
We will be happy to publish them on our website.


Send your version to:
[email protected]


CidaBen Social Media

SimPSP Social Media


This tutorial was created by CidaBen in May 2026, exclusively for the website https://simpsp.com

Tutorial tested, reviewed and translated into English by Márcinha in June 2026.
The content of this tutorial is the sole responsibility of the author.
Sim PSP only hosts and shares it for publication purposes.
Partial or full reproduction is prohibited without the author's permission.
Please respect the credits and encourage the creation of new content!