TRADUÇÕES:
Obrigada aos nossos tradutores!
MATERIAL
1 Tube Principal à sua escolha 1 Misted Paisagem à sua escolha Decor_ Roberta Decor1_ Roberta MasksAC_48
PLUGIN L & K
ROTEIRO
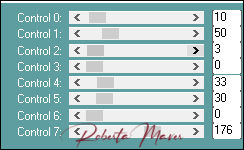
1- Abrir o material no PSP, duplique e feche o original. Escolher duas cores para trabalhar. Foreground #740d1d Background #ef9284
2- Abra uma imagem transparente de 900 x 500 px. Pintar com o cor do Foreground #740d1d
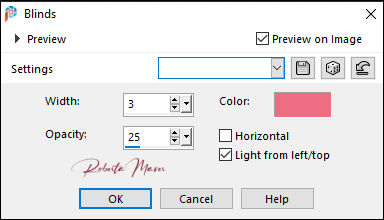
3- Effects > Texture Effects > Blinds: Color: Background #ef9284
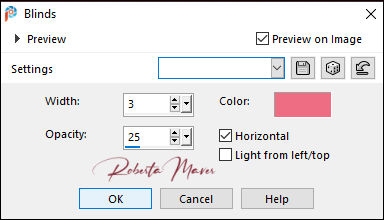
4- Effects > Texture Effects > Blinds: Color: Background #ef9284
Adjust > Sharpness > Sharpen
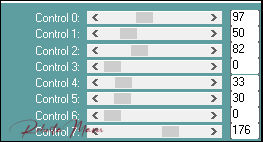
5- Effects > Plugin > L em K Paris
6- Layers > New Raster Layer. Pinte com a cor do background.
Layers > New Mask Layer > From Image:
AC_48
Adjust > Sharpness >
Sharpen
Layers > Merge > Merge
Group.
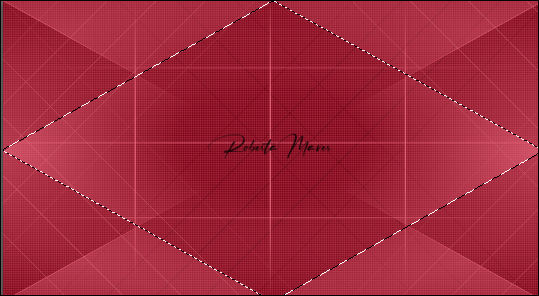
7- Com a ferramenta Freehand Selection, selecione como mostro no print.
8- Layers > New Raster Layer. Pinte com a cor do Foreground
#740d1d.
9- Effects > Plugin
> L em K Paris
 10- Layers > New Raster Layer. Ainda selecionada: Selection > Modify> Select Selection Bords. 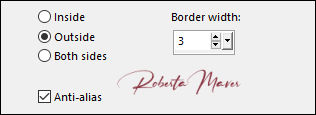 Pinte cor do background.
Selections > Select None
11 - Edit > Copy no Misted Paisagem Edit > Paste as new layer. Image > resize à seu gosto Adjust > Sharpness > Sharpen Layers > Arrange > Move Down.
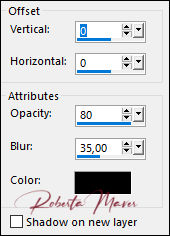
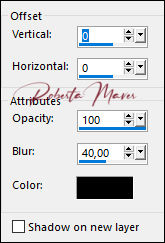
12- Ativar a Layer do topo Effects > 3D Effects > Drop Shadow.
Layers > Merge > Merge Down. Repetir Layers > Merge > Merge Down.
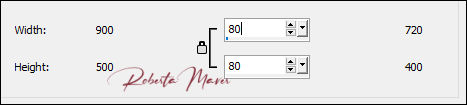
13- Image> Resize > 80% > All layers desmarcado
14- Effects > Image Effects > Seamless Tiling: 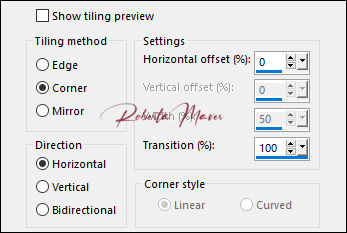 15- Edit > Copy no decor_Espelho_ByRoberta.
Edit > Paste a New Layer.
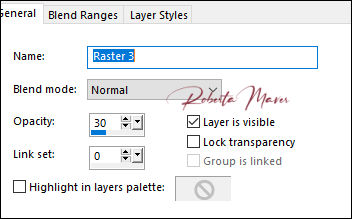
16- Layers > Properties > General > Blend Mode:
Normal - Opacity: 30%
 17- Image > Add Borders: 2 px cor Foreground >#740d1d 4 px cor Background >#ef6d82 2 px cor Foreground >#740d1d Selections > Select All. Edit > Copy Image > Add Broders: 50 px com qualquer cor. Selections > invert. Edit > paste into selection.
18 - Adjust > Blur > Gaussian Blur: 20
19- Effects > Plugin > L em K Paris
Edit > Repeat L en K Paris Adjust > Sharpness > Sharpen Selections > invert.
20- Effects > 3D Effects > Drop Shadow.
Selections > Select None
21- Edit
> Copy no decor1_Espelho_ByRoberta.
Edit > Paste a New Layer. Adjust > Sharpness > Sharpen.
22- Layers >
Duplicate.
23- Adjust
> Blur > Gaussian Blur: 10
Layers > Properties > General > Blend Mode: Multiply
Layers >
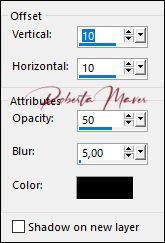
Arrange > Move Down. 24- Ativar a Layer do topo. Effects > 3D Effects > Drop Shadow
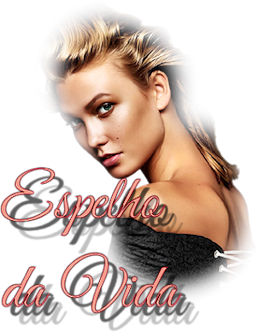
25- Edit > Copy no Tube Principal. Edit > Paste a new Layer. De resize se necessário Posicione à direita. Effects > 3D Effects > Drop Shadow como preferir.
26- Layers >
Duplicate.
Image> Mirror > Mirror Horizontal
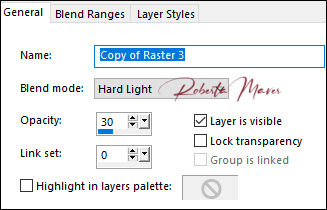
27- Layers > Properties >
General > Blend
Mode: Hard light - Opacity: 30%
28- Edit > Copy no Titulo. Edit > Paste a New Layer. Posicione como desejar.
29- Image > Add Borders: 2 px cor Foreground >#740d1d
30- Se você desejar, redimensiona seu
trabalho.
Aplicar sua marca d'água ou assinatura. File > Export > JPEG Optimizer.
Créditos: 3105 -
woman - LB TUBES / Paisagem: Angel Star_AS tube-71
Créditos
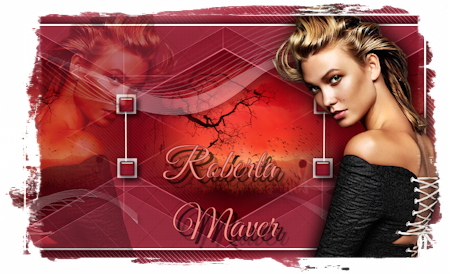
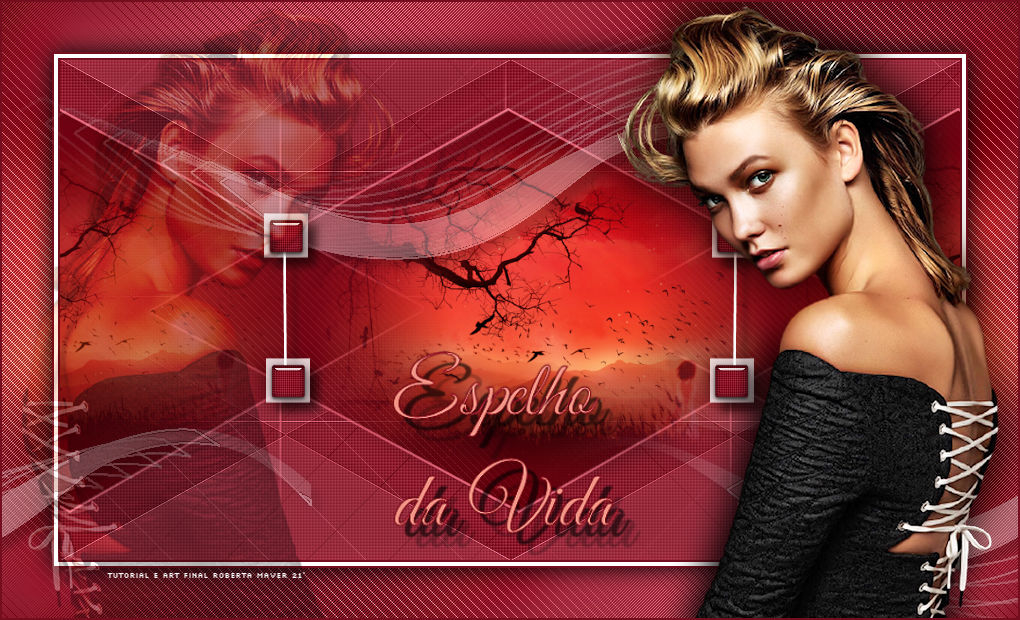
Tutorial e art final criado por
Roberta Maver
Tube:6238-luzcristina
Paisagem:paysages_0189_lisat
18/02/2021
Sinta-se à vontade para enviar suas versões. Terei todo o prazer em publicá-las em nosso site.
|