  TRADUÇÕES:
Obrigada aos nossos tradutores! MATERIAL 1 Tube Principal 1 Misted Paisagem creation.tine_masque249 Decor1_by Roberta Sel-Stranger_roberta* Titulo_Strager in Paradise_by Roberta OBS.: Salvar o arquivo Sel-Stranger_roberta na pasta de seleções do psp.
PLUGINS Bkg Designer sf10 II Carolaine and Sensibility Plugin Flaming Graphics Plus Mehdi
Roteiro:
1 - Abrir o material no PSP, duplique e feche o original. Escolher duas cores para trabalhar. Foreground #dad4d0 Background #353c4c
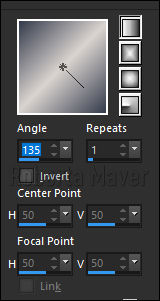
2 - Abra uma imagem transparente de 900 x 550 px. Pintar com o gradiente Linear, Angle 135, Repeats 1.
Selections > Select All.
3 - Edit > Copy no Misted Paisagem Edit > Paste Into Selection. Adjust > Sharpness > Sharpen Selections > Select None.
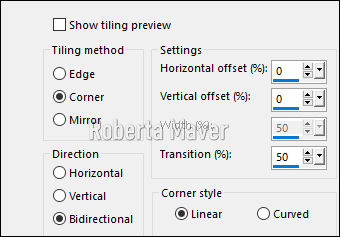
4 - Effects > Image Effects > Seamless Tiling: Default
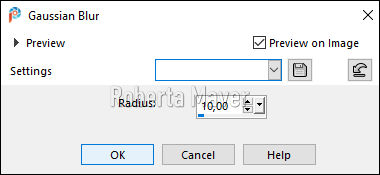
5 - Adjust > Blur > Gaussian Blur >10.
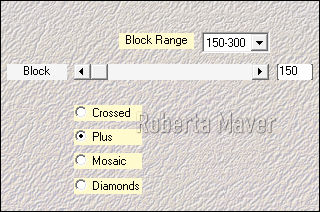
6 - Effects > Plugins Mehdi > Sorting Tiles.
7 - Effects > Edge Effects > Enhance
8- Layers > Duplicate.
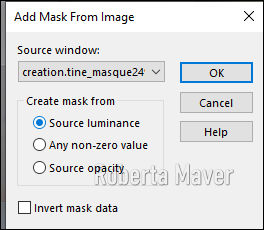
9 - Layers > New Mask layer > From Image: creation.tine_masque249.
Layers > Merge > Merge Group Layers > Duplicate.
10- Ative a layer da Group (mask) - (Group - Copy of Raster 1)
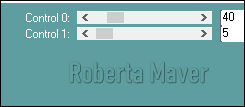
11- Effects > Plugin Caroline and Sensibility > CS-D Lines
12 - Ative a cópia Group (Copy of Group - Copy of Raster 1)
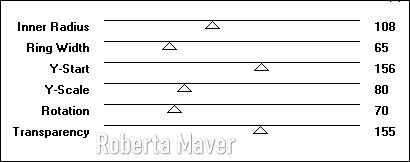
13 - Effects > Plugin Factor Gallery B > Circulator ...
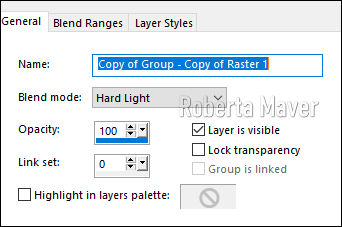
Layers > Properties: Blend Mode Hard Light.
14 - Selection /loads /save selection /loads selection from disk: Sel-Stranger_robertaAperte a tecla delete no teclado Ainda selecionada
15 - Layers > New Raster Layer Pinte a layer com o gradiente em uso.
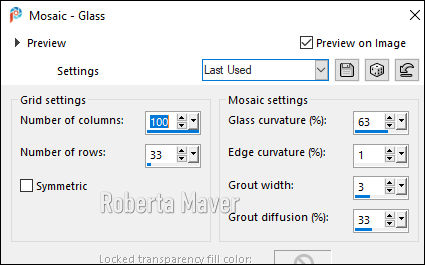
16 - Effects > Texture Effects > Mosaic > Glass
17 - Edit > Copy no Misted Paisagem Edit > Paste Into Selection. Adjust > Sharpness > Sharpen Selections > Select None. Layers > Arrange > Move Down.
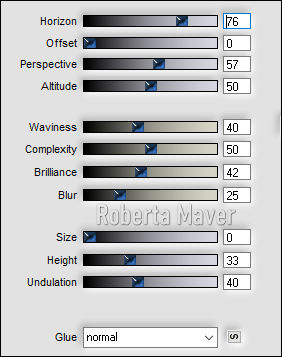
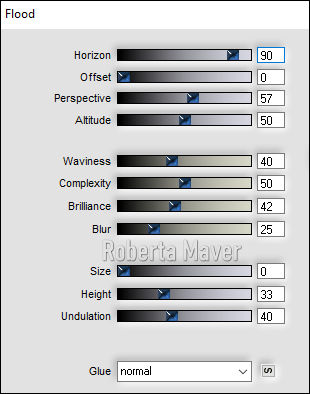
18 - Effects > Plugins Flaming > Flood
19- Ative a cópia da Group (Copy of Group - Copy of Raster 1) Effects > 3D Effects > Drop Shadow 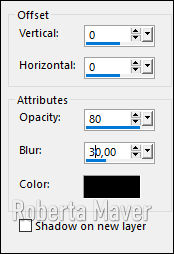 Ainda na cópia
da Group
(Copy of Group - Copy of Raster 1)
20 -
Selection /loads /save selection /loads selection from disk:
Sel-Stranger_roberta
21- Selection > modify > select selection bords 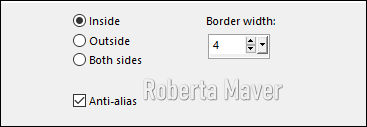 22 - Layers
> New Raster Layer
Pinte a layer com o gradiente em uso.
23 - Effects > 3D Effects > Inner Bevel 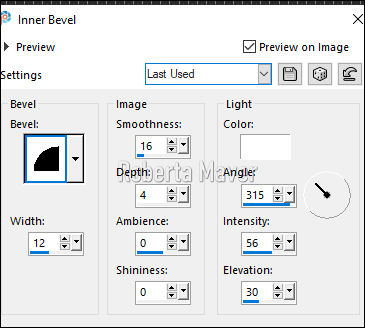 Layers > Merge
> Merge Down.
Selections > Select None.
24 - Ative a
cópia da Group
(Copy of Group - Copy of Raster 1)
25 - Effects
> Plugin Flaming > Flood
 26- Ative a
raster 1
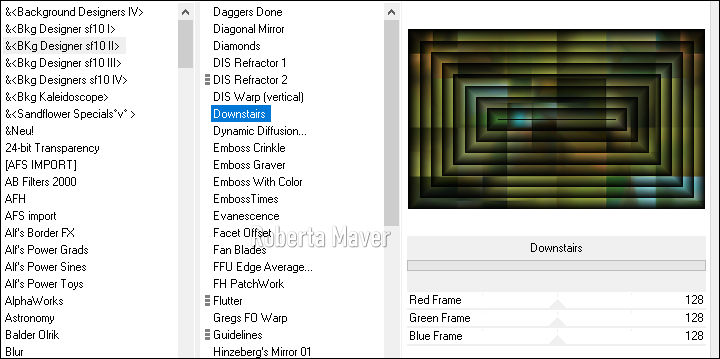
Effects > Filters
Unlimited 2.0 > Bkg Designer sf10 II > Downstais >
Defauld
 27 - Repetir o item 25
> Effects > Plugins
Flaming > Flood
28 - Ative a layer do topo. Edit > Copy no Tube principal. De resize se necessário Posicione. Aplique o mesmo plugin do item 25 > Effects > Plugin Flaming > Flood
Effects > 3D Effects > Drop Shadow como preferir
29-
Image > Add Borders:
1px cor clara 3 px cor escura 1px cor clara Selections > Select All. Image > Add Broders: 40 px com qualquer cor. Selections > invert. Pintar esta borda com o gradiente em uso
30 - Effects > Plugins > Graphics Plus > Cross Shadow > Default Selections > invert.
31 - Effects > 3D Effects > Drop Shadow: 0, 0, 100, 40, cor preta. Selections > Select None.
32 - Image > Add Borders: 1px cor clara 3 px cor escura 1px cor clara
33 - Edit > Copy no decor_ByRoberta. Edit > Paste a New Layer. Com a ferramenta pick Tool posicione: Position X 27, Position Y 26. 34 - Edit > Copy no titulo. Edit > Paste a New Layer. Com a ferramenta pick Tool posicione: Position X 608, Position Y 312.
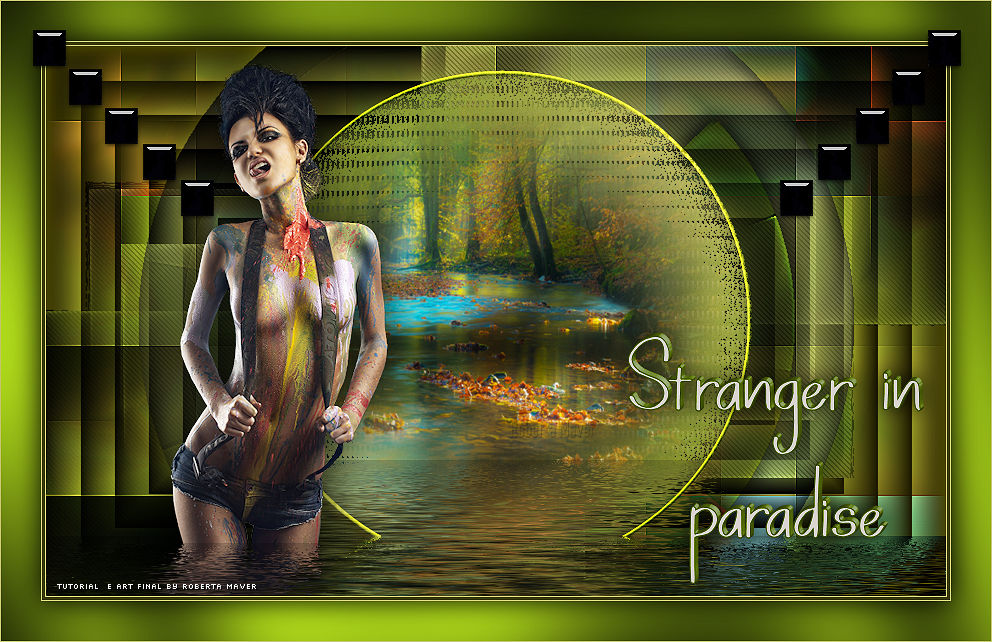
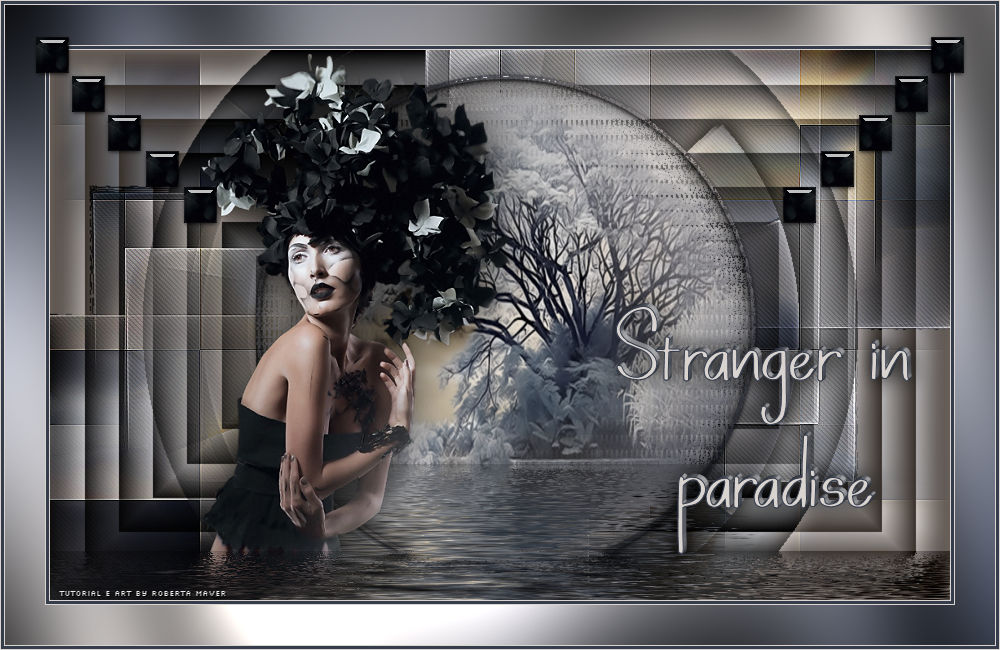
Se você desejar, redimensiona seu trabalho. Aplicar sua marca d'água ou assinatura. File > Export > JPEG Optimizer.
Créditos
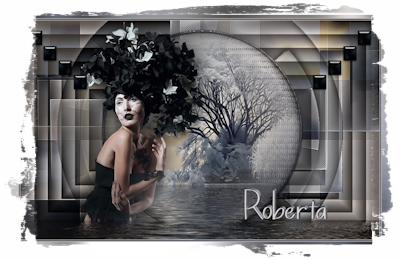
Tutorial e art final criado por
Roberta Maver
Tube:libellulegraphisme_femme_fleurs_noires
Paisagem:
1250147618_paysages_nikita
15/12/2020
 Sinta-se à vontade para enviar suas versões. Terei todo o prazer em publicá-las em nosso site.
|