TRADUÇÕES:
Obrigada aos nossos tradutores!
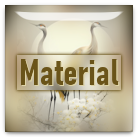
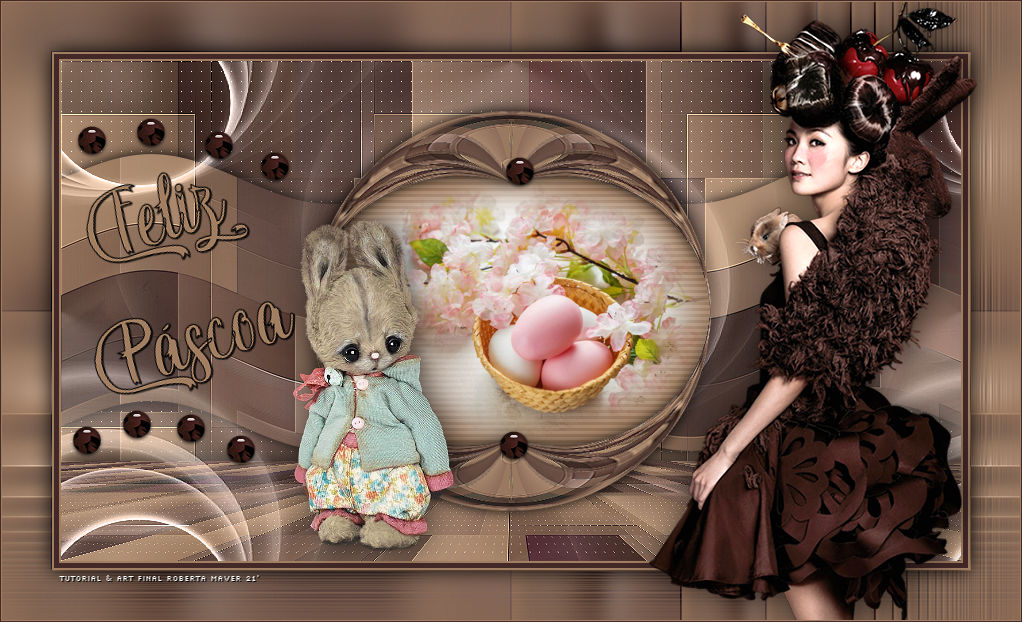
MATERIAL 1 Tube Principal 1 Misted Paisagem Decor_Páscoa_by Roberta Titulo_Páscoa_by Roberta
PLUGINS AP Flaming Pear FM Tile Tools Mehdi LOtis Filters
Roteiro:
1 - Abrir o material no PSP, duplique e feche o original.
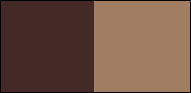
Escolher duas cores para trabalhar.
Foreground #432a26
Background #a17e62
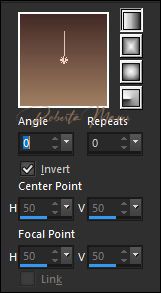
2 - Abra uma imagem transparente de 900 x 500 px.
Pintar com o gradiente Linear, Angle 0 , Repeats 0. Invert marcado, formado pelas cores em uso.
3 - Layers > New Raster Layer.
Selections > Select All.
4- Edit > Copy no Tube Principal.
Edit > Paste Into Selection.
Selections > Select None.
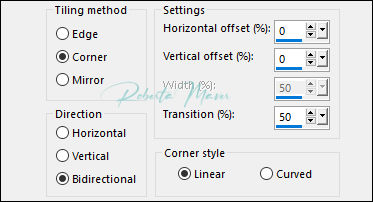
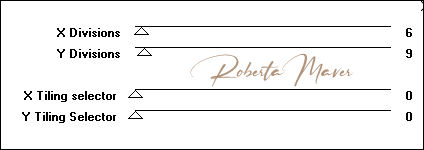
5 - Effects > Image Effects > Seamless Tiling: Default
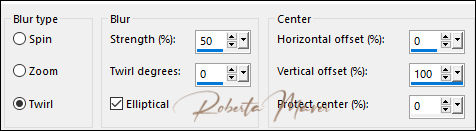
6-Adjust > Blur > Radial Blur:
Effects > Edges efects > Enhance
Layers > Merge > Merge Visibile.
Renomeie essa layer com o nome: fundo
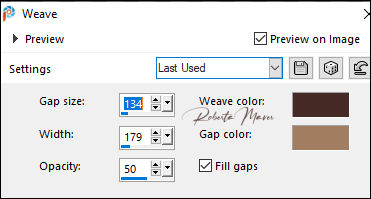
7- Effects > Texture Effects > Weave:
Effects > Edges effects > Enhance
8- Effects > Plugin Mehdi > Sorting Tiles
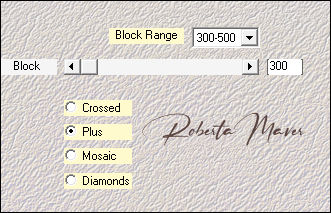
9- Effects > Plugin > LOtis filters > Mosaic toolkit
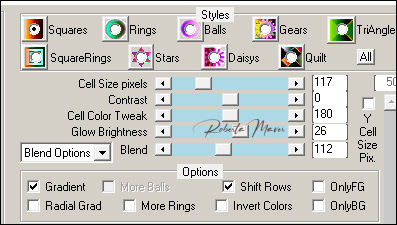
10- Effects > Plugin > FM Tiles Tools > Blend Emboss > Default
Layers > Duplicate.
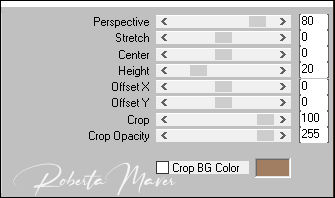
11- Effects > Plugins > Mura's Meister > Perspective Tiling
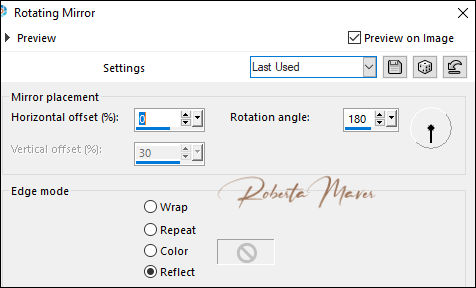
12- Effects > Reflections Effects > Rotatin Mirror.
Effects > Edges Effects > Enhance
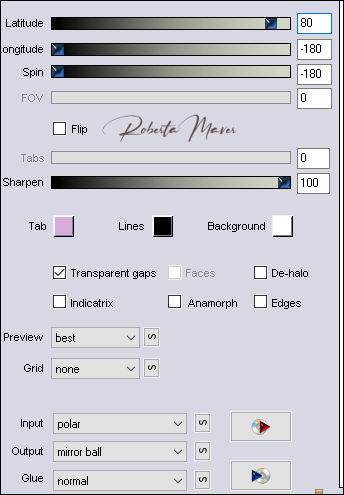
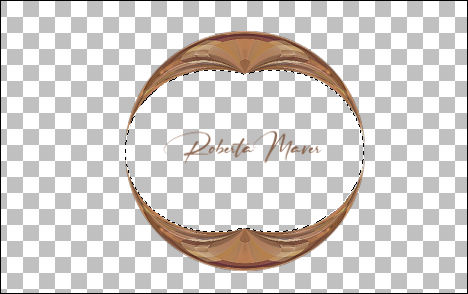
13- Effects > Plugins > Flaming Pear > Flexify 2
14 - Image > Resize: 80% - all layers desmarcado.
Adjust > Sharpness > Sharpen
15 - Layers > Duplicate.
Image > Mirror > Mirror Vertical.
Layers > Merge > Merge Down.
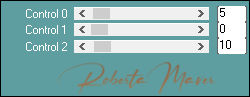
Com a ferramenta Magic Wand Tool > Tolerance e Feather: 0, selecione como mostro no print:
16- Layers > New Raster Layer
Pinte com a cor do background #a17e62
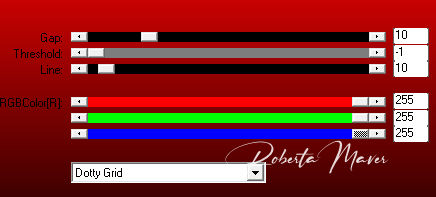
17- Plugin > Carolaine & Sensibility > CS-HLines:
18- Edit > Copy no Misted Paisagem
Edit > Paste Into Selection.
Adjust > Sharpness > Sharpen
Selections > Select None.
Ativar a cópia do efeito Flexify 2 (Copy of Fundo)
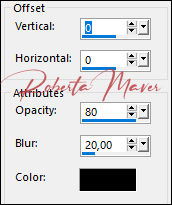
19 - Effects > 3D Effects > Drop Shadow.
Ativar a layer do topo (Raster 1) Layers > Merge > Merge Down.
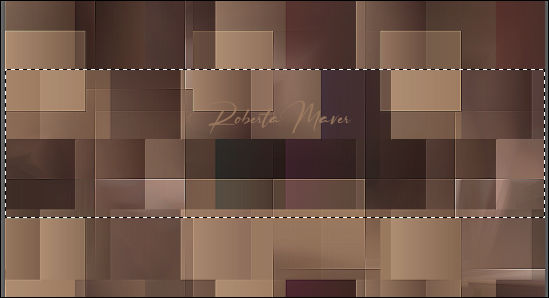
20- Ativar a layer Fundo.
Com a ferramenta Selection > Rectangle - Feather: 0, selecione como mostro no print.
Selections > Promote Selection to Layer.
Selections > Select None.
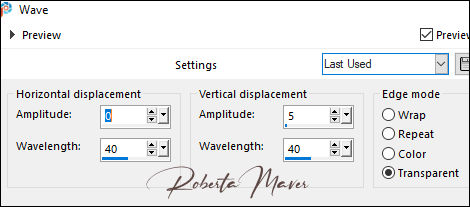
21- Effects > Distortion Effects > Wave.
Effects > 3D Effects > Drop Shadow: 0, 0, 80, 20 Color Preto
Ativar a layer fundo
22 - Effects > Plugins > AP Lines > SilverLining
Layers > Duplicate.
23 - Effects > Plugins > Mura's Meister > Perspective Tiling
Adjust > Sharpness > Sharpen
24 - Effects > 3D Effects > Drop Shadow.
25- Layers > New Raster Layer
Pintar com o cor #FFFFFF (branco)
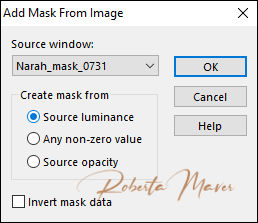
26 - Layers > New Mask layer > From Image: Narah_mask_0731.
Layers > Duplicate
Effects > Edges Effects > Enhance
Layers > merge > Merge Group.
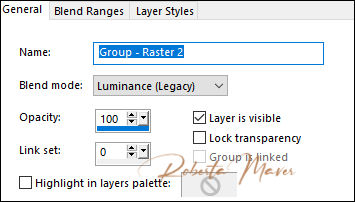
Layers > Properties: Blend Mode:Luminance L .
27 - Effects > Image Effects > Seamless Tiling: Default
Layer > Arrange > Move UP. 28 - Image > Add Borders:
2 px cor Background #a17e62
5 px cor Foreground #432a26
2 px cor Background #a17e62
29- Edit > Copy
Selections > Select All.
Image > Add Broders: 50 px com qualquer cor.
Selections > invert.
Edit > paste into selection.
Adjust > Blur > Gaussian Blur > 20.
30 - Effects > Plugins > Factory Gallery D > Infini Tiles
Effects > User defined filters: Emboss 3
Selections > invert.
31 - Effects > 3D Effects > Drop Shadow: 0, 0, 100, 30 Color Preto
Selections > Select None.
32 - Edit > Copy no Tube Principal.
Edit > Paste a new Layer.
De resize se necessário
Posicione
Effects > 3D Effects > Drop Shadow: como preferir.
33 - Edit > Copy no decor_Pácoa_ByRoberta.
Edit > Paste a New Layer.
Com a ferramenta Pick Tool posicione: Position X 68, Position Y 115.
34 - Edit > Copy no Titulo_páscoa_Roberta
Edit > Paste a New Layer.
Posicione como desejar.
35 - Image > Add Borders:
1 px cor Background #a17e62
1 px cor Foreground #432a26
36 - Se você desejar, redimensione seu trabalho.
Aplicar sua marca d'água ou assinatura.
File > Export > JPEG Optimizer.
 Créditos:_k@rine_
Dreams_Little_Girl_2899_Avril_2014 / Paisagem: imagemJpg
 Créditos
Tutorial e art final criado por
Roberta Maver
Tube:
Easter_chocolate_story_CibiBijoux
rooskestube-pasen-11
Paisagem:Easter4-4_Silvie_18.03.2020
06/03/2021
Sinta-se à vontade para enviar suas versões. Terei todo o prazer em publicá-las em nosso site.
|