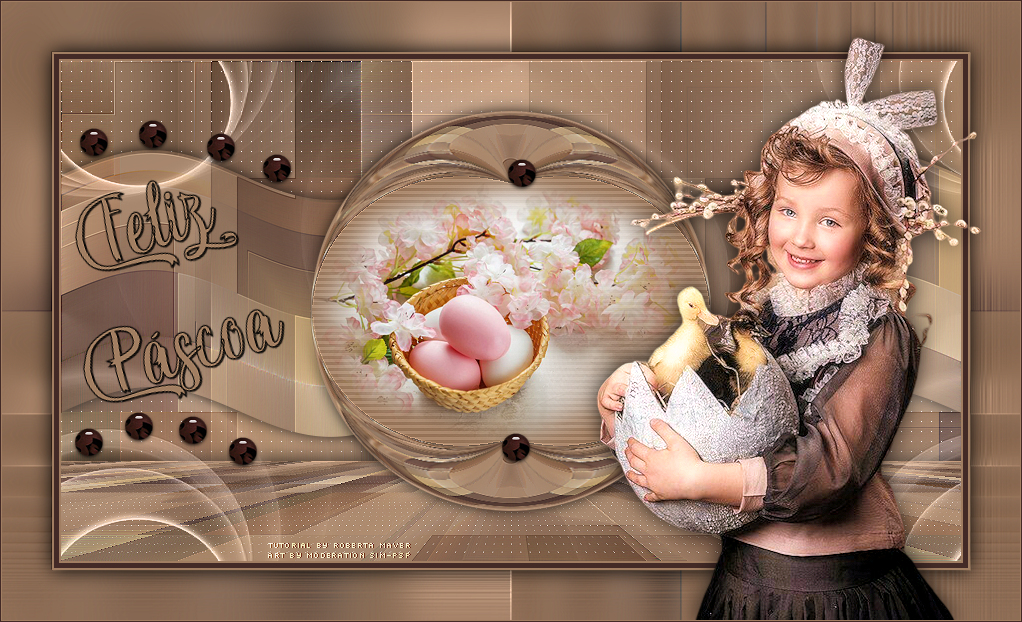 
Tutorial by Roberta Maver English Translation by Moderation SIM-PSP Original Tutorial
MATERIAL Main Tube Easter of your choice Misted Landscape of your choice Decor_Páscoa_by Roberta Titulo_Páscoa_by Roberta Narah_mask_0731
PLUGINS AP Flaming Pear FM Tile Tools Mehdi LOtis Filters
Tutorial:
1 - Open the material on the PSP, duplicate and close the original. Choose two colors to work with. Foreground #432a26
Background #a17e62
2 - Open a transparent image of 900 x 500 px.
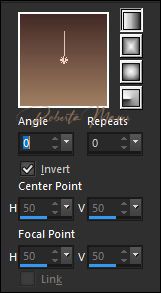
Paint with the Linear gradient, Angle 0, Repeats 0.
3 - Layers > New Raster Layer.
Selections > Select All.
4- Edit > Copy the main tube.
Edit > Paste Into Selection.
Selections > Select None.
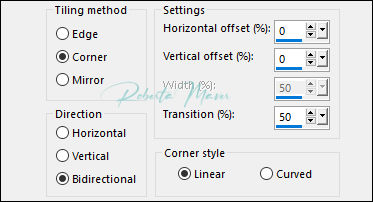
5 - Effects > Image Effects > Seamless Tiling: Default
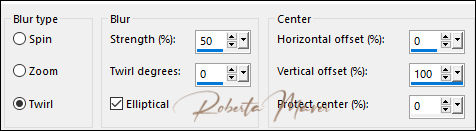
6-Adjust > Blur > Radial Blur:
Effects > Edges efects > Enhance
Layers > Merge > Merge Visibile.
Rename this layer with the name: Background
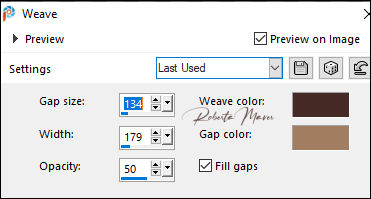
7- Effects > Texture Effects > Weave:
Effects > Edges effects > Enhance
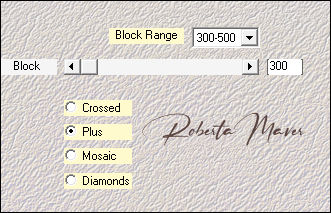
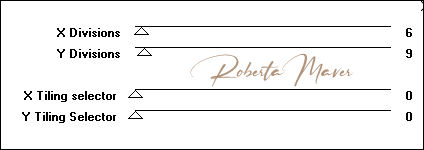
8- Effects > Plugin Mehdi > Sorting Tiles
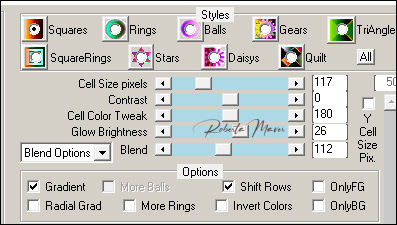
9- Effects > Plugin > LOtis filters > Mosaic toolkit
10- Effects > Plugin > FM Tiles Tools > Blend Emboss > Default
Layers > Duplicate.
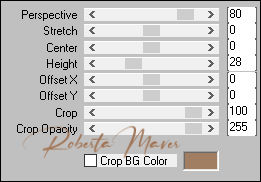
11- Effects > Plugins > Mura's Meister > Perspective Tiling
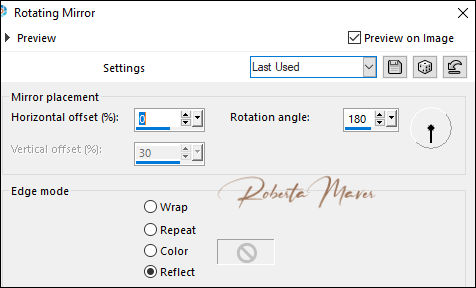
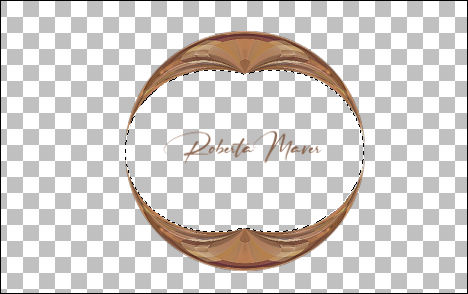
12- Effects > Reflections Effects > Rotatin Mirror.
Effects > Edges Effects > Enhance
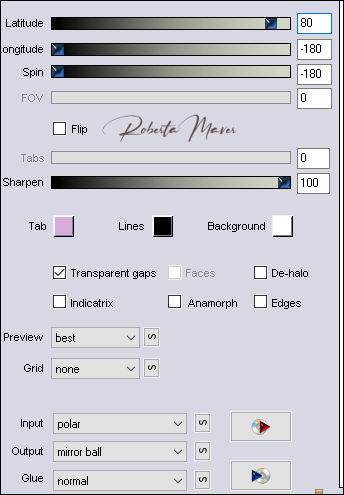
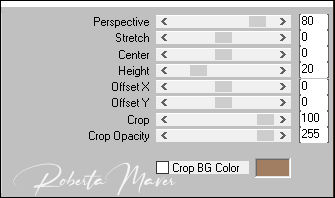
13- Effects > Plugins > Flaming Pear > Flexify 2
14 - Image > Resize: 80% - all layers unchecked.
Adjust > Sharpness > Sharpen
15 - Layers > Duplicate.
Image > Mirror > Mirror Vertical.
Layers > Merge > Merge Down.
With
the Magic Wand Tool > Tolerance and Feather: 0,
16- Layers > New Raster Layer
Paint with the background color#a17e62
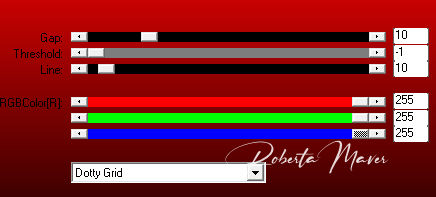
17- Plugin > Carolaine & Sensibility > CS-HLines:
18- Edit > Copy in the misted landscape
Edit > Paste Into Selection.
Adjust > Sharpness > Sharpen
Selections > Select None.
Enable copying of the Flexify 2 effect (Copy of Background)
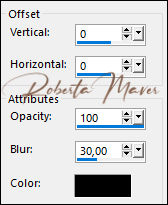
19 - Effects > 3D Effects > Drop Shadow.
Activate the top layer(Raster 1)
Layers > Merge > Merge Down.
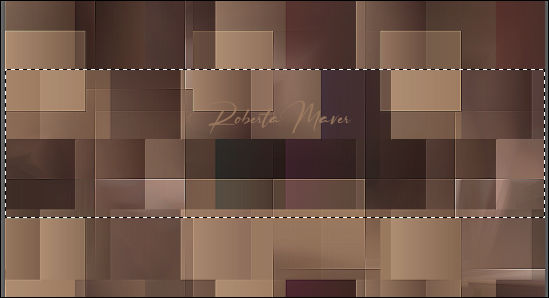
20- Activate the Background layer.
With the Selection > Rectangle - Feather tool: 0, select as indicated:
Selections > Promote Selection to Layer.
Selections > Select None.
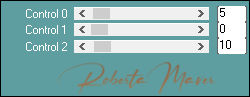
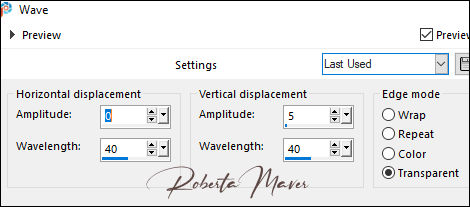
21- Effects > Distortion Effects > Wave.
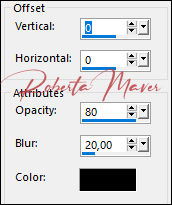
Effects > 3D Effects > Drop Shadow: 0, 0, 80, 20 Color: #000000 (Black)
Activate the Background layer.
22 - Effects > Plugins > AP Lines > SilverLining
Layers > Duplicate.
23 - Effects > Plugins > Mura's Meister > Perspective Tiling
Adjust > Sharpness > Sharpen
24 - Effects > 3D Effects > Drop Shadow.
25- Layers > New Raster Layer
Paint with color #FFFFFF (branco)
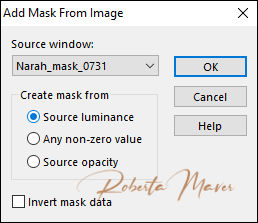
26 - Layers > New Mask layer > From Image: Narah_mask_0731.
Layers > Duplicate
Effects > Edges Effects > Enhance
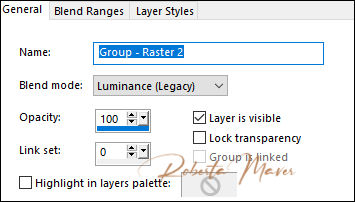
Layers > merge > Merge Group.
Layers > Properties > General > Blend Mode: Luminance L .
27 - Effects > Image Effects > Seamless Tiling: Default
Layer > Arrange > Move UP. 28 - Image > Add Borders:
2 px color Background #a17e62
5 px color Foreground #432a26
2 px color Background #a17e62
29- Edit > Copy
Selections > Select All.
Image > Add Bordes > 50px - simmetric - Any color.
Selections > invert.
Edit > paste into selection.
Adjust > Blur > Gaussian Blur > 20.
30 - Effects > Plugins > Factory Gallery D > Infini Tiles
Effects > User defined filters: Emboss 3
Selections > invert.
31 - Effects > 3D Effects > Drop Shadow: 0, 0, 100, 30 Color: #000000 (black)
Selections > Select None.
32 - Edit > Copy Copy the main tube
Edit > Paste a new Layer.
Image > Resize if necessary.
Position to your choice.
Effects > 3D Effects > Drop Shadow: of your choice.
33 - Edit > Copy no decor_Pácoa_ByRoberta.
Edit > Paste a New Layer.
With the Pick Tool, position: Position X 68, Position Y 115.
34 - Edit > Copy no Titulo_páscoa_Roberta
Edit > Paste a New Layer.
Position to your choice.
35 - Image > Add Borders:
1 px color Background #a17e62
1 px color Foreground #432a26
36 -
If desired, resize your work.
Créditos
Tutorial by
Roberta Maver
English Translation by
Moderation SIM-PSP
Main Tube:
Sylvie Erwan
Misted Landscape: by
Moderation SIM-PSP
Mask:
Narah_mask_0731
Feel free to send your versions. I will be happy to publish them on our website.
|