|
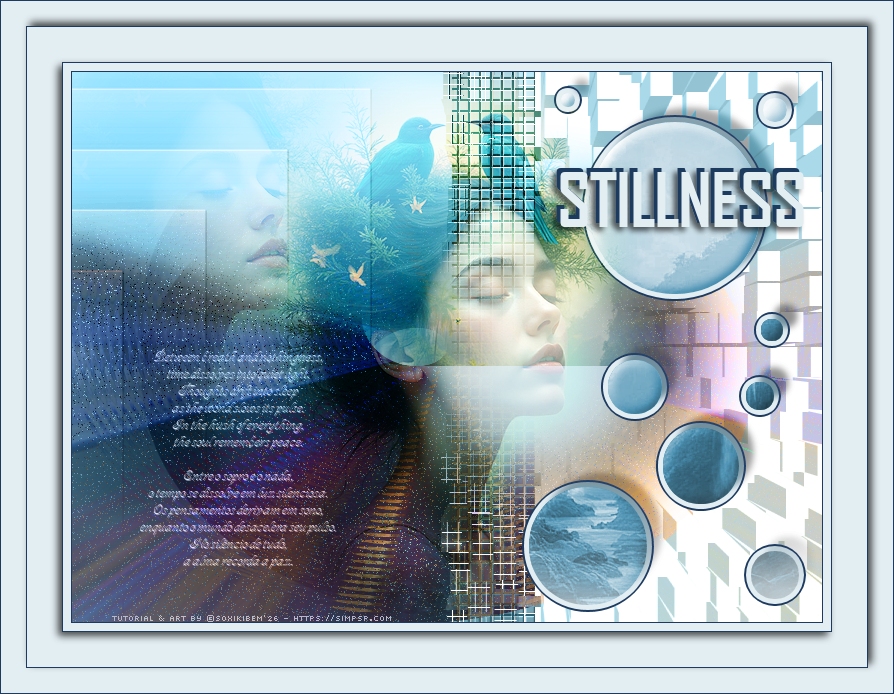
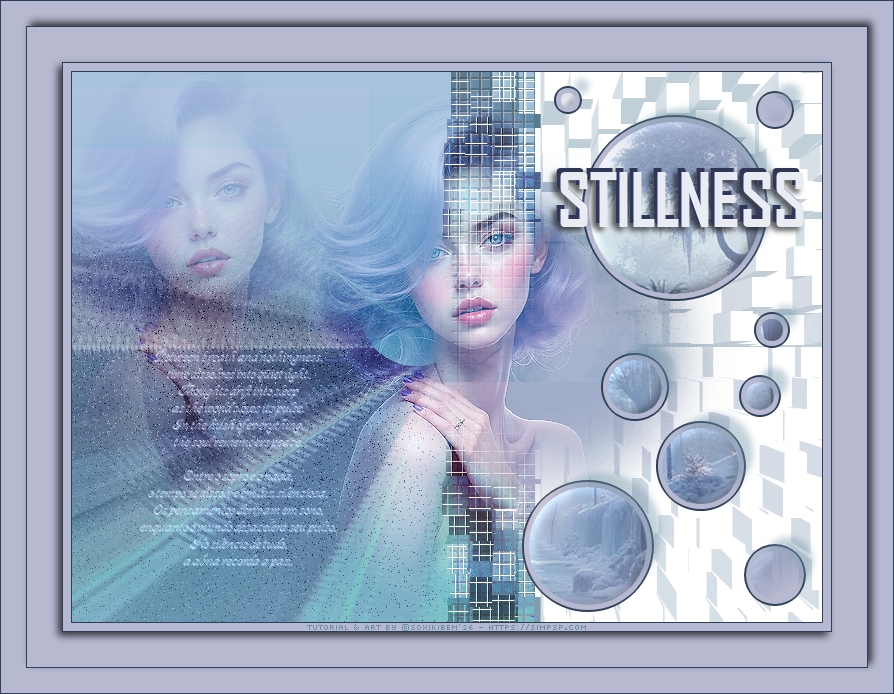
Between breath and
nothingness, time dissolves into quiet light.
TRANSLATIONS:
SIM PSP
values and recognizes the work of the translators who make these
tutorials accessible in different languages.
MATERIAL: 1 Main Tube or any character of your choice 1 Misted Paisage of your choice Other Materials by Soxikibem
PLUGINS: AP [Utility] > Utility -
Reflections, Repeat 4
Tutorial created with PSP 2022 Tested and reviewed by Márcinha using PSP 2020.
I would like to thank all tube artists for their beautiful Tubes and Masks, as this tutorial would
not have been possible without their work. and preserve all proper
credits.
TUTORIAL
*Delete the watermark from all supplied
materials. Background: #4fb3a2 Color 3: #8ed1c6 Color 4: #e3eef3 Color 5: #1f3a5f
2 - Open a new 750x550px transparent image. Flood Fill with the Foreground color.
3 - Selections > Select All. Edit > Copy the Landscape Misted. Edit > Paste Into Selection. Selections > Select None.
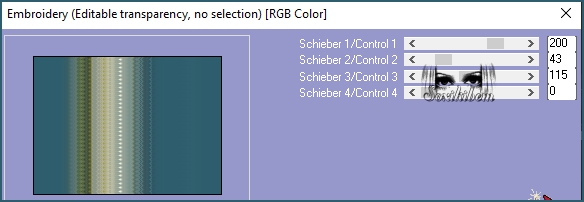
4 - Plugin Birgits Chaos
> Embroidery. NOTE: This effect may vary depending on the colors and size of your Landscape Misted.
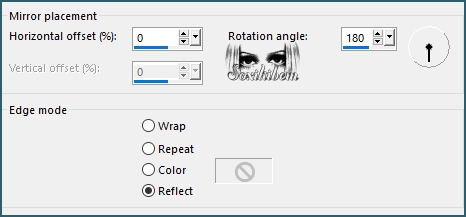
5 - Effects > Reflection Effects > Rotating Mirror.
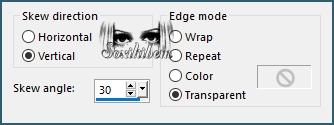
6 - Effects > Geometric Effects > Skew.
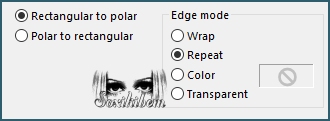
7 - Effects > Distortion Effects > Polar Coordinates.
8 - Selections > Load/Save Selections > Load Selection From Disk: 315_xiki1. Press Delete (or use Edit > Cut) four times. Selections > Select None.
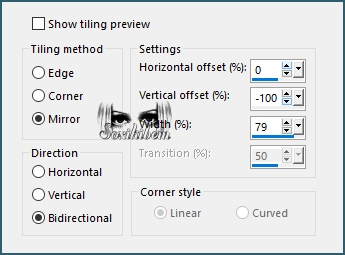
9 - Effects > Image Effects > Seamless Tiling.
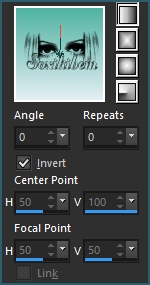
10 - Layers > New Raster Layer. Flood Fill with a gradient from the Background color and Colo 4.
Layers > Arrange > Move Down.
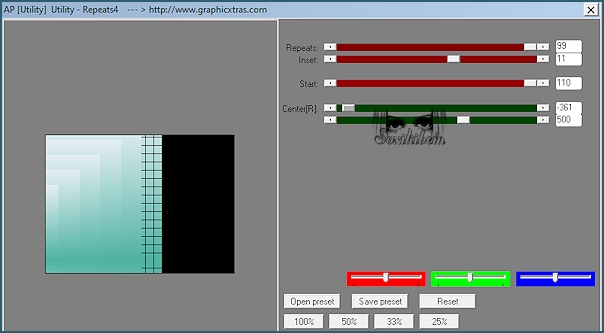
11 - AP [Utility] > Utility - Repeats4.
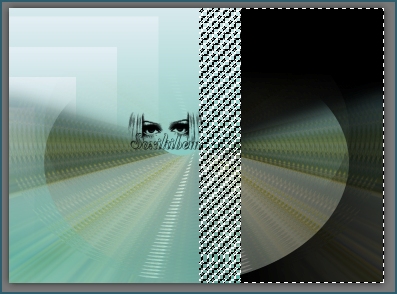
12 - Using the Magic Wand Tool with Tolerance 0 and Feather 0, click on the black area of this effect.
13 - Selections > Promote Selection to layer. Activate Raster 2. Press Delete (or use Edit > Cut).
14 - Selections > Select None.
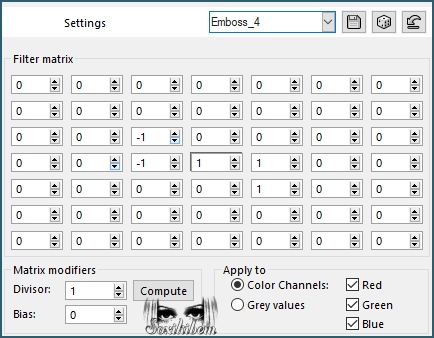
15 - With Raster 2 active, apply: Effects > User Defined Filter: Emboss_4.
16 - Activate the Promoted Selection layer. Image > Negative Image.
17 - Image > Mirror > Mirror Horizontal.
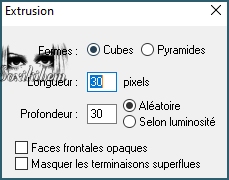
18 - Plugin Esthétiques > Extrusion.
19 - Image > Mirror > Mirror Horizontal.
20 - Layers > New Raster Layer. Flood Fill with the Foreground color. Layers > Arrange > Send to Bottom.
21 - Activate Raster 2. Layers > Properties > General > Blend Mode: Luminance (L). For my second version, I used Hard Light instead.
22 - Activate Raster 1. Layers > Arrange > Move Down. Layers > Properties > General > Blend Mode: Diference. For my second version, I used Darken instead.
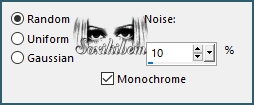
23 - Adjust > Add/Remove Noise > Add Noise.
24 - Activate the Promote Selection layer. Layers > Properties > General > Blend Mode: Luminance (L).
25 - Selections > Load/Save Selection > Load Selection Drom Disk: 315_xiki2. Press Delete (or use Edit > Cut), twice.
26 - Layers > New Raster Layer. Edit > Copy the Landscape Misted. Edit > Paste Into Selection. Selections > Select None.
27 - Layers > Arrange > Move Down.
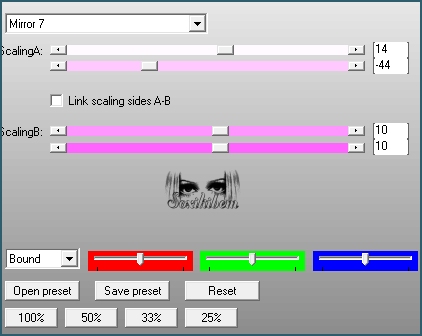
28 - AP [Utility] > Utility - Reflections.
29 - Pick Tool: Position X: 271, Position Y: 96.
30 - Activate the Promoted Selection layer. Layers > New Raster Layer.
31 - Selections > Load/Save Selection > Load Selection From Disk: 315_xiki3. Flood Fill the selections with Color 5.
32 - Selections > Modify > Contract: 2. Flood Fill the selections with Color 4.
33 - Selections > Modify > Contract: 5.
34 - Edit > Copy the Landscape Misted. Edit > Paste As New Layer. Using the Move Tool, position it as desired.
35 - Selections > Invert. Press Delete (or use Edit > Cut).
36 - Selections > Invert. Layers > Properties > General > Blend Mode: Luminance. For my second version, I left the Blend Mode set to Normal.
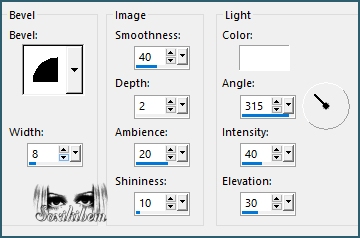
37 - Effects > 3D Effects > Inner Bevel.
Selections > Select None.
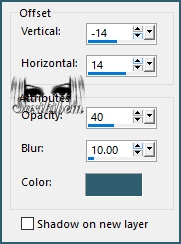
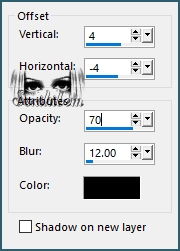
38 - Effects > 3D Effects > Drop Shadow, using the Foreground color.
39 - Edit > Copy the Character Misted. Edit > Paste As New Layer. If you are using the supplied material, resize it to 60% with Resize all layers unchecked. Then: Image > Mirror > Mirror Horizontal.
40 - Adjust > Sharpness > Sharpen. Layers > Properties > General > Blend Mode: Overlay.
41 - Layers > Duplicate. Layers > Properties > General > Blend Mode: Soft Light. Position it in the upper-left corner. If you are using the supplied material, set: Pick tool - Position X: -104, Position Y: -131.
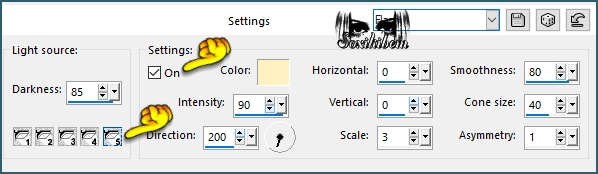
42 - OPTIONAL - Effects > Illumination Effects > Lights. *NOTE: In Settings, only Light #5 should remain ON. Color #fff1c2. Check Lights 1, 2, 3, and 4 and make sure On is unchecked.
* I did not apply this effect in my second version.
43 - Edit > Copy DecorText_xiki. Edit > Paste As New Layer. Pick Tool: Position X: 68, Position Y: 276. Layers > Properties > General > Blend Mode: Luminance (L).
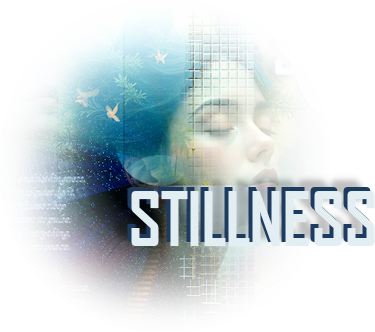
44 - Edit > Copy no TituloStillness_xiki. Edit > Paste a New Layer. Pick Tool: Position X: 484, Position Y: 96.
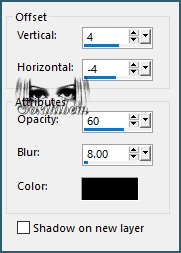
45 - Effects > 3D Effects > Drop Sahdow: color black.
NOTE: Before adding the borders, make sure you are happy with the Blend Modes you have applied. If not, feel free to experiment with different combinations until you achieve the look you prefer.
46 - Image > Add Borders > Symmetric: 1px Color 5 8pxColor 4 1px Color 5 Selections > Select All.
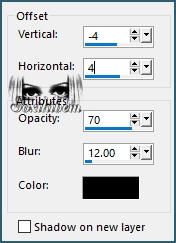
47 - Image > Add Borders > Symmetric: 35px, Color 4. Effects > 3D Effects > Drop Shadow, Color black.
Selections > Select None.
48 - Image > Add Borders > Symmetric: 1px, Color 5 Selections > Select All.
49 - Image > Add Borders > Symmetric: 25px Color 4 Effects > 3D Effects > Drop Shadow.
Selections > Select None.
50 - Image > Add Borders > Symmetric: 1px, Color 5.
51 - Edit > Copy Credit-Tutorial_bySoxikibem. Edit > Paste as New Layer. Position is wherever you prefer. Add your watermark or
signature.
Because every detail
matters... as a little gift for you
to use in your creations.
VERSION:
Credit: Formatting, Artwork & Tutorial by Soxikibem Main Tube: AI Generated by Soxikibem Other Materials: by Soxikibem
Feel free to send me your version. It will be my pleasure to showcase your work on our website.
Send your version to: soxikibem.simpsp@gmail.com
SimPSP Social Media:
|