|
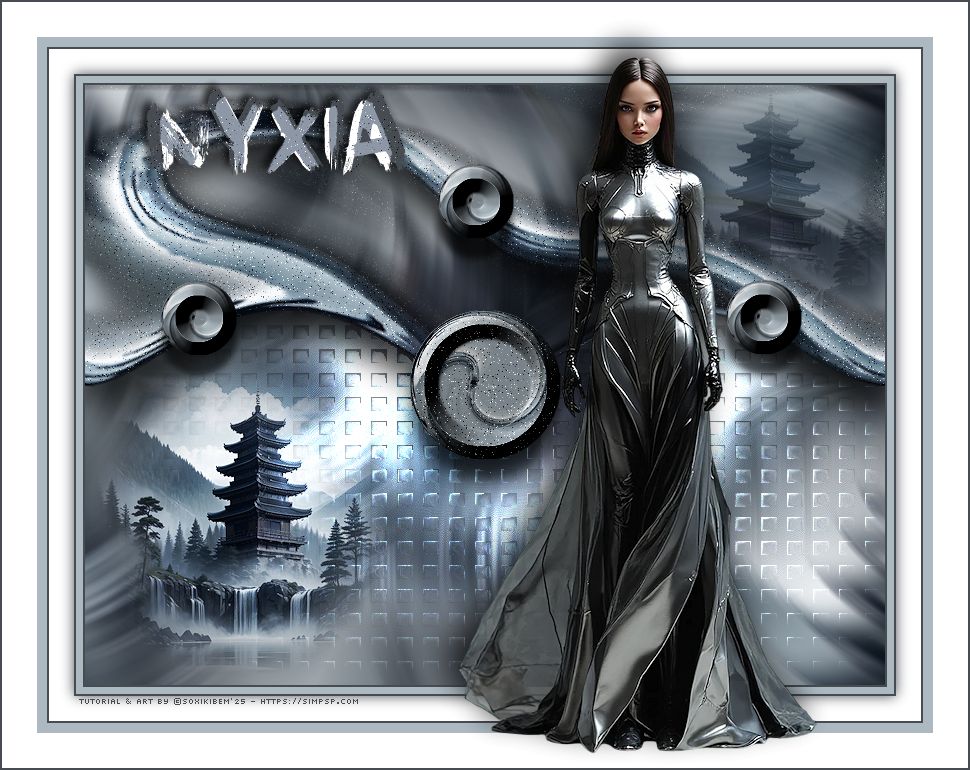
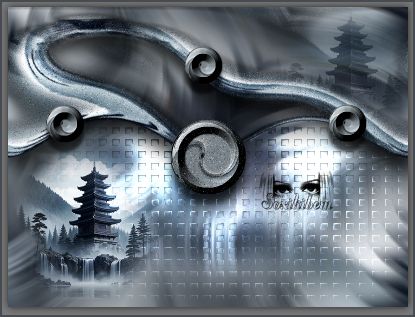
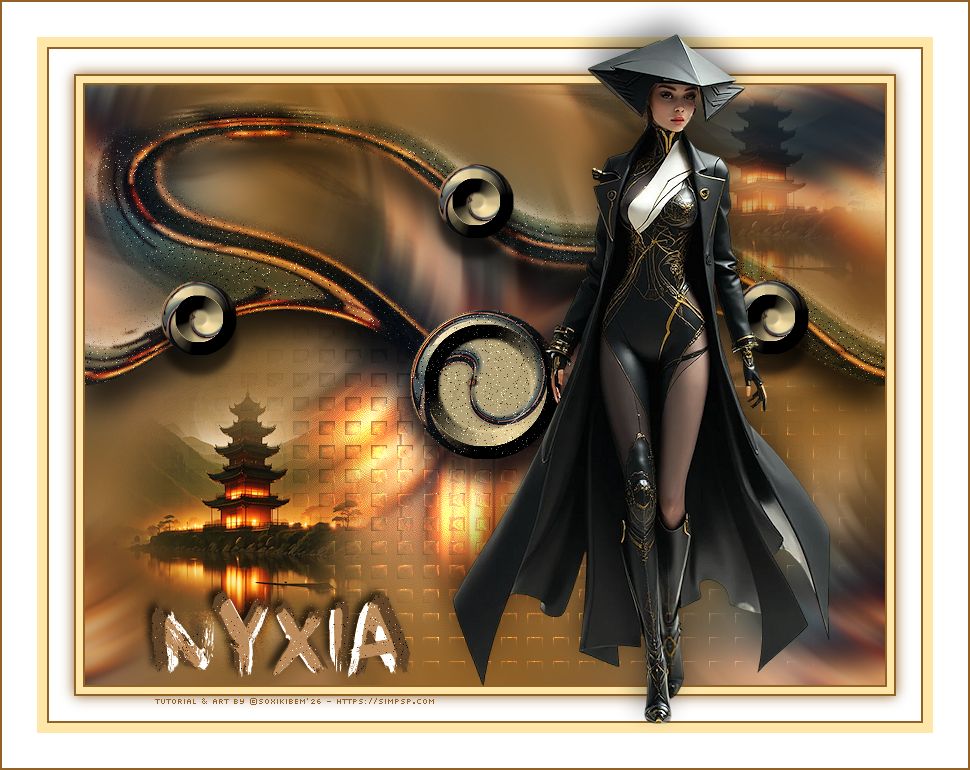
Entre o aço e a neblina,
surge Nyxia, a fusão do espírito e do metal.
TRADUÇÕES:
O Sim
PSP valoriza e reconhece o trabalho das tradutoras que tornam os
tutoriais acessíveis a diferentes idiomas.
MATERIAL: 1 Tube Principal ou Personagem à sua escolha 1 Misted Paisagem à sua escolha Outros Materiais by Soxikibem
PLUGINS: Alien Skin | Eye Candy 5 Impact > Bevel Flaming Pear > Flexify 2
Tutorial elaborado no PSP 2022 Testado e revisado por Márcinha no PSP 2020
Agradeço às Tubeiras pelos Tubes e Masks, pois sem eles não seria
possível criar este trabalho.
TUTORIAL
*Deletar a Marca D'água de todos os
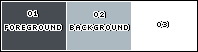
materiais. Cor 3: #ffffff
2 - Abra uma imagem
transparente de 800x600px.
3 - Selectons > Select All. Edit > Copy no Misted Paisagem. Edit > Paste Into Selection. Selections > Select None.
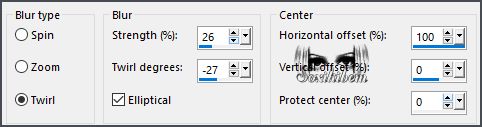
4 - Effects > Image Effects > Seamless Tiling: Default. Adjust > Blur > Radial Blur.
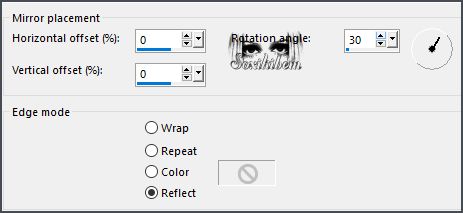
5 - Effects > Reflection Effects > Rotating Mirror.
6 - Layers > New Raster Layer. Selections > Select All. Edit > Copy no Misted Paisagem. Edit > Paste Into Selection. Selections > Select None.
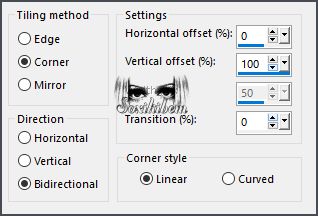
7 - Effects > Image Effects > Seamless Tiling.
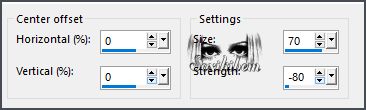
8 - Effects > Distortion Effects > Warp.
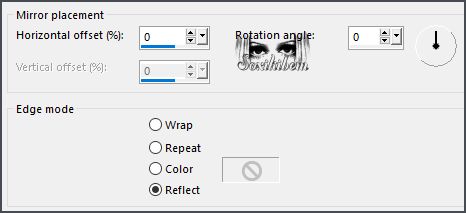
9 - Effects > Reflection Effects > Rotation Mirror.
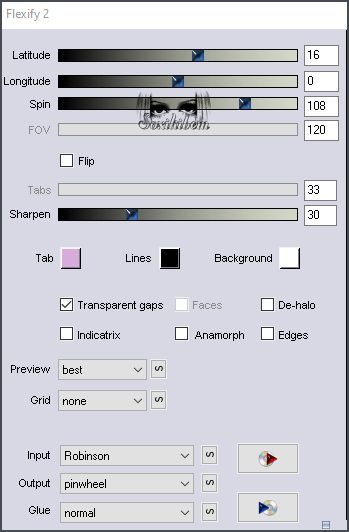
10 - Plugin Flaming Pear > Flexify 2.
11 - Image > Resize: 50%, all layers desmarcados. Layers > Duplicate. Fechar a visibilidade da layer Copy of Raster 2. Ativar a layer Raster 2.
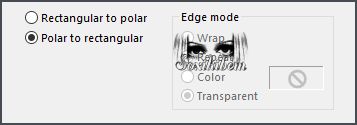
12 - Effects > Distortion Effects > Polar Coordinates.
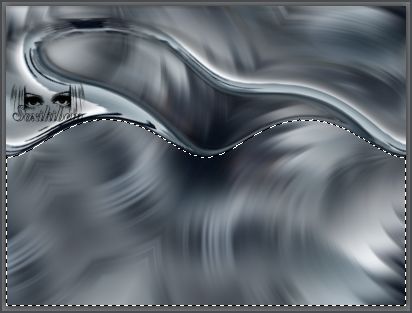
13 - Com a Magic Wand Tolerance e Feather 0, selecione a parte inferior deste efeito.
14 - Layers > New Raster Layer. Edit > Copy no Misted Paisagem. Edit > Paste Into Selection.
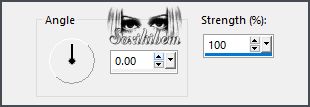
15 - Adjust > Blur > Motion Blur, por 2 vezes.
16 - Effects > Edge Effects > Enhance, por 2 vezes. Selections > Select None. Layers > Arrange > Move Down.
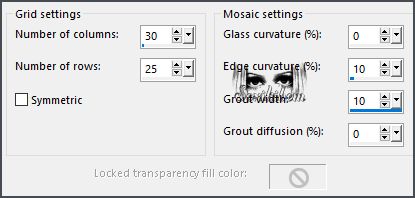
17 - Effects > Texture Effects > Mosaic - Glass.
18 - Layers > Properties > General > Blend Mode: Dodge.
19 - Ativar a Layer Raster 2. Com a Magic Wand Tolerance e Feather 0, novamente selecione a parte inferior deste efeito. Ativar a Layer Raster 3. Selections > Invert. Edit > Cut ou Delete no teclado.
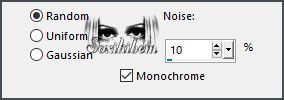
20 - Mantenha a Seleção. Ativar a Layer Raster 2. Adjust > Add/Remove Noise > Add Noise.
Selections > Select None.
21 - Layers > Properties > General > Blend Mode: Hard Light. Effects > 3D Effects > Drop Shadow: 20, 0, 60, 45, cor preta.
22 - Ativar e abrir a visibilidade da layer Copy of Raster 2. Image > Resize: 50%, all layers desmarcado. Adjust > Sharpness > Sharpen.
23 - Layers > Duplicate. Image > Resize: 50%, all layers desmarcado.
24 - Com a Magic Wand, Tolerance e Feather 0, clique fora deste feito. Selections > Invert. Layers > New Raster Layer. Pintar com a cor do Background.
25 - Layers > Arrange > Move Down. Ativar a Layer Copy (2) of Raster 2. Layers > Merge > Merge Down. Selections > Select None.
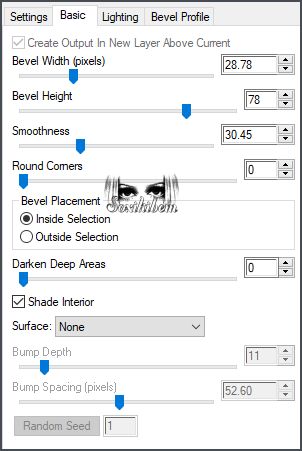
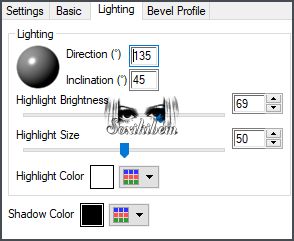
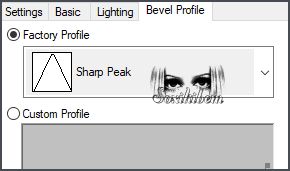
26 - Plugin Alien Skin | Eye Candy 5 Impact > Bevel.
27 - Effects > 3D Effects > Drop Shadow: 20, 0, 60, 10, cor preta. Pick Tool: Psoition X 641, Position Y 195. Layers > Duplicate. Pick Tool: Psoition X 346, Position Y 79. Layers > Duplicate. Pick Tool: Psoition X 69, Position Y 196. Layers > Merge Down, 2 vezes.
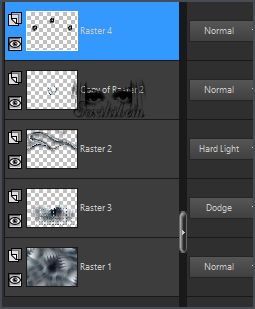
28 - Suas Layers deverão estar assim.
29 - Ativar a Layer Copy of Raster 2. Com a Magic Wand, Tolerance e Feather 0, clique fora deste feito. Selections > Invert. Layers > New Raster Layer. Pintar com a cor do Background. Layers > Arrange > Move Down.
30 - Ativar a Layer Copy of Raster 2. Layers > Merge > Merge Down. Selections > Select None.
31 - Plugin Alien Skin | Eye Candy 5 Impact > Bevel nas mesmas configurações do item 26.
32 - Adjust > Add/Remove Noise > Add Noise.
33 - Effects > 3D Effects > Drop Shadow: 20, 0, 60, 20, cor preta.
34 - Ativar a Layer Raster 3. Edit > Copy no Misted Paisagem Edit > Paste a New Layer. Resize se for necessario, se estiver usando o do material de um resize de 50%. Adjust > Sharpness > Sharpen. Posicione no canto superior direito.
35 - Layers > Properties > General > Blend Mode: Soft Light, Opacity 60.
36 - Layers > Duplicate. Posicione no canto inferior esquerdo. Layers > Properties > General > Blend Mode: Hard Light, Opacity 100%.
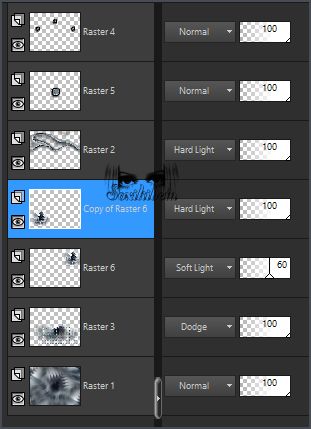
37 - Suas Layers deverão estar assim.
38 - Image > Add Borders >
Symmetric: 7px com a cor do Background 2px com a cor do Foreground Selections > Select All 25px com a cor do 3 (#ffffff)
39 - Effects > 3D Effects > Drop Shadow: 0, 0, 100, 20, cor Foreground. Selections > Select None.
40 - Image > Add Borders >
Symmetric: 10px com a cor do Background 35px com a cor do 3 (#ffffff)
41 - Edit > Copy no tube Personagem. Edit > Paste a New Layer. Resize se for necessario, se estiver usando o do material de um resize de 70%. Posicione e aplique efeito como preferir.
42 - Edit > Copy no TituloNyxia_Xiki. Edit > Paste a New Layer. Posicione como preferir.
43 - Image > Add Borders > Symmetric: 2px com a cor do Foreground.
44 - Edit > Copy no Credit-Tutorial_bySoxikibem. Posicione como preferir. Aplicar sua marca d'água ou assinatura.
Porque cada detalhe faz
diferença...
Versão:
Créditos Versão 1 & 2: Formatação, Arte Final e Tutorial by Soxikibem Tube Principal: AI Generated by Soxikibem Outros Materiais: by Soxikibem
Sinta-se à vontade para enviar suas versões. Terei todo o prazer em publicá-las em nosso site.
Envie sua versão para o e-mail: soxikibem.simpsp@gmail.com
SimPSP Redes Sociais
|