SUPPLIES:
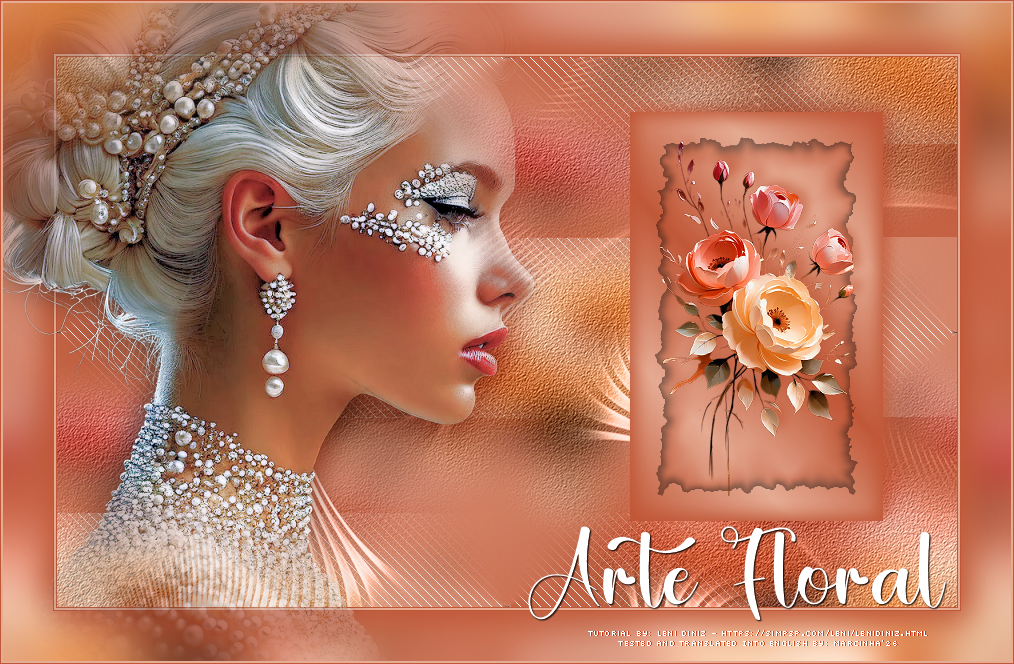
1 Main Tube of your choice
1 Floral Tube of your choice
Other materials by Leni Diniz
PLUGINS:
dsb flux > Linear Transmission
AP Lines > Silverlining > Backslash
Xero > Tekstya
Alien Skin Xenofex 2 > Burnt Edges
Tutorial created in PSP 2020
Tutorial tested and reviewed by Márcinha in PSP 2020
*********
I thank the Tube artists for the Tubes and Masks, as without them this work would not have been possible.
When sharing or using them, please keep the Tubes intact and preserve the proper credits.
Feel free to adjust the blends according to the colors you are using.
Colorize the decorative elements whenever necessary to match your chosen colors.
********
TUTORIAL
01- Open the materials in PSP, duplicate them, and
close the originals.
*Delete the Watermark from all materials.
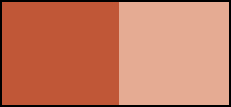
Choose two colors to work with.
#c05737 Foreground (dark color)
#e5ab93 Background (light color)
02- Activate the file
alpha_channel_leni_art_floral.
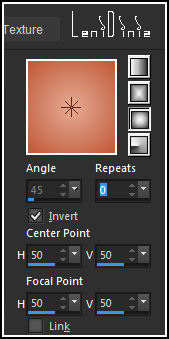
Paint with the Sunburst gradient, made up of the
chosen colors:
Repeats: 0 > Invert: checked.
03- Effects > Plugins > dsb flux > Linear
Transmission.
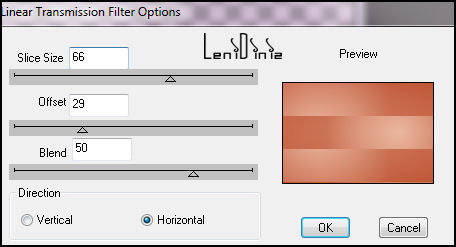
04- Selections > Load/Save Selections > Load
Selection from Alpha Channel leni #1
Selections > Promote Selection to Layer.
Effects > Plugins > AP Lines > Silverlining >
Backslash.
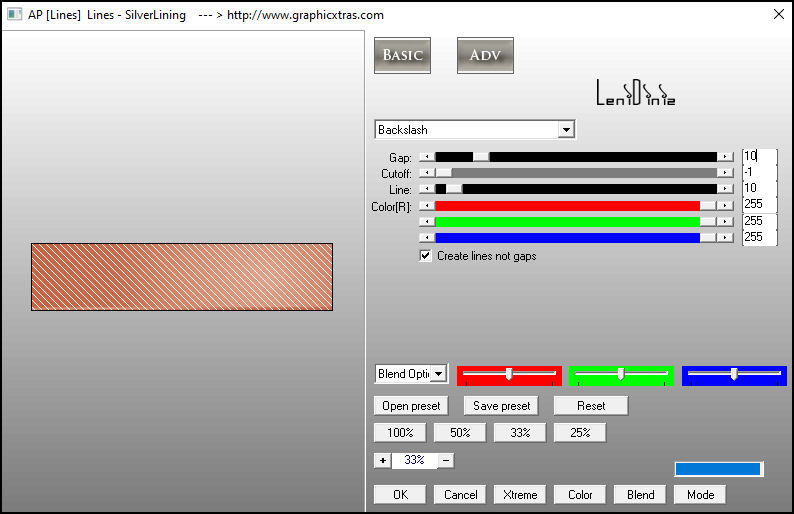
05- Effects > 3D Effects > Drop Shadow: 0,
0, 100, 50. Foreground color
Edit > Repeat
Selections > Select None.
06- Effects > Image Effects > Seamless Tiling:
Default
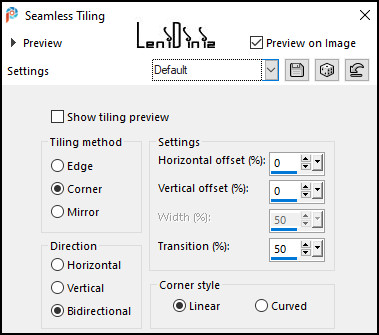
07- Layers > New Raster Layer.
Selections > Select All.
Edit > Copy on the floral tube.
Back on the work file...
Edit > Paste Into Selection.
Selections > Select None.
08- Effects > Image Effects > Seamless Tiling:
Default
Adjust > Blur > Gaussian Blur.
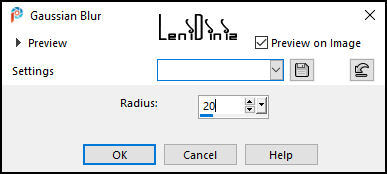
09- Effects > Plugins > Xero > Tekstya.
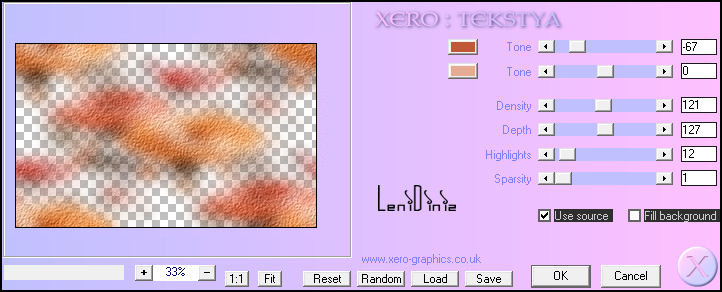
Adjust > Sharpness > Sharpen.
10- Edit > Copy on the decor_leni file
Back on the work file...
Edit > Paste As New Layer.
Layers > Properties > General > Blend Mode:
Luminance (L)
11- Layers > New Raster Layer.
Selections > Load/Save Selections > Load Selection
from Alpha Channel leni #2
Paint with the linear gradient, invert unchecked
Angle: 45 - Repeat: 5 - Invert: unchecked
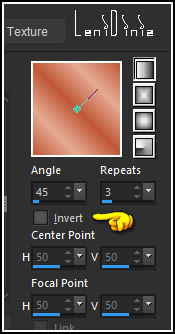
12- Layers > Duplicate.
Turn off the visibility of the Copy of Raster 4 layer.
Activate the Raster 4 layer.
Selections > Invert.
13- Effects > 3D Effects > Drop Shadow: 0,
0, 100, 30. Foreground color.
Edit > Repeat Drop Shadow.
14- Selections > Invert.
Effects > 3D Effects > Drop Shadow:
-5, 8, 60, 15. Foreground
color
15- Activate and turn on the visibility of the Copy
of Raster 4 layer.
Keep the selection..
16- Effects > Plugins > Alien Skin Xenofex 2 >
Burnt Edges.
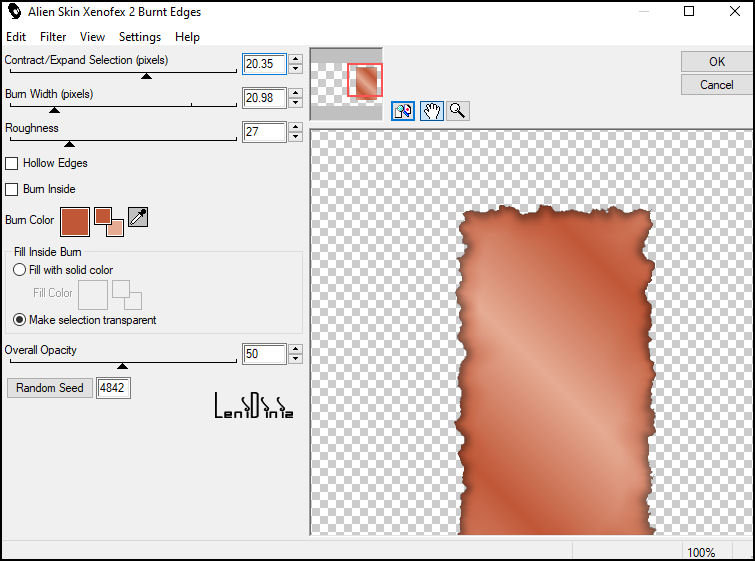
Keep the selection..
17- Edit > Copy on the floral tube file.
Back on the work file...
Edit > Paste As New Layer.
Image > Resize: 29% - all layers unchecked.
Using the Move Tool, center it within the
frame.
18- Adjust > Sharpness > Sharpen.
Selections > Select None.
19- Effects > 3D Effects > Drop Shadow:
-5, 8, 60, 15.
Foreground color.
20- Edit > Copy Special > Copy Merged.
21- Image > Add Borders:
1px - symmetric - color: Foreground #c05737 (dark
color)
2px - symmetric - color: Background #e5ab93 (light
color)
1px - symmetric - color: Foreground #c05737 (dark
color)
22- Selections > Select All.
Image > Add Borders: 50px - symmetric - any color
Selections > Invert.
Edit > Paste Into Selection.
23- Adjust > Blur > Gaussian Blur: 15
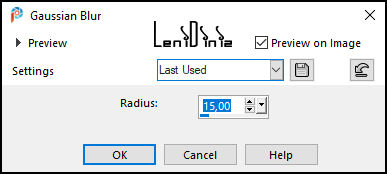
Image > Mirror > Mirror Horizontal.
Selections > Invert.
24- Effects > 3D Effects > Drop Shadow:
10, 10, 100, 50. Foreground color
Repeat Effects > 3D Effects > Drop Shadow:
-10,
-10, 100, 50.
Selections > Select None.
25- Edit > Copy on the Main Tube file.
Back on the work file...
Edit > Paste As New Layer.
Image > Resize, if needed. On the tube used in the
material, 80% was applied.
Adjust > Sharpness > Sharpen.
Position it to the left.
Effects > 3D Effects > Drop Shadow: your choice.
26- Edit > Copy on the
leni_diniz_titulo_arte_floral file.
Back on the work file...
Edit > Paste As New Layer.
Position it with the Pick Tool > Position >
X: 524 - Y: 522
27- Image > Add Borders:
2px - symmetric - color: Background #e5ab93 (light
color)
1px - symmetric - color: Foreground #c05737 (dark
color)
28- Edit > Copy from the
Credito-TradByMarcinha file:

Edit >
Paste As New Layer and position it wherever you prefer.
Apply your watermark or signature.
File > Export > JPEG Optimizer...
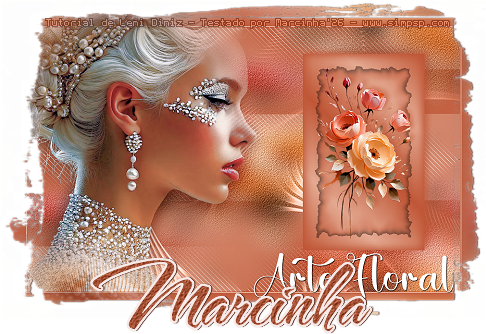
Credits:
Tutorial by Leni Diniz
Tubes by Leni Diniz
Other Materials: by Leni Diniz
VERSION:
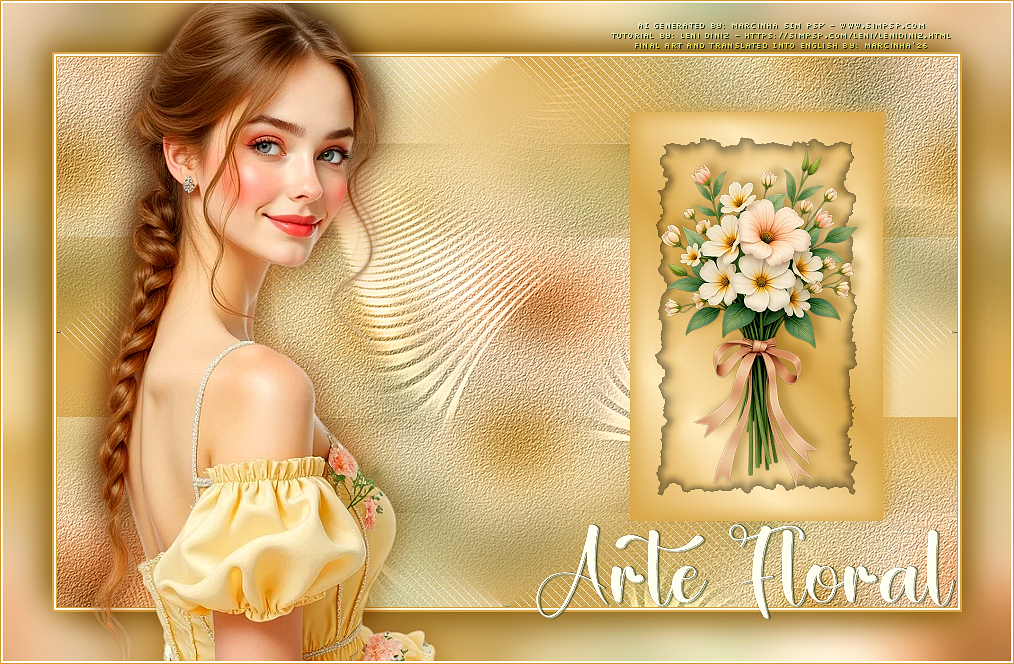
Version credits:
Formatting, Final Artwork, and English Translation by
Márcinha
Tutorial: by
Leni Diniz -
Main Tube and Flower: AI-generated by
Marcinha (SIM PSP)
Prints by
Leni Diniz
Feel free to send us your versions.
We would be delighted to publish them on our site.
Send your version to this e-mail:
familia.olgador@gmail.com

SimPSP Social Media


|
This tutorial was created by Leni
Diniz in
July 2026, exclusively for the SIM PSP site: https://simpsp.com
Tutorial tested, reviewed and translated into
English by Marcinha
in August 2026.
The content of this tutorial is the sole
responsibility of the author.
Sim PSP only hosts and shares it for
promotional purposes.
Partial or total reproduction is prohibited without proper
authorization from the author.
Respect the credits and encourage the creation of new
content |