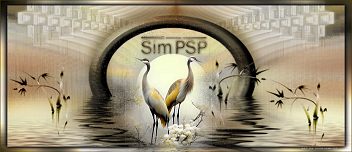
|
Material Main Tubeof your choice Misted Landscape of your choice Mask Monaiekje mask 32 Effects of PSP 2020  Plugins Mehdi > Sorting Tiles Flaming Pear > Flexify 2 Carolaine & Sensibility > CS-HLines Nik Software > Color Efex 3.0 Complete Alien Skin Eye Candy 5 > Impact
***************
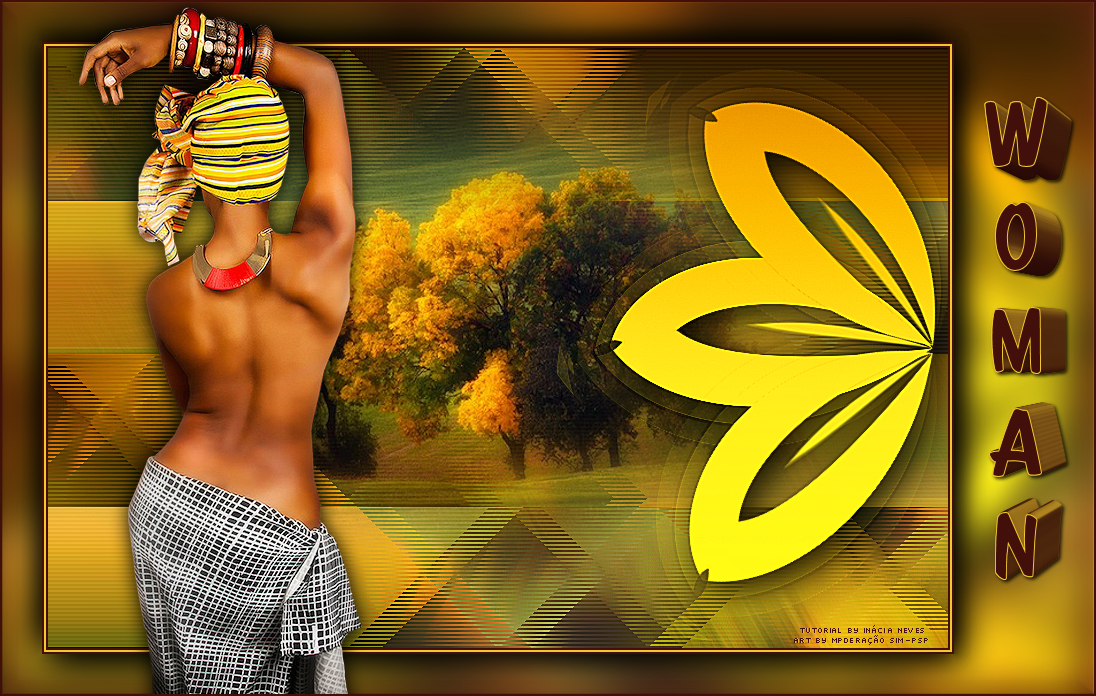
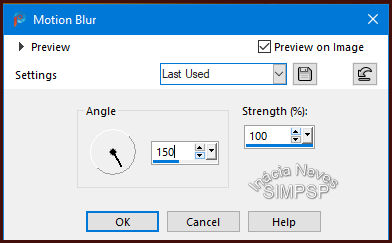
TUTORIAL 1- Open a transparent image of 900 x 600 px Escolher 2 cores do tube da Paisagem I chose the colors: Foreground: #f3c72d Background: #420f0b Form a gradient Style Linear > Angle 0 > Repeats 0 Dark color at the top of the gradient Paint with the gradient. 2- Layers > New Layer Selections > Select All Edit > Copy in the misted landscape Edit > Paste > Into Selection Selections > Select None Effects > Image Effects > Seamless Tiling > Default 3- Adjust > Blur > Motion Blur
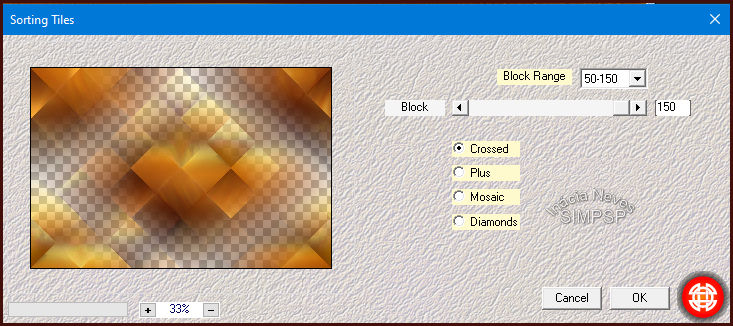
Edit > Repeat Motion Blur Effects > Edge Effects > Enhance More 4- Layers > Duplicate Effects > Plugin > Mehdi > Sorting Tiles
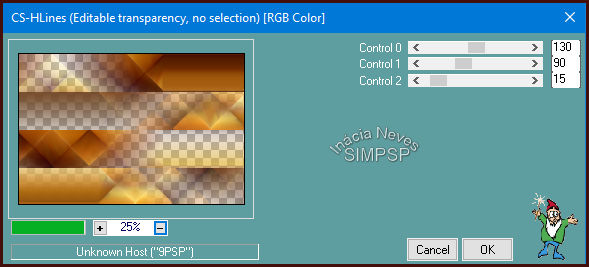
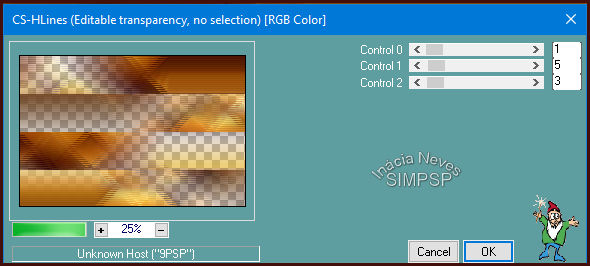
5- Effects > Plugin > Carolaine & Sensibility > CS-HLines 6- Effects > Plugin > Carolaine & Sensibility > CS-HLines
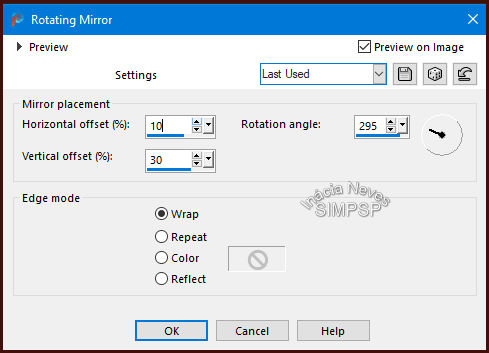
Adjust > Sharpness > Sharpen More 7- Activate layer Raster 2 Layers > Properties > General > Blend Mode: Hard Light or of your choice 8- Activate layer Copy of Raster 2 Layers > New Layer Paint with the light color in use Open the Mask Monaiekje mask 32 in the PSP Layers > New Mask Layer > From image > Monaiekje mask 32 Effects > Edge Effects > Enhance More Layers > Merge > Merge Group 9- Effects > Reflection Effects > Rotating Mirror
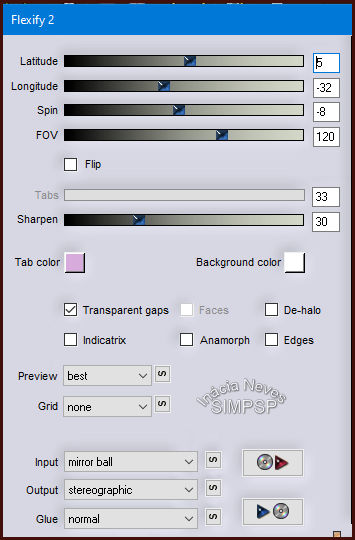
10 - Effects > Plugin > Flaming Pear > Flexify 2
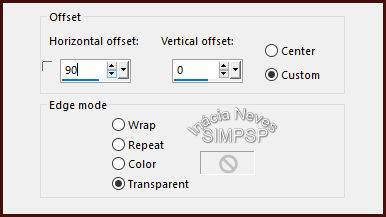
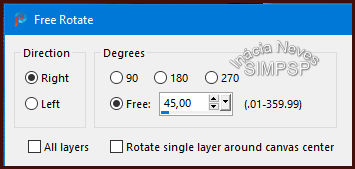
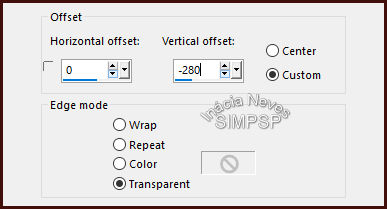
Image > Mirror > Mirror Horizontal Effects > Image Effects > Offset 11- Layers > Duplicate Image > Free Rotate Effects > Image Effects > Offset 12- Layers > Duplicate Image > Free Rotate
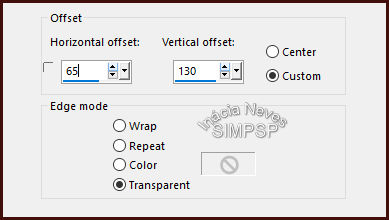
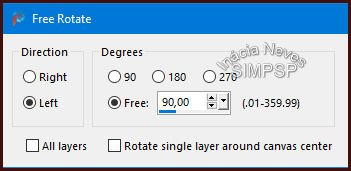
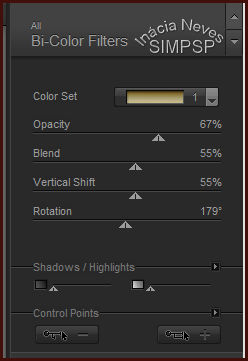
Effects > Image Effects > Offset 13- Layers > Merge > Merge Down. Repeat Layers > Merge > Merge Down. 14- Effects > Plugin > Nik Software > Color Efex 3.0 Complete > Bi-Color Filters In Color Set, I chose Brown 1, but you can choose another one more suited to your work:
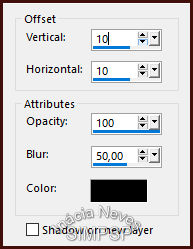
Effects > 3D Effects > Drop Shadow
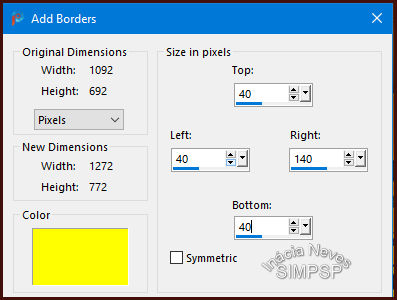
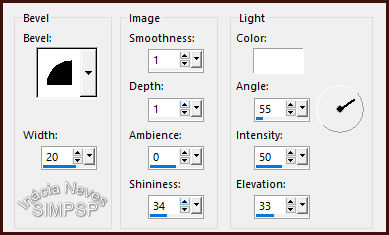
Adjust > Sharpness > Sharpen More 15- Activate the Misted Landscape, Edit > Copy Activate your work Edit > Paste a New Layer With the Pick tool, adjust and position your choice Layers > Arrange > Move Down Layers > Merge > Merge All 16- Create the borders: Image > Add Borders > 2 px > Symmetric > dark color of use Image > Add Borders > 2 px > Symmetric > light color of use Image > Add Borders > 2 px > Symmetric > dark color of use Edit > Copy 17- Image > Add Borders With the Magic Wand: Tolerance and Feather tool at 0, select that border. Edit > Paste > Into Selection Adjust > Blur > Gaussian Blur > Radius 20 Effects > 3D > Inner Bevel
Selections > Invert Effects > 3D Effects > Drop Shadow:
Repeat Drop Shadow: Vertical and Horizontal: -10 / -10 Selections > Select None 18- Write the text with font and effects of your choice Font Scriptorama Markdown JF, > Size: 80 px > Direction: Vertical
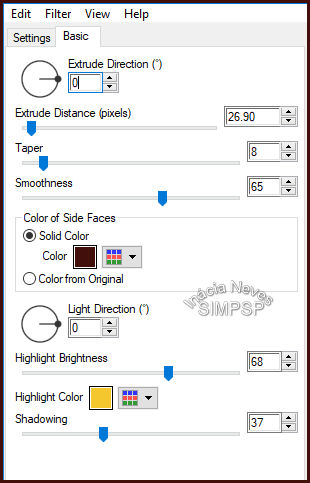
Apply Effects> Alien Skin Eye Candy 5 Plugin> Impact> Extrude Effects > 3D > Drop Shadow > 2/2/82/5 Color Preto Place the text to the right, on the wide part of the border. 19- Activate the main tube Edit > Copy Activate your work Edit > Paste as New Layer Effects > 3D Effects > Drop Shadow of your choice. Adjust > Sharpness > Sharpen Layers > Merge > Merge All 21- Image > Add Borders > 2 px > Symmetric > dark color of use 22- Apply your watermark or signature. File > Export > JPEG Optimizer.
Credits: Tube and Misted: Tubed by VERLAINE Mask: Monaiekje mask 32
Feel free to send your versions.
Send your version to: inacia.neves@gmail.com
SimPSP Social Media
|