|
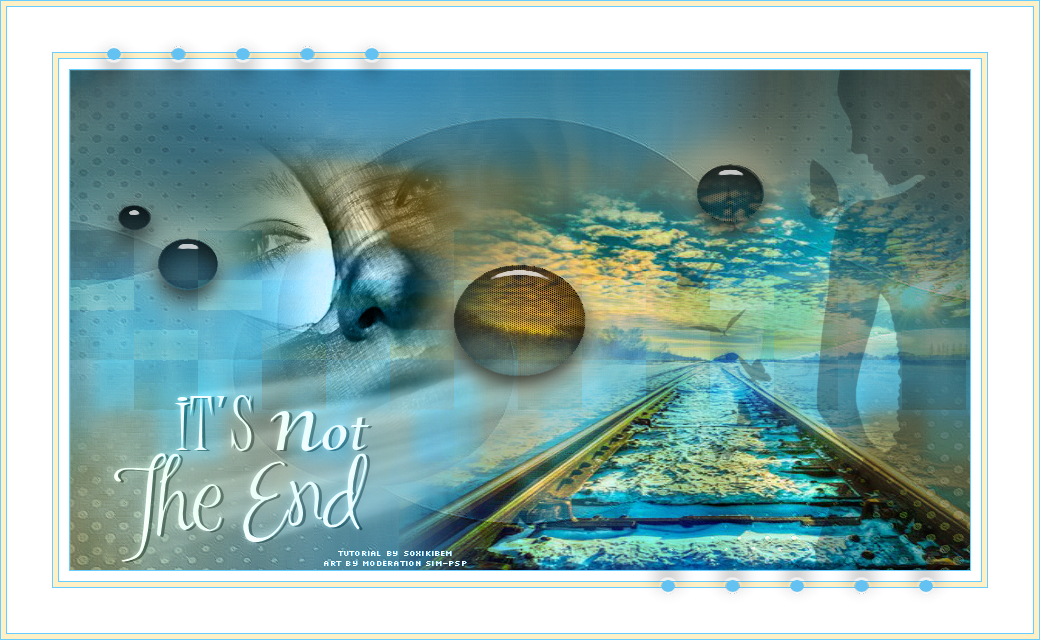
Tutorial By Soxikibem English Translation by SIM-PSP moderation Original Tutorial
MATERIAL 1 Misted landscape of your choice nicole-silhouette-2014 nicole-mist-face-2013 tituloItsNotTheEndBySoxikibem decorByXiki NarahsMasks_1592 Selection > ItsNotTheEnd1.PspSelection (Save to the PSP Selection folder) Script > ItsNotTheEnd.PspScript (Save to the PSP Script-Restricted folder)
Plugins Alien Skin Eye Candy 5 Impact Dsb Flux Mehdi 2 Ulead Effects ScreenWorks
Tutorial
01 - Open the material on the PSP, duplicate and close the original. Choose two colors to work with: Foreground #69ceff Background #fff0c5 Cor Extra: Branca #ffffff
2 - Open a transparent image of 900x500px. Paint with the color of the Foreground.
3 - Selections > Select All. Edit > Copy the Misted landscape. Edit > Paste Into Selection. Selections > Select None.
4 - Effects > Image Effects > Seamless Tiling: Default.
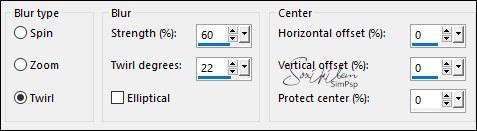
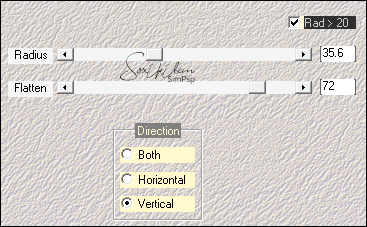
5 - Adjust > Blur > Radial Blur.
6 - Effects > Plugin Mehdi 2 > Flat Median.
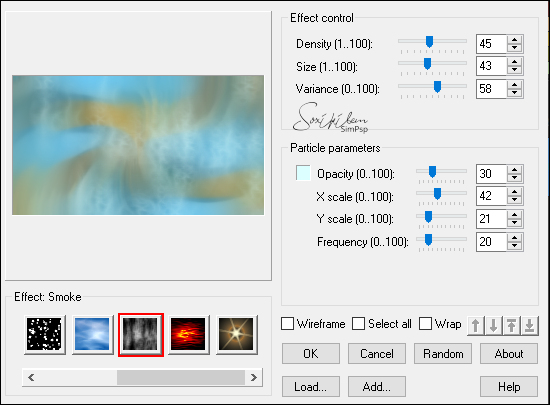
7 - Effects > Plugin Ulead Effects > Particle.
Effects > Edge Effects > Enhance.
8 - Layers > Duplicate. Layers > New Mask Layer > From Image: NarahsMasks_1592. Effects > Edge Effects > Enhance. Layers > Merge > Merge Group. Effects > 3D Effects > Drop Shadow: 1, 1, 100, 0, color: Background. Layers > Properties > General > Blend Mode: Difference, Opacity 50%.
9 - Edit > Copy the Misted landscape. Edit > paste a New Layer. Position to the right (see model). Layers > Properties > General > Blend Mode: Overlay
10 - Selections > Load/Save Selections > Load Selection From Disk: ItsNotTheEnd1. Selections > Promote Selection to Layer.
11 - Effects > Plugin ScreenWorks > Dot Screen. Effects > 3D Effects > Drop Shadow: 0, 0, 100, 80, color: Background.
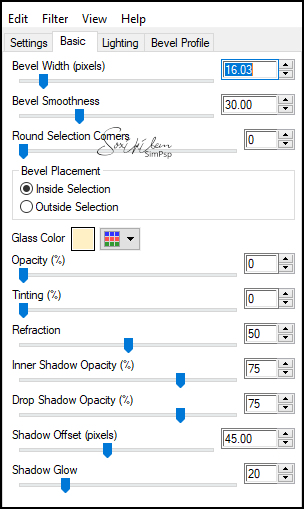
12 - Effects > Plugin Alien Skin Eye Candy 5 Impact > Glass. Settings: Clear.
Seelections > Select None.
13 - Activate the Raster 1 layer. Layers > Duplicate. Layers > Arrange > Bring To Top. Effects > Geometric Effects > Perspective - Horizontal: (-85), Transparent. Repeat Geometric Effects > Perspective - Horizontal: 85, Transparent.
14 - Effects > Plugin Dsb Flux > Linear Transmission.
15 - Effects > 3D Effects > Drop Shadow: 50, 25, 100, 20, color: Foreground. Layers > Arange > Move Down. Layers > Properties > General > Blend Mode: Overlay, Opacity 60%.
16 - Open the nicole-silhouette-2014 file. Image > Resize: 500px high. Edit > Copy. Edti > Paste as New Layer. Objects > Align: Right. Layers > Properties > General > Opacity 30%.
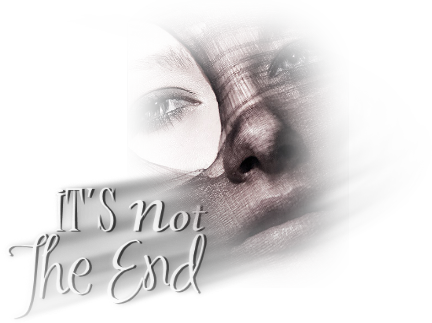
17 - Edit> Copy the file nicole-mist-face-2013 or another of your choice. Edit > Paste as New Layer. Image > Resize: 70%, all layers unchecked. Position according to the model. Layers > Properties > General > Blend Mode: Luminence (L).
18 - Edit > Copy the tituloItsNotTheEndBySoxikibem. Edit > Paste as New Layer. Objects > Align Left. Objects > Align Bottom. Layers > Properties > General > Blend Mode: Luminence (L).
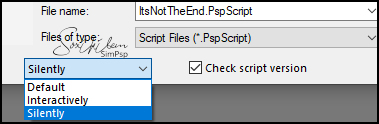
19 - File > Script > Run: ItsNotTheEnd Choose the option Silently if you are using the same colors as the tutorial. If you are using other colors choose the option Interactively.
* If the PSP program ran the Script, skip to step 21.
If the Script did not work on the PSP, continue with step 20 and make the borders in these settings: 20 - Image > Add Borders: 1px color foreground 10px color #FFFFFF (white) 1px color foreground 5px color background 1px color foreground 45px color #FFFFFF (white) 1px color foreground 5px color background 1px color foreground
21 - Edit > Copy no decorByXiki. Edit > Paste as New Layer.
22 - Apply your watermark or signature. File > Export > JPEG Optimizer.
CREDITS: Tutorial by Soxikibem'21 English Translation by Moderation SIM-PSP
Misted
landscape
and Tubes:
Tubed by
Nicole
M
Feel free to send your versions.
|