|
TRADUÇÕES:
Obrigada aos nossos tradutores!
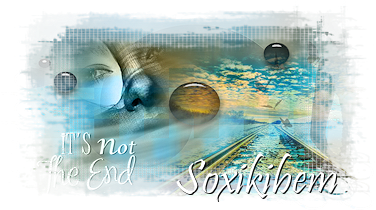
MATERIAL nicole-silhouette-2014 nicole-mist-face-2013 1 Misted Paisagem tituloItsNotTheEndBySoxikibem decorByXiki NarahsMasks_1592 Selection: ItsNotTheEnd1.PspSelection > Salvar dentro da pasta Selection do seu Psp. Script: ItsNotTheEnd.PspScript > Salvar dentro da pasta Script-Restricted.
Plugins Alien Skin Eye Candy 5 Impact Dsb Flux Mehdi 2 Ulead Effects ScreenWorks
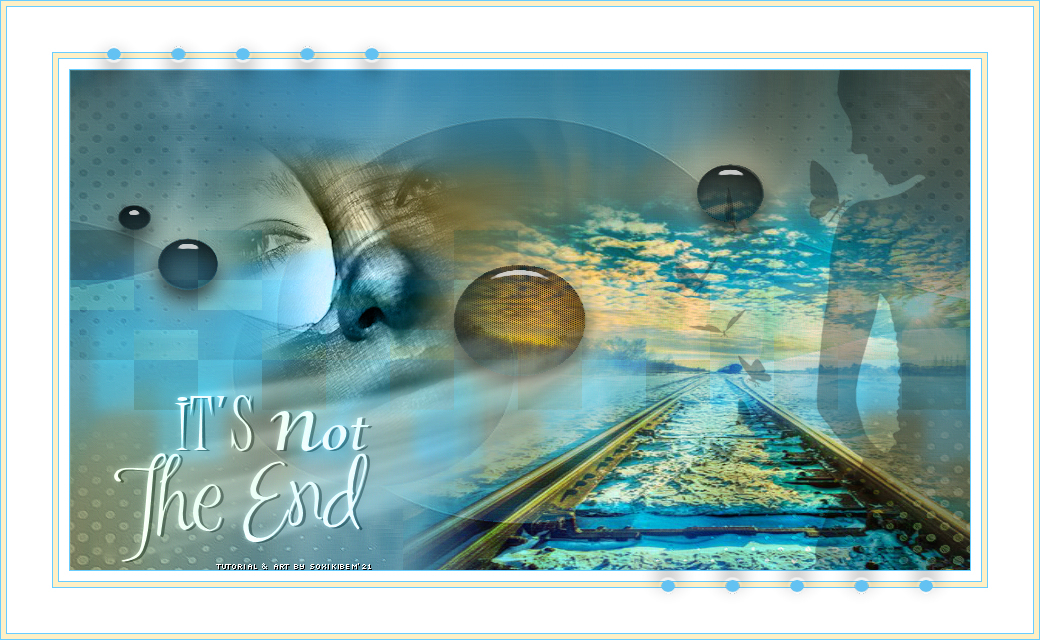
Tutorial
1 - Abrir o material no PSP, duplique e feche os originais. Escolha duas cores para trabalhar: Foreground #69ceff Background #fff0c5 Cor Extra: Branca #ffffff
2 - Abra uma transparência de 900x500px. Pintar com a cor do Foreground.
3 - Selections > Select All. Edit > Copy no Misted Paisagem. Edit > Paste Into Selection. Selections > Select None.
4 - Effects > Image Effects > Seamless Tiling: Default.
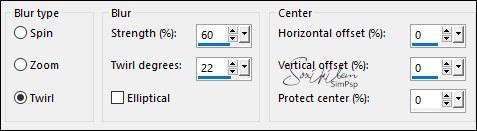
5 - Adjust > Blur > Radial Blur.
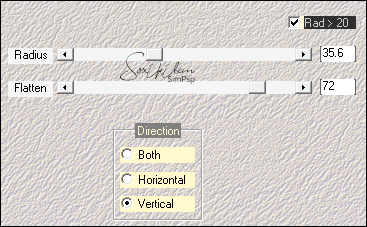
6 - Effects > Plugin Mehdi 2 > Flat Median.
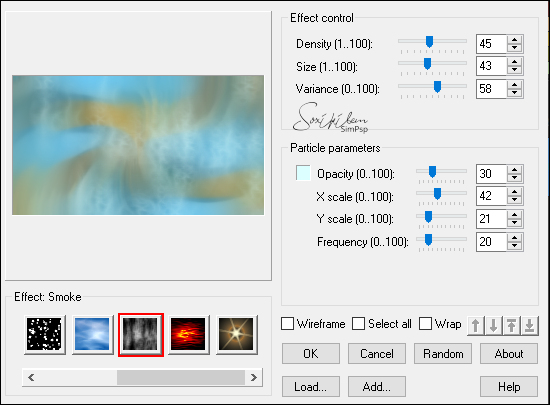
7 - Effects > Plugin Ulead Effects > Particle.
Effects > Edge Effects > Enhance.
8 - Layers > Duplicate. Layers > New Mask Layer > From Image: NarahsMasks_1592. Effects > Edge Effects > Enhance. Layers > Merge > Merge Group. Effects > 3D Effects > Drop Shadow: 1, 1, 100, 0, com a cor do Background. Layers > Properties > General > Blend Mode: Difference, Opacity 50%.
9 - Edit > Copy no Misted Paisagem. Edit > paste as New Layer. Posicione à direita (veja o modelo). Layers > Properties > General > Blend Mode: Overlay
10 - Selections > Load/Save Selections > Load Selection From Disk: ItsNotTheEnd1. Selections > Promote Selection to Layer.
11 - Effects > Plugin ScreenWorks > Dot Screen. Effects > 3D Effects > Drop Shadow: 0, 0, 100, 80, cor do Background.
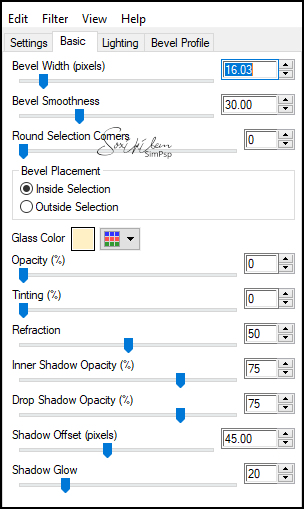
12 - Effects > Plugin Alien Skin Eye Candy 5 Impact > Glass. Settings: Clear.
Seelections > Select None.
13 - Ativar a layer Raster 1. Layers > Duplicate. Layers > Arrange > Bring To Top. Effects > Geometric Effects > Perspective - Horizontal: (-85), Transparent. Repetir o Geometric Effects > Perspective - Horizontal: 85, Transparent.
14 - Effects > Plugin Dsb Flux > Linear Transmission.
15 - Effects > 3D Effects > Drop Shadow: 50, 25, 100, 20, cor Foreground. Layers > Arange > Move Down. Layers > Properties > General > Blend Mode: Overlay, Opacity 60%.
16 - Abra o arquivo nicole-silhouette-2014. Image > Resize: 500px de altura. Edit > Copy. Edti > Paste as New Layer. Objects > Align: Right. Layers > Properties > General > Opacity 30%.
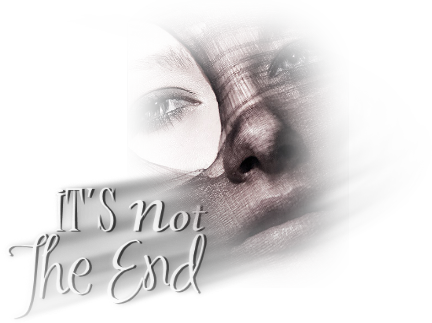
17 - Edit > Copy no arquivo nicole-mist-face-2013 ou outro de sua preferência. Edit > Paste as New Layer. Image > Resize: 70%, all layers desmarcado. Posicionar conforme o modelo. Layers > Properties > General > Blend Mode: Luminence (L).
18 - Edit > Copy no tituloItsNotTheEndBySoxikibem. Edit > Paste as New Layer. Objects > Align Left. Objects > Align Bottom. Layers > Properties > General > Blend Mode: Luminence (L).
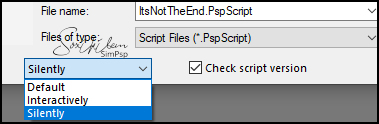
19 - File > Script > Run: ItsNotTheEnd Escolha Silently se estiver usando as mesmas cores do tutorial. Se estiver usando outras cores escolha a opção Interactively.
*Se o programa PSP executou o Script, pule para a etapa 21.
Se o Script não funcionou no PSP, continue a estapa 20 e faça as bordas nestas configurações: 20 - Image > Add Borders: 1px cor foreground 10px cor branca 1px cor foreground 5px cor background 1px cor foreground 45px cor branca 1px cor foreground 5px cor background 1px cor foreground
21 - Edit > Copy no decorByXiki. Edit > Paste as New Layer.
22 - Aplicar sua marca d'água ou assinatura. File > Export > JPEG Optimizer.
CREDITOS Tubes & Misted Paisagem by Nicole - Mask by Narah
Sinta-se à vontade para enviar suas versões. Terei todo o prazer em publicá-las em nosso site.
|