|
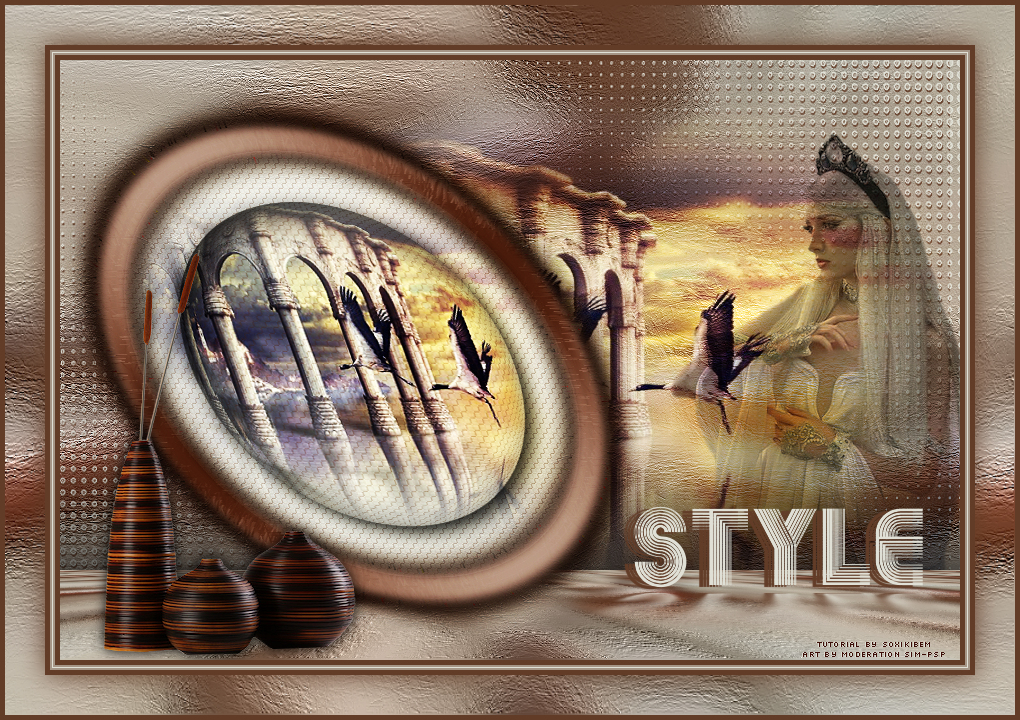
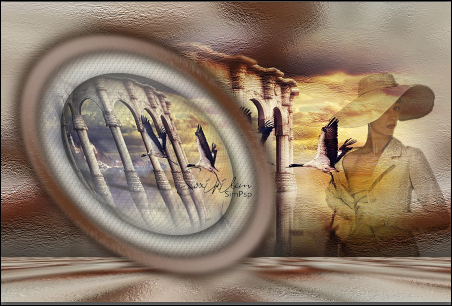
Style is a way to say
Tutorial By Soxikibem English Translation by SIM-PSP moderation Original Tutorial
MATERIAL 1 Main Tube of your choice 1 Misted landscape of your choice 1 Decorative tube of your choice. StyleTituloSoxikibem NarahsMasks_1604 glass_soxiki20
* double-click on the file glass_soxiki20 to import the
effect
Plugins Alien Skin Eye Candy 5 Impact Mura's Meister
TUTORIAL
1 - Open the material on the PSP, duplicate and close the original. Choose four colors to work with.
Cor 1: Foreground #623c27 Cor 2: Background #dbc3a7 Cor 3: #a59586 Cor 4: #e0e0d6
2 - Open a transparent image of 900x600px. Paint with the color of the foreground. Selections > Select All. Edit > Copy on the main tube. Edit > Paste Into Selection. Selections > Select None.
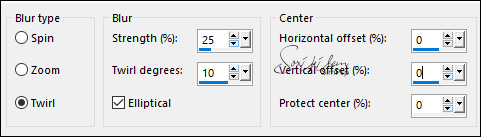
3 - Effects > Image Effects > Seamless Tiling: Default. Adjust > Blur > Radial Blur.
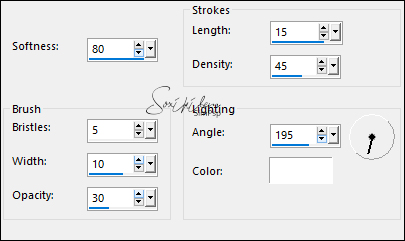
4 - Effects > Art Media Effect > Brush Strokes.
5 - Layers > New Raster Layer. Paint with the color of the foreground. Effects > Geometric Effects > Circle: Transparent. Image > Resize 80%, all layers unchecked.
6 - Selections > Select All. Selections > Float. Selections > Defloat. Selections > Modify > Contract: 30. Press the Delete key on the keyboard.
7 - Layers > New Raster Layer. Selections > Modify > Expand: 5. Paint with color 4.
8 - Edit > Copy in the Misted landscape Edit > Paste Into Selection. Adjust > Sharpness > Sharpen.
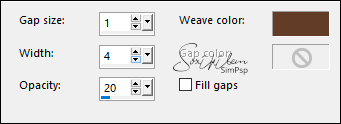
9 - Effects > Texture Effects > Weave.
Adjust > Sharpness > Sharpen.
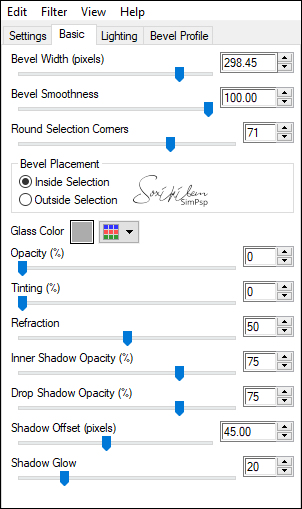
10 - Plugin Alien Skin Eye Candy 5 Impact > Glass: glass_soxiki20 or configure as indicated:
* double-click on the file glass_soxiki20 to import the
effect
Selections > Select None. Layers > Arrange > Move Down.
11 - Activate Layer Raster 2. Layers > Duplicate. Activate the Raster 2 layer again. Effects > Art Media Effect > Brush Strokes.
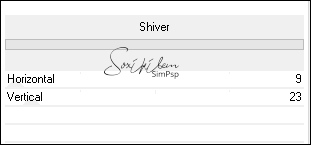
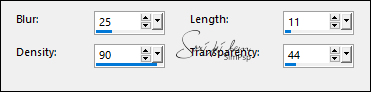
12 - Activate the Copy of Raster 2 layer. Filters Unlimited 2.0 > Special Effects 1 > Shiver: 9, 23.
13 - Effects > Texture Effects > Fur.
14 - Effects > 3D Effects > Drop Shadow: 0, 0, 100, 40, color: #000000.
15 - Close the visibility of the Raster 1 layer. Layers > Merge > Merge Visibile. Open the visibility of the Layer Raster 1.
16 - Layer Merged active. Effects > Geometric Effects > Skew.
Position with the Pick Tool: Position X 0, Position Y 30.
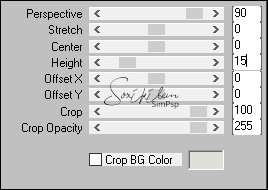
17 - Activate the Raster 1 layer. Layers > Duplicate. Plugin Mura's Meister > Perspective Tiling.
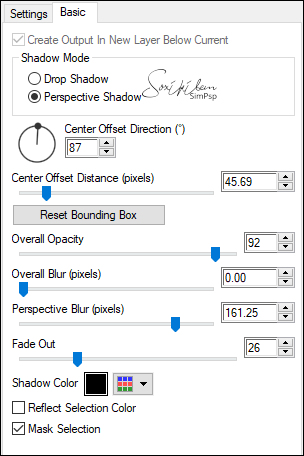
18 - Plugin Alien Skin Eye Candy 5 Impact > Perspective Shadow: Settings Cast on Wall.
19 - Layers > New Raster Layer. Selections > Select All. Edit> Copy in Misted Landscape. Edit > Paste Into Selection. Selections > Select None. Layers > Properties > General > Blend Mode: Hard Light or as you prefer. Layers > Arrange > Move Down.
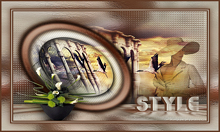
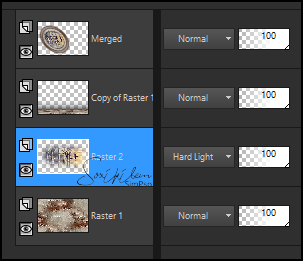
20 - Check the Layers.
21 - With the Raster 2 layer activated ... Edit> Copy in main tube. Edit > Paste a new Layer. Position to the right. Layers > Properties >General > Blend Mode: Multiply, Opacity 70%, or as you prefer.
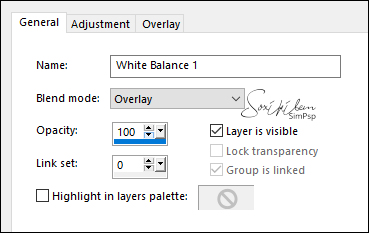
22 - Activate the Merged layer. Selections > Select All. Selections > Float. Selections > Defloat. Layers > Adjustment Layer > White Balance > General:
Selections > Select None. This item 22 is optional
23 - Activate Layer Raster 1. Layers > New Raster Layer. Paint with color 4. Layers > New Mask Layer > From Image: NarahsMasks_1604. Effects > Edge Effects > Enhance. Layers . Merge > Merge Group.
24 - Effects > 3D Effects > Drop Shadow: 2, -10, 100, 1, color: foreground.
25 - Activate the top layer. Edit > Copy in Decorative tube. Edit > Paste a New Layer. Position to the left. Effects > 3D Effects > Drop Shadow: your choice
26 - Edit > Copy no StyleTituloSoxikibem. Edit > Paste a New Layer. Pick Tool: Position X 501, Position Y 466.
27 - Activate the Raster 1 layer. Edit > Copy.
28 - Image > Add Borders: 5px color 1 2px color 3 1px color 4 2px color 3 5px color 1 Selections > Select All. Image > Add Borders: 40px > Any color. Selections > Invert. Edit > Paste Into Selection. Selections > Invert.
29 - Effects > 3D Effects > Drop Shadow: 0, 0, 100, 40, color: 1. Selections > Select None.
30 - Image > Add Borders: 5px > Color: 1
31 - Apply your watermark or signature. File > Export > JPEG Optimizer.
CREDITS: Tutorial by Soxikibem'21 English Translation by Moderation SIM-PSP Main Tube: Tubed by Naise M Decorative tube: Tubed by Nena Silva Misted landscape: by Colybrix Mask by Narah
Feel free to send your versions.
|