|
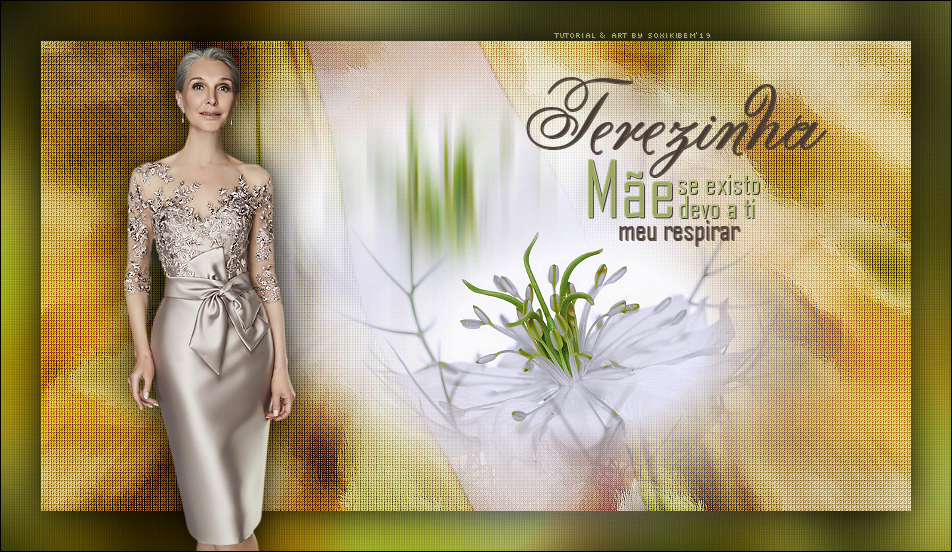
Tutorial dedicado a minha querida Mãe!!!
TRADUÇÕES:
Obrigada aos nossos tradutores!
MATERIAL 1 Tube Principal à suaescolha 1 Misted Flores à sua escolha titulo_terezinha
PLUGINS Flaming Pear > Flexify 2 Greg's Factory Output Vol II > Pool Shadow Unlimite 2.0 > Tile & Mirror
EXECUÇÃO
1 - Abrir o material no PSP, duplique e feche o original. Escolher duas cores para trabalhar. Foreground #483b33 Background #9ba667
2 - Abra uma transparência de 950x550px. Pintar com o gradiente Radial com as cores escolhidas.
3 - Layers > New Raster Layer. Selections > Select All.
4 - Edit > Copy no tube principal. Etid > Paste Into Selection. Selections > Select None.
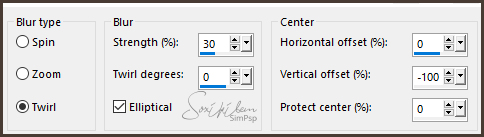
5 - Effects > Image Effects > Seamless Tiling: Default. Adjust > Blur > Radial Blur.
Effects > Edge Effects > Enhance More.
6 - Layers > Duplicate. Fechar a visibilidade da layer Copy of Raster 2. Ativar a layer Raster 2. Layers > Merge > Merge Down.
7 - Effects > Filters Unlimited 2.0 > Tile & Mirror > Seamless Blend (vertical).
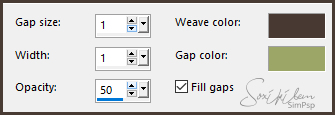
8 - Effects > Texture Effects > Weave. Weave com a cor do foreground e Gap com a cor do background.
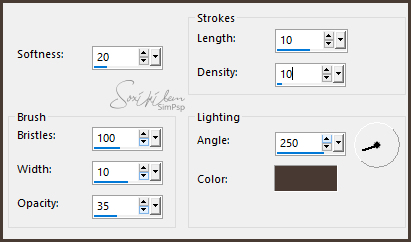
9 - Ativar e abrir a visibilidade da layer Copy of Raster2. Layers > Duplicate. Fechar a visibilidade da layer Copy (2) of Raster 2. Com a Copy of Raster 2 ativa aplicar: Effects > Art Media Effects > Brush Strokes. Em color usar a cor do foreground.
Layers > Properties > General: Blend Mode: Hard Light ou outro à sua escolha Opacity: para 80%.
10 - Layers > New Raster Layer. Selections > Select All. Edit > Copy no misted Flor. Edit > Paste Into Selection. Selections > Select None.
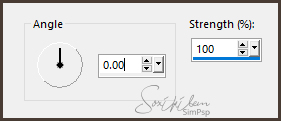
11 - Adjust > Blur > Motion blur.
Edit > Repeat Motion Blur. Effects > Edge Effects > Enhance.
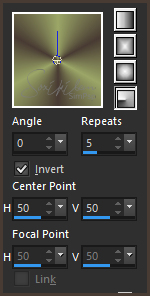
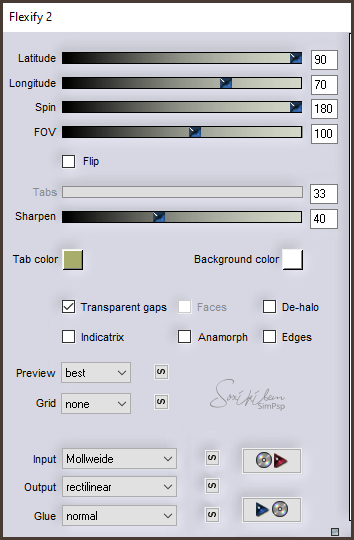
12 - Ativar e abrir a visibilidade da layer Copy (2) of Raster 2. Effects > Geometric Effects > Circle: Transparent. Image > Resize em 80%, all layers desmarcado. Effects > Plugin Flaming Pear > Flexify 2.
13 - Layers > Duplicate. Image > Mirror > Mirror Horizontal. Image > Mirror > Mirro Vertical. Layers > Merge > Merge down.
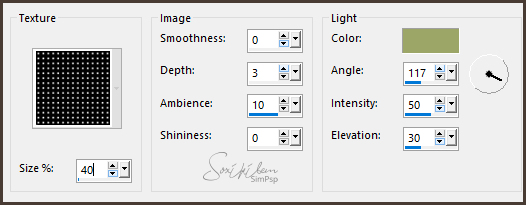
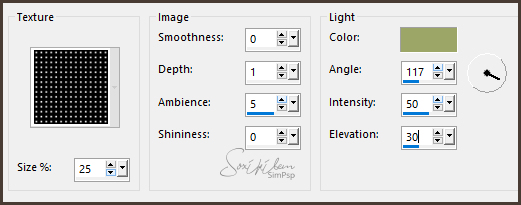
14 - Effects > Texture Effects > Texture. Usei a Texture Grid. Em light color a cor do background.
Layers > Properties > General > Blend Mode: Overlay ou como preferir.
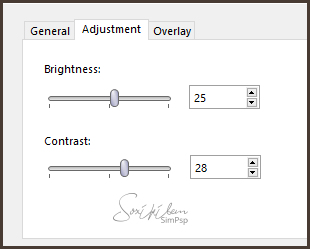
15 - Layers > New Adjustment Layer > Brightness/Contrast.
Na Aba General Mude o blend Mode para Burn ou outra que preferir. Em Opacity diminua para 50%. No segundo exemplo usei o Blend Mode > Hue (L).
16 - Layers > Merge > Merge All. Selections > Select All. Selections > Modify > Contract: 40. Selections > Invert. Adjust > Blur > Gaussian Blur: 30.
17 - Plugin Greg's Factory Output Vol II > Pool Shadow: Default.
18 - Effects > Texture Effects > Texture.
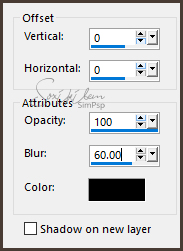
19 - Selections > Invert. Effects > 3D Effects > Drop Shadow.
Selections > Select None.
20 - Edit > Copy no Misted Flor. Edit > Paste a New Layer no trabalho. Posicione como preferir.
21 - Edit > Copy to tube principal. Edit > Paste a New Layer no trabalho. Posicione. Effects > 3D Effects > Drop Shadow como preferir.
22 - Edit > Copy no titulo_terezinha. Edit > Paste a New Layer no trabalho. Posicione. Effects > 3D Effects > Drop Shadow como preferir.
23 - Finalize com uma borda de 1px preta.
24 - Se você desejar, redimensione seu trabalho. Aplicar sua marca d'água ou assinatura. File > Export > JPEG Optimizer.
CREDITOS Versao 1 & 2: Tube by L&B - Misted Flowers by Animabelle Tutorial by Soxikibem'19
Sinta-se à vontade para enviar suas versões. Terei todo o prazer em publicá-las em nosso site.
|