|
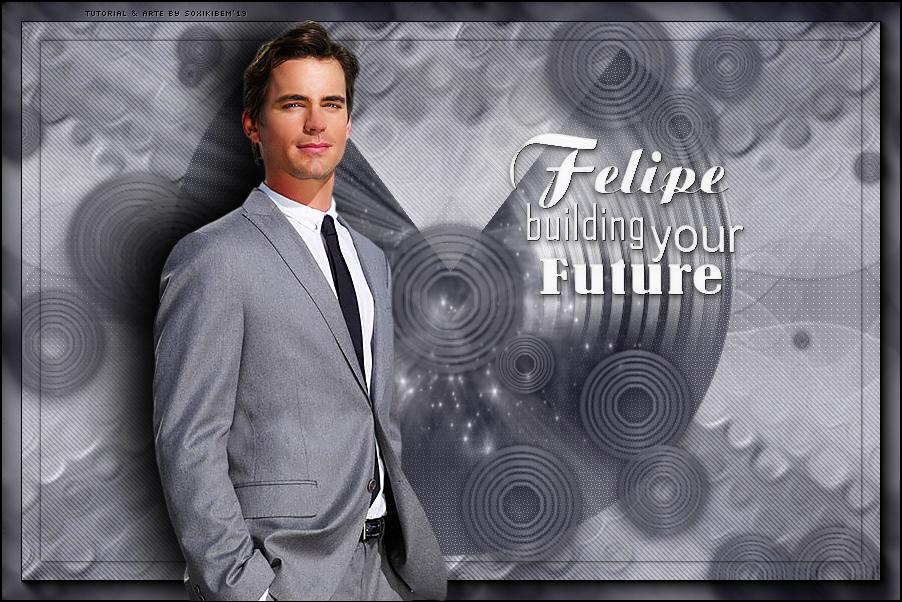
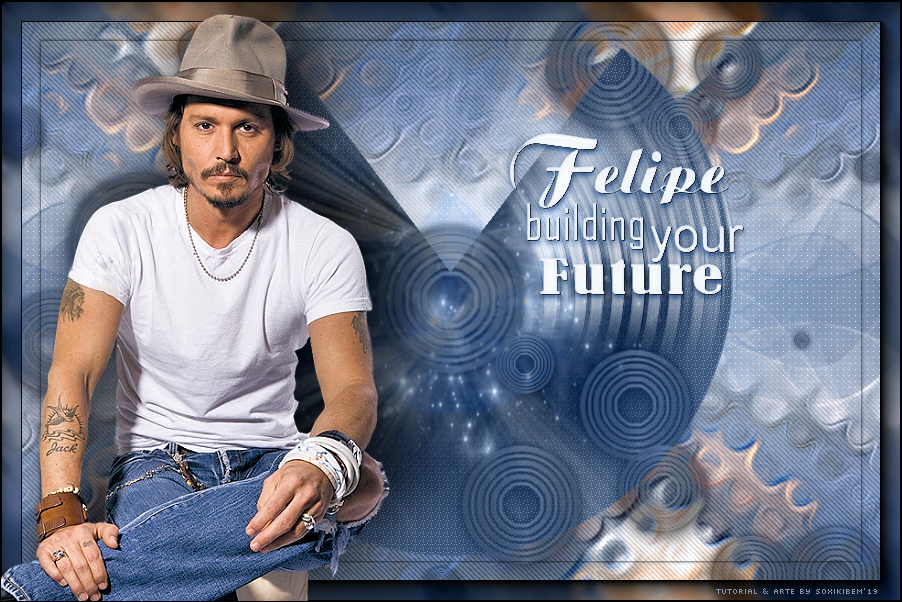
Tutorial dedicado ao meu genro Felipe.
TRADUÇÕES:
Obrigada aos nossos tradutores!
MATERIAL 1 Tube Principal à sua escolha 1 Misted Paisagem à sua escolha circle_bysoxikibem design_bysoxikibem titulo95_felipe Narah_Mask_1221.jpg Narah_Mask_1201
PLUGINS AAA Frames Carolaine and Sensibility VM Distortion Unlimited 2.0
EXECUÇÃO
1 - Abrir o material no PSP, duplique e feche o original. Escolher duas cores para trabalhar. Foreground #908e9c Background #565664
2 - Abra uma imagem transparente de 900x600px. Pintar com a cor do background. Selections > Select All. Edit > Copy no Tube. Edit > Paste Into Selection. Selections > Select None.
3 - Effects > Image Effects > Samless Tiling: Default.
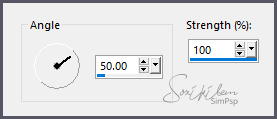
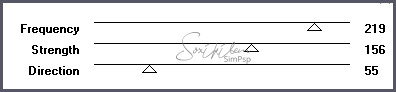
4 - Adjust > Blur > Motion Blur.
Edit > Repeat Motion Blur. Edit > Repeat Motion Blur.
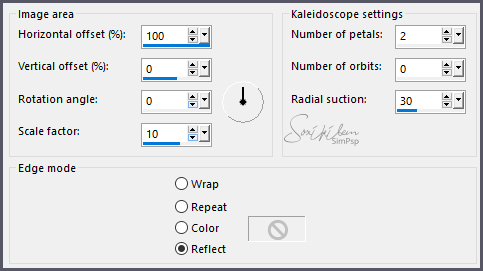
5 - Effects > Reflections Effects > Kaleidoscope.
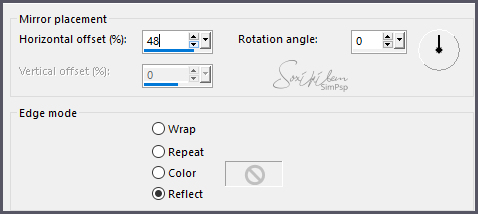
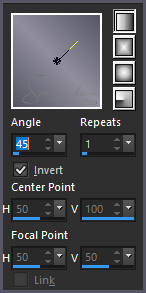
6 - Effects > Reflections Effects > Rotating Mirror.
Edit > Repeat Rotating Mirror.
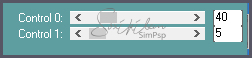
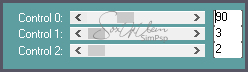
7 - Effects > Plugin VM Distortion > Smallpox.
8 - Effects > Plugin Carolaine and Sensibility > CS-DLines.
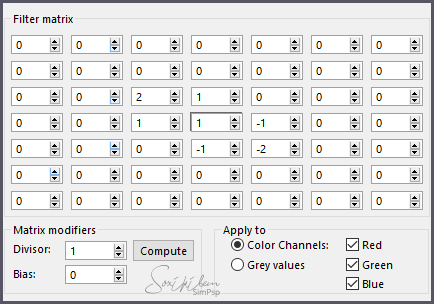
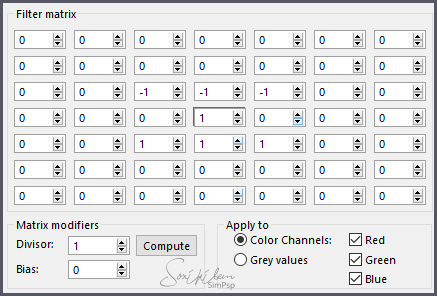
9 - Effects > User Defined Filter: Emboss_5.
10 - Layers > New Raster Layer. Pintar com um Gradiente Linear.
11 - Layers > New mask Layer > From Image: Narah_Mask_1221 Layers > Merge > Merge Group. Layers > Duplicate. Layers > Merge > Merge Down. Layers > Duplicate. Image > Flip > Flip Horizontal. Image > Flip > Flip Vertical. Layers > Merge > Merge Down.
12 - Effects > Filters Unlimited 2.0 > Bkg Designer sf10 I > 4 Way Average.
13 - Effects > User Defined Filter: point of view.
14 - Effects > Plugin Carolaine and Sensibility > CS-LDots.
15 - Edit > Copy no design_bysoxikibem. Edit > Paste a New Layer. Colorize para combinar com as cores que esta usando. Selections > Select All. Selections > Float. Selections > Defloat.
16 - Layers > New Raster Layer. Edit > Copy no Misted Paisagem. Edit > Paste Into Selection. Selections > Select None. Layers > Properties > General > Blend Mode: Luminence (L).
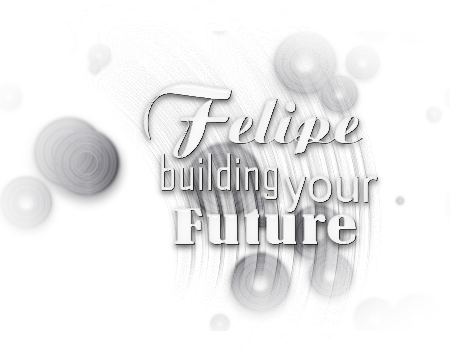
17 - Layers > New Raster Layer. Pintar esta layer com a cor branca Layer > New Mask Layer > From Image: Narah_Mask_1201 Layers > Merge > Merge Group.
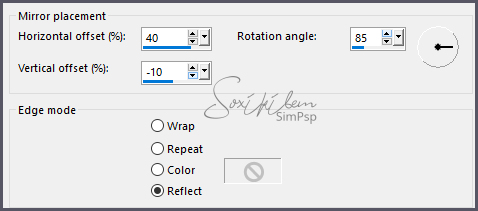
18 - Effects > Reflection Effects > Rotating Mirror.
19 - Layers > Duplicate. Layers > Merge > Merge Down. Layers > Properties > General > Opacity: 50%.
20 - Edit > Copy no circle_bysoxikibem. Edit > Paste a New layer. Colorize para que combine com as cores que esta usando. Layers > Properties > General > Blend Mode: Luminense (Legacy) / Opacity: 80%.
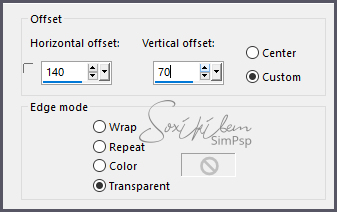
21 - Edit > Copy no titulo95_felipe. Edit > Paste a New Imagem. Effects > Image Effects > Offset.
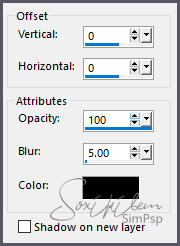
22 - Layers > Merge > Merge All. Selections > Select All. Selections > Modify > Contract: 40. Effects > 3D Effects > Drop Shadow.
Selections > Invert.
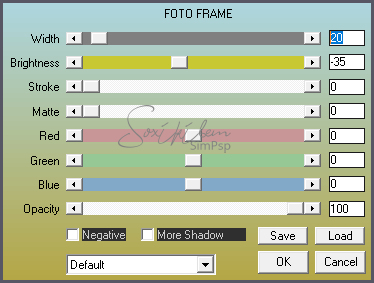
23 - Effects > Plugin AAA Frames > Foto Frame.
Selections > Select None.
24 - Edit > Copy no Tube principal. Edit > Paste a new Layer. Posicione como preferir. Effects > 3D Effects > Drop Shadow: à sua escolha. Image > Add Borders: 1px cor preta.
25 - Se você desejar redimensiona seu trabalho. Aplicar sua marca d'água ou assinatura. File > Export > JPEG Optimizer.
CREDITOS: Versão 1: Tube by Kad - Misted by Alenza - Mask by Narah - Versão 2: Tube by Isa Tutorial by Soxikibem'19
Sinta-se à vontade para enviar suas versões. Terei todo o prazer em publicá-las em nosso site.
|