|
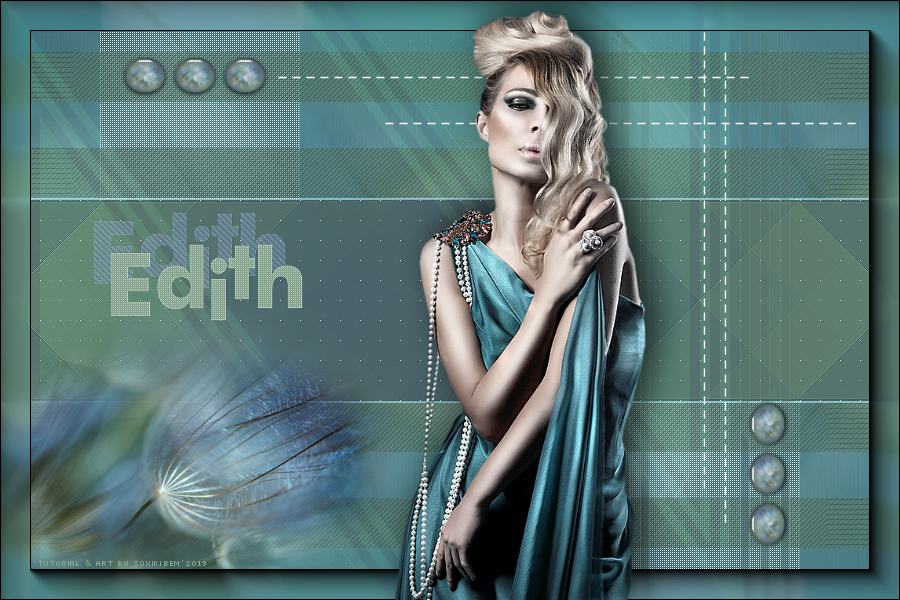
Tutorial dedicado a nossa amada Edith, Owner do AOG. Uma pessoa encantadora de um sorriso largo e espontâneo.
TRADUÇÕES: Obrigada aos nossos tradutores!
MATERIAL 1 Tube principal à sua escolha. 1 Misted Paisagem à sua escolha. alpha_channel_85edith titulo_85edith
Pluguins Carolaine and Sensibility Italian Editors Effect Unlimited 2.0 AAA Frames Penta.com AP Lines Mehdi
Execução
1 - Abrir o material no PSP, duplique e feche o original. Escolher duas cores para trabalhar. Foreground #687f9d Background #8ca693
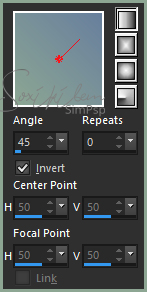
2 - Abra o alpha_channel_85edith. Pinte com um gradiente Linear com as cores escolhidas.
3 - Selections > Select All. Edit > Copy no Misted Paisagem a sua escolha. Edit > Paste Into Selection. Selections > Select None.
4 - Adjust > Blur > Radial Blur.
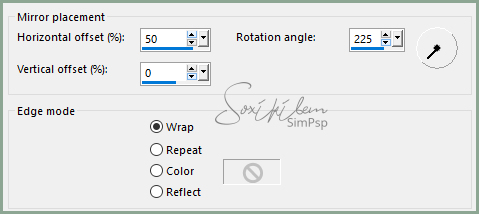
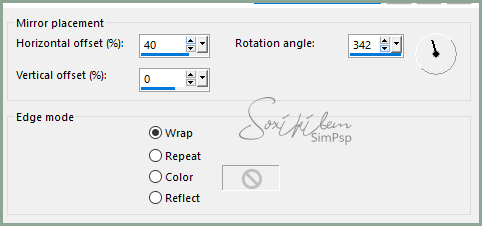
5 - Effects > Reflection Effects > Rotating Mirror.
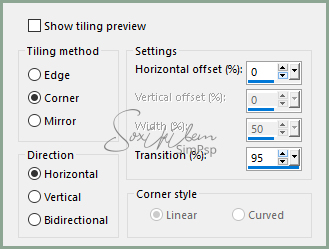
6 - Effects > Image Effects > Seamless Tiling.
7 - Effects > Edge Effects > Enhance.
8 - Layers > Duplicate. Image > Flip > Flip Vertical. Layers > Properties > General > Blend Mode: Overlay. Layers > Merge > Merge Down.
9 - Selections > Load / Save Selection > Load Selection From Alpha Channel: Selection #1. Selections > Promote Selection to Layer. Selections > Select None.
10 - Effects > Plugin Carolaine and Sensibility > CS-LDots.
Adjust > Sharpness > Sharpen.
11 - Layers > New Raster Layer. Selections > Load / Save Selection > Load Selection From Alpha Channel: Selection #2. Pintar estas duas seleções com a cor do background. Selections > Select None. Effects > Plugin AP Lines > Silver Lining.
12 - Effects > Plugin Italian Editors Effect > Effetto Fantasma.
13 - Layers > New Raster Layer. Selections > Load / Save Selection > Load Selection From Alpha Channel: Selection #3. Pinte esta seleção com o gradiente em uso. Selections > Select None.
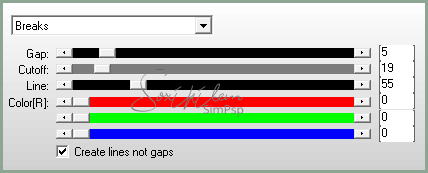
14 - Effects > Plugin Mehdi > Sorting Tiles.
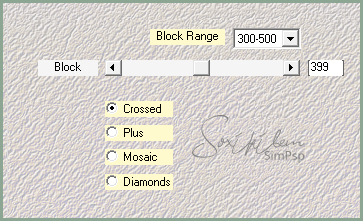
15 - Effects > Filters Unlimited 2.0 > Bkg Designer sf10 I > 4 Way Average.
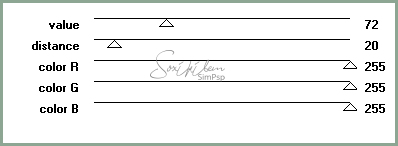
16 - Effects > Edge Effects > Enhance. Plugin > penta.com > color dot: 72, 20, 255, 255, 255.
Adjust > Sharpness > Sharpen.
17 - Layers > New Raster Layer. Selections > Load / Save Selection > Load Selection From Alpha Channel: Selection #4. Pinte estas seleções com a cor do foreground. Selections > Select None.
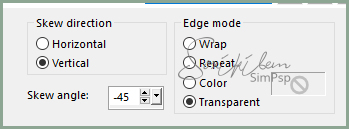
18 - Effects > Geometric Effects > Skew.
Effects > Edge Effects: Enhance. Effects > Plugin Italian Editors Effect > Effetto Fantasma.
19 - Layers > New Raster Layer. Selections > Load / Save Selection > Load Selection From Alpha Channel: Selection #5. Pinte estas seleções com a cor do background. Selections > Select None.
20 - Effects > Reflections Effects > Rotating Mirror.
21 - Layers > Duplicate. Image > Mirror > Mirror Horizontal. Image > Flip > Flip Vertical. Objects > Align > Left. Layers Merge > Merge Down. Layers > Properties > General > Blend Mode: Soft Light.
22 - Layers > New Raster Layer. Selections > Load / Save Selection > Load Selection From Alpha Channel: Selection #6. Pinte estas seleções com a cor do background. Pluguin > penta.com > color dot.
Adjust > Sharpness > Sharpen. Selections > Select None. Layers > Properties > General > Blend Mode: Soft Light ou Hard Light.
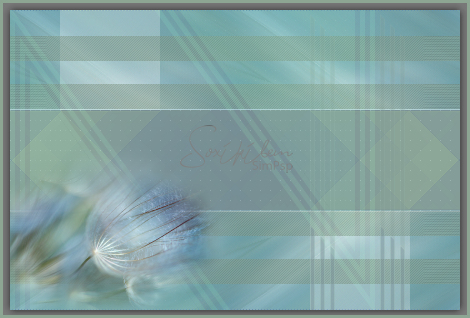
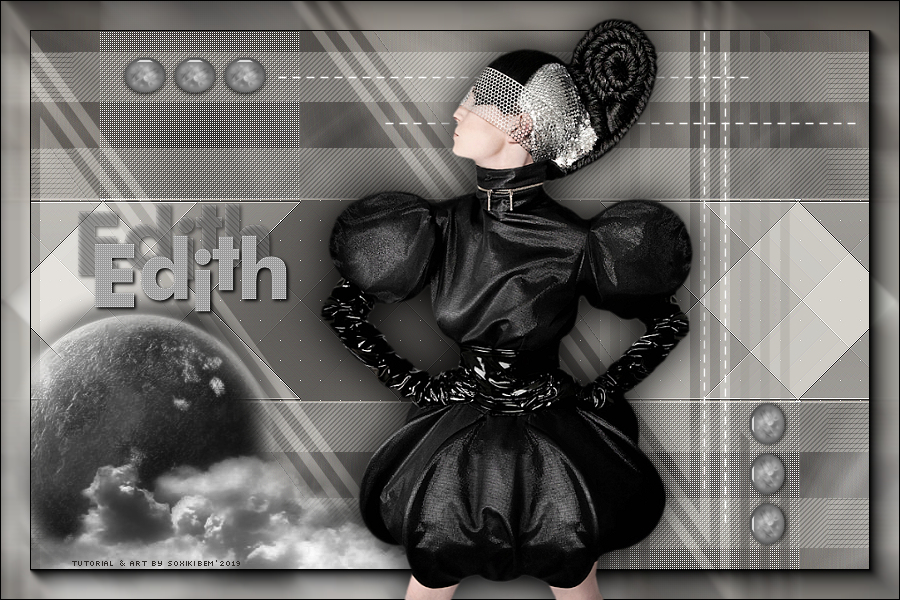
23 - Edit > Copy no Misted escolhido. Edti > paste a new layer. Posicione como mostra o print abaixo.
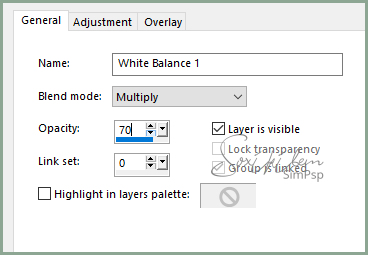
24 - Layers > New Adjustment Layer > White Balance. Mudando apenas na Aba General.
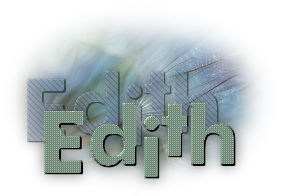
25 - Edit > Copy no titulo_85edith. Edit > Paste a new layer Posicione à esquerda. Effects > 3D Effect > Drop Shadow se desejar e a gosto.
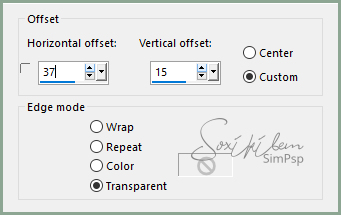
26 - Edti > Copy no detalhes_85edith. Edit > Paste a new Layer. Effects > Image Effects > Offset.
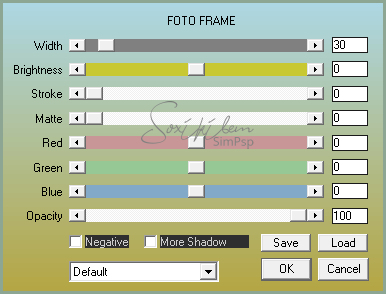
27 - Layers > Merge > Merge Visible. Effects > Plugin AAA Frames > Foto Frame.
28 - Edit > Copy no Tube principal. Edit > Paste a New layer. Posicione e aplique drop shadow como preferir. Finalize com uma borda de 1px preta.
29 - Se você desejar redimensione seu trabalho. Aplicar sua marca d'água ou assinatura. File > Export > JPEG Optimizer.
CREDITOS: Versão 1 & 2: Tube, by Isa - Miste by Moi-Meme
Tutorial by Soxikibem'19
Sinta-se à vontade para enviar suas versões. Terei todo o prazer em publicá-las em nosso site.
|
