|
English Translation by Soxikibem Original Tutorial
MATERIAL 1 tube of your choice. 1 Tube decorative of your chooice. grafico79_soxikibem, alenza_tube_496, alenza_tube_569, titulo_puzzles_of_the_universe_bysoxikibem
PLUGINS AAA Frames, Carolaine and Sensibility, Filters Factory Gallery M, Italian Editors Effects, Mehid, Mura's Meister, Filters Unlimited 2.0
EXECUTION:
1 - Open your material, duplicate and close the original. Choose two colors to work with. Here I used the color #3d4170 in the foreground and #ebdfb5 in the background.
2 - Open the grafico79_soxikibem. Paint with a gradient formed by the colors chosen.
3 - Effects > Plugin Mehdi > Sorting Tiles: 300-500, 450, Crossed.
4 - Effects > Filters Unlimited 2.0 > Bkg Designer sf10 I > Corner Right Wrap.
5 - Selections > Load/Save Selections > Load Selectio From Alpha Channel: Selection #1.
6 - Selections > Promote Selection to layer. Enable layer Raster 1. Hit the Delete key on the keyboard. Enable layer Promoted Selection. Selections > Select None.
7 - Effects > Plugin Mura's Meister > Perspective Tiling: 80, 0, 0, 20, 0, 0, 100, 255.
8 - Layers > Duplicate. Image > Flip > Flip Vertical. Layers > Arrange > Move Down.
9 - Close visibility of layer Raster 1. Layers > Merge > Merge Visible. Effects > 3D Effects Drop Shadow: 0, 0, 100, 50. Open the visibility of the Raster layer 1.
10 - Layers > New Raster Layer. Paint with Foreground Color. Layers > Arrange > Send To Bottom.
11 - Effects > Plugin Carolaine and Sensibility > CS-LDots: 55, 3, 2. Adjust > Sharpness > Sharpen.
12 - Enable layer Raster 1. Selections > Load/Save Selections > Load Selectio From Alpha Channel: Selection #2. Layers > New Raster Layer.
13 - Edit > Copy no alenza_tube_496 Edit > Paste into selection. Selections > Select None. Layers > Properties > General > Blend mode: Hard Light.
14 - Enable layer Raster 1. Selections > Load/Save Selections > Load Selectio From Alpha Channel: Selection #2. Layers > New Raster Layer. Paints both selections with background color to correct effect error. Selections > Select None.
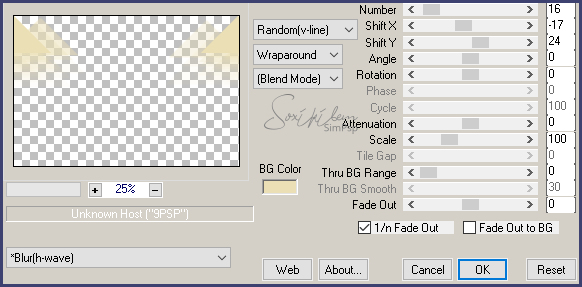
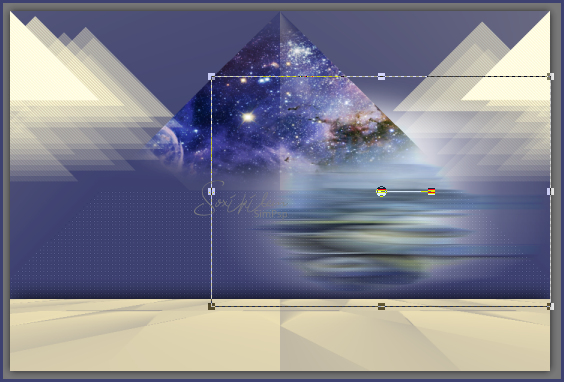
15 - Effects > Plugin Mura's Meister > Copies.
16 - Effects > Plugin Carolaine and Sensibility > CS-DLines: 40, 5. Layers > Properties > General > Blend mode: Hard Light.
17 - Enable layer Raster 1. Edit > Copy in alenza_tube_569. Edit > Paste as new layer. Image > Resize by 70% all layers unchecked.
18 - Layers > Duplicate. Activate the layer below the duplicate. Effects > Distortion Effects > Wind: From Left, 100.
19 - With the Pick Tool, Mode Scale pull sideways to the right as in the print below. (I closed the visibility of the copy just to show what it would look like)
20 - Enable layer copy of raster 5 Adjust > Sharpness > Sharpen.
21 - Enable layer Raster 1. Layers > New Raster Layer. Selections > Load/Save Selections > Load Selectio From Alpha Channel: Selection #4. Paint the selection with the background color. Selections > Select None.
22 - Effects > Plugin Italian Editors Effects > Effetto Fantasma: 35, 70. Layers > Properties > General > Blend mode: Burn - Opacity: 75%
23 - Edit > Copy on alenza_tube_512 Edit > Paste as new layer. Image > Resize em 40% all layers unchecked. Effects > Image Effects > Offset: 290, -75, Custom, Transparent.
24 - Layers > Properties > General > Blend mode: Luminense (L) - Opacity: 85%.
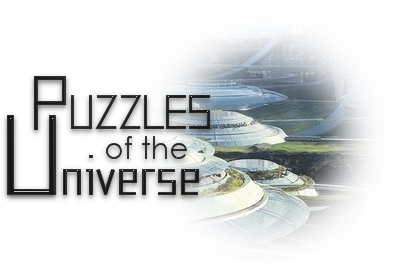
25 - Activate top layer. Layers > New Raster Layer. Paint with the foreground color. Effects > Plugin Filters Factory Gallery M > Ambrosia: 108, 136, 33, 9, 183, 0.
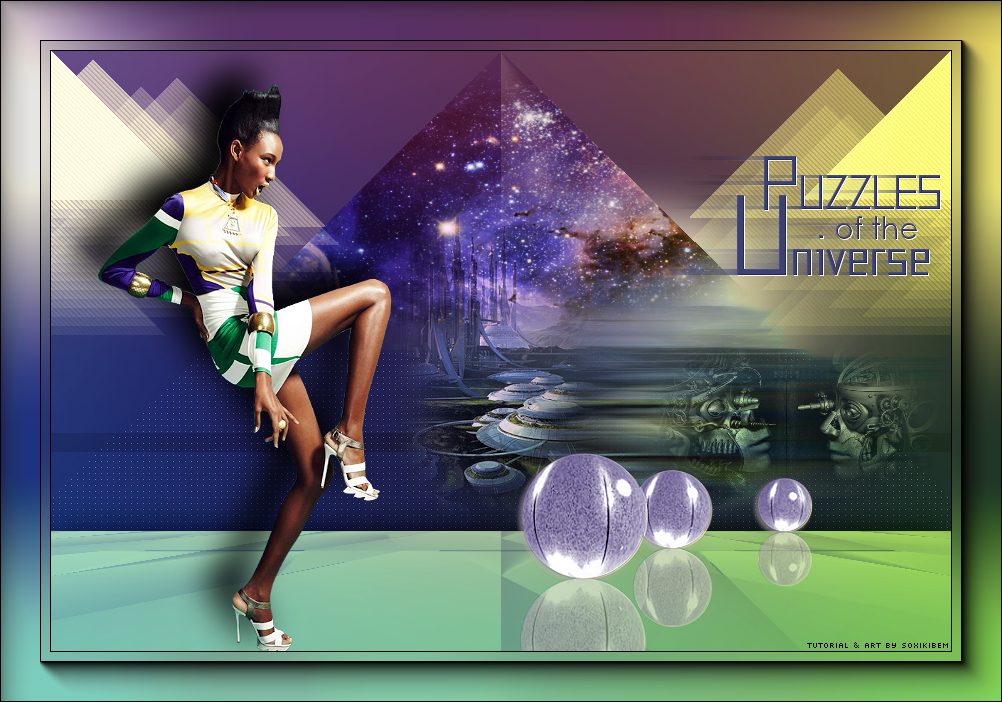
26 - Adjust > Blur > Gaussian Blur: 60. Layers > Properties > General > Blend mode: Hard Light - Opacity: 35%
27 - Layers > New Adjustment Layer > White Balance. In General > Blend Mode: Multiply - Opacity: 50%.
28 - Edit > Copy on the main tube. Edit > Paste as new layer. Position to the left. Effects > 3D Effects > Drop Shadow: of your choice.
29 - Edit > Copy or export to custom png the titulo_puzzles_of_the_universe_bysoxikibem. Apply to your work as you prefer.
30 - Layers > Merge > Merge All. Edit > Copy. Image > Add Borders > 1px - symmetric - color: #000000 Selections > Select All. Image > Add Borders > 50px - symmetric Selections > Invert. Edit > Paste Into Selection.
31 - Adjust > Blur > Gaussian Blur: 60.
32 - Effects > Plugin AAA Frames > Foto Frame: 40, 0, 0, 0, 0, 0, 0, 100. Selections > Select None.
33 - Edit > Copy in the decorative tube. Edit > Paste as new layer. Position. Effects > 3D Effects > Drop Shadow: of your choice.
34 - If you want to resize your work now. Apply your watermark or signature. File > Export > JPEG Optimizer...
CREDITS: Tube & Misteds by Alenza - WordArt by Soxikibem - Tube Decorative kTs-08_049
Tutorial by Soxikibem'19
Feel free to submit your versions. I'll be happy to post them on our site.
|