|
TRADUÇÕES:
Obrigada aos nossos tradutores!
MATERIAL 1 tube principal à sua escolha. 1 Tube decorativo à sua escolha. grafico79_soxikibem, alenza_tube_496, alenza_tube_569, titulo_puzzles_of_the_universe_bysoxikibem
PLUGINS AAA Frames, Carolaine and Sensibility, Filters Factory Gallery M, Italian Editors Effects, Mehid, Mura's Meister, Filters Unlimited 2.0
EXECUÇÃO:
1 - Abra o seu material, duplique e feche o original. Escolha duas cores para trabalhar. Aqui usei a cor #3d4170 para o foreground e a #ebdfb5 para o background.
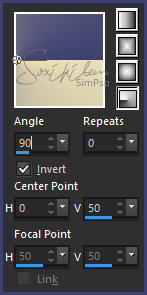
2 - Abra o grafico79_soxikibem. Pintar com um gradiente formado pelas cores escolhidas.
3 - Effects > Plugin Mehdi > Sorting Tiles: 300-500, 450, Crossed.
4 - Effects > Filters Unlimited 2.0 > Bkg Designer sf10 I > Corner Right Wrap.
5 - Selections > Load/Save Selections > Load Selectio From Alpha Channel: Selection #1.
6 - Selections > Promote Selection to layer. Ativar a layer Raster 1. Apertar a tecla Delete do teclado. Ativar a layer Promoted Selection. Selections > Select None.
7 - Effects > Plugin Mura's Meister > Perspective Tiling: 80, 0, 0, 20, 0, 0, 100, 255.
8 - Layers > Duplicate. Image > Flip > Flip Vertical. Layers > Arrange > Move Down.
9 - Fechar a visibilidade da layer Raster 1. Layers > Merge > Merge Visible. Effects > 3D Effects Drop Shadow: 0, 0, 100, 50. Abrir a visibilidade da layer Raster 1.
10 - Layers > New Raster Layer. Pintar com a cor do Foreground. Layers > Arrange > Send To Bottom.
11 - Effects > Plugin Carolaine and Sensibility > CS-LDots: 55, 3, 2. Adjust > Sharpness > Sharpen.
12 - Ativar a layer Raster 1. Selections > Load/Save Selections > Load Selectio From Alpha Channel: Selection #2. Layers > New Raster Layer.
13 - Edit > Copy no alenza_tube_496 Edit > Paste into selection. Selections > Select None. Layers > Properties > General > Blend mode: Hard Light.
14 - Ativar a layer Raster 1. Selections > Load/Save Selections > Load Selectio From Alpha Channel: Selection #2. Layers > New Raster Layer. Pinta as duas seleções com a cor do background para corrigir erro de efeito. Selections > Select None.
15 - Effects > Plugin Mura's Meister > Copies.
16 - Effects > Plugin Carolaine and Sensibility > CS-DLines: 40, 5. Layers > Properties > General > Blend mode: Hard Light.
17 - Ativar a layer Raster 1. Edit > Copy no alenza_tube_569. Edit > Paste as new layer. Image > Resize em 70% ao layers desmarcado.
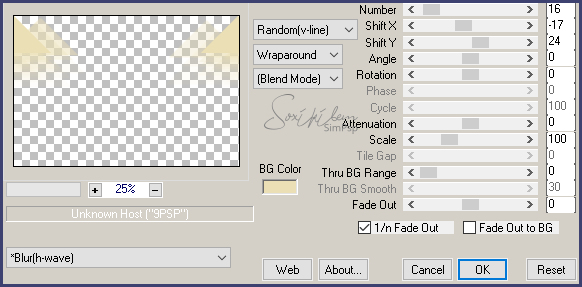
18 - Layers > Duplicate. Ative a layer abaixo da duplicada. Effects > Distortion Effects > Wind: From Left, 100.
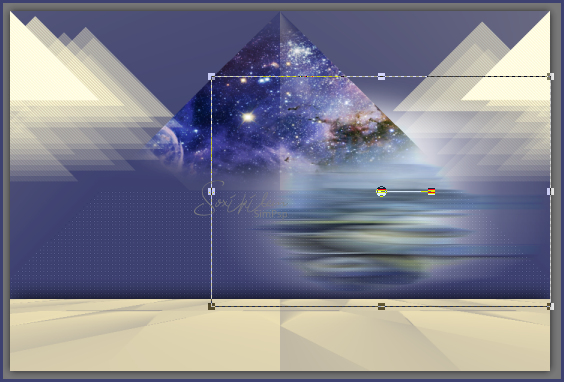
19 - Com a Ferramenta Pick Tool, Mode Scale puxe na lateral para a direita como no print abaixo. (Fechei a visibilidade da cópia apenas para mostrar como ficaria)
20 - Ativar a layer copy of raster 5 Adjust > Sharpness > Sharpen.
21 - Ative a layer Raster 1. Layers > New Raster Layer. Selections > Load/Save Selections > Load Selectio From Alpha Channel: Selection #4. Pintar a seleção com a cor do background. Selections > Select None.
22 - Effects > Plugin Italian Editors Effects > Effetto Fantasma: 35, 70. Layers > Properties > General > Blend mode: Burn - Opacity: 75%
23 - Edit > Copy no alenza_tube_512 Edit > Paste as new layer. Image > Resize em 40% all layers desmarcado. Effects > Image Effects > Offset: 290, -75, Custom, Transparent.
24 - Layers > Properties > General > Blend mode: Luminense (L) - Opacity: 85%.
25 - Ative a layer que está no topo. Layers > New Raster Layer. Pintar com a cor do foreground. Effects > Plugin Filters Factory Gallery M > Ambrosia: 108, 136, 33, 9, 183, 0.
26 - Adjust > Blur > Gaussian Blur: 60. Layers > Properties > General > Blend mode: Hard Light - Opacity: 35%
27 - Layers > New Adjustment Layer > White Balance. Em General > Blend Mode: Multiply - Opacity: 50%.
28 - Edit > Copy no tube principal. Edit > Paste as new layer. Posicione à esquerda. Effects > 3D Effects > Drop Shadow: a sua escolha.
29 - Edit > Copy ou exporte em custom png o titulo_puzzles_of_the_universe_bysoxikibem. Aplique no seu trabalho como preferir.
30 - Layers > Merge > Merge All. Edit > Copy. Image > Add Borders > 1px - symmetric - color: #000000 Selections > Select All. Image > Add Borders > 50px - symmetric Selections > Invert. Edit > Paste Into Selection.
31 - Adjust > Blur > Gaussian Blur: 60.
32 - Effects > Plugin AAA Frames > Foto Frame: 40, 0, 0, 0, 0, 0, 0, 100. Selections > Select None.
33 - Edit > Copy no tube decorativo. Edit > Paste as new layer. Posicione. Effects > 3D Effects > Drop Shadow: a sua escolha.
34 - Se você desejar redimensione seu trabalho. Aplicar sua marca d'água ou assinatura. File > Export > JPEG Optimizer...
CREDITOS: Tube e Misteds by Alenza - WordArt by Soxikibem - Tube Decorativo kTs-08_049
Tutorial by Soxikibem'19
Sinta-se à vontade para enviar suas versões. Terei todo o prazer em publicá-las em nosso site.
|