|

Tutorial by
Roberta Maver
English Translation by Moderation SIM-PSP
Original Tutorial
MATERIAL
1 Main Tube of your choice
1
Misted Landscape
of your choice
1 Decorative Tube
of your choice
Deco01_Roberta and
Deco_02_Roberta
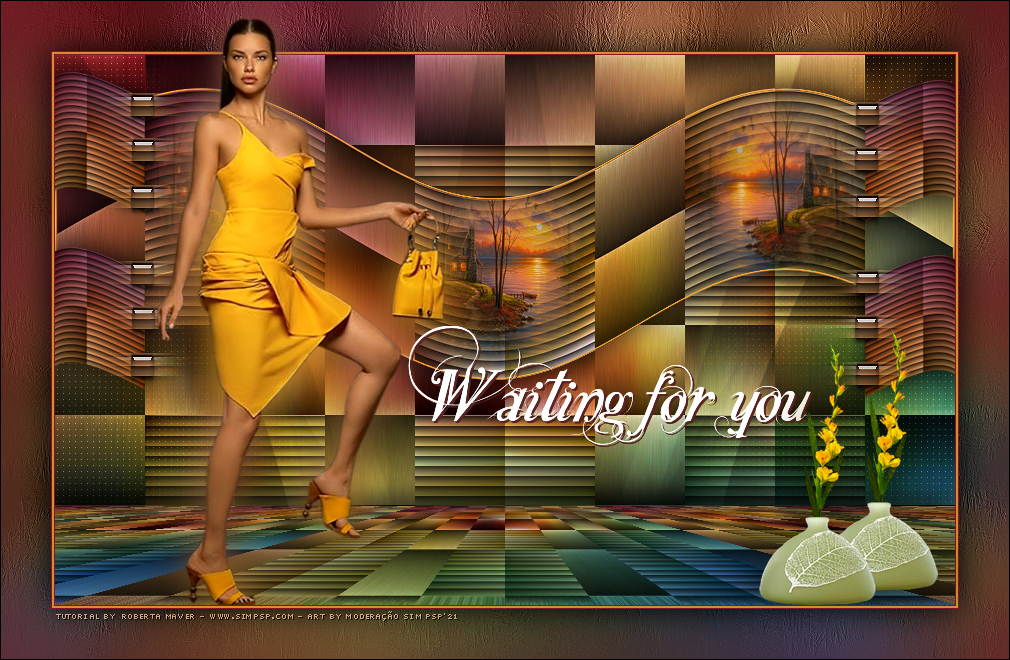
Titulo_Waitingforyou_Roberta
PLUGINS
Carolaine & Sensibility
Plugin Mehdi
Plugins Toadies
MuRa's Filters Meister
ROTEIRO
1 - Open the material on the PSP, duplicate and close the
original.
Choose Two colors to work with:
Foreground #7c1727
Background #d88b2f
2 - Open the Alpha_waitingforyou_byRoberta file.
Selections > Select All.
Edit > Copy Fundo_By Roberta
Edit > Paste Into Selection.
Selections > Select None.
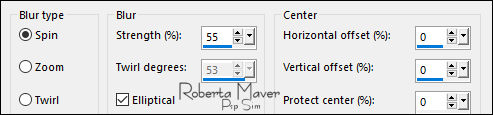
3 - Adjust > Blur > Radial Blur:
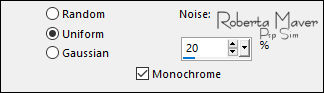
4 - Adjust > Add/Remove Noise > Add Noise: Uniform
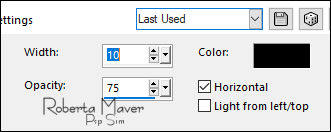
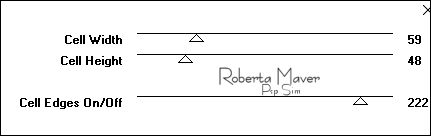
5 - Effects > Texture Effects > Blinds:
Color: #000000
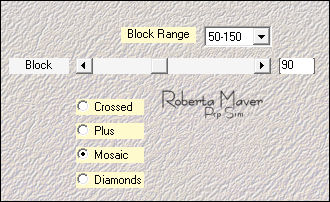
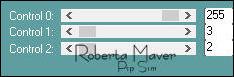
6 - Effects > Plugins > Mehdi > Sorting Tiles:
7 - Selections > Load/Save Selection > Load Selection From Alpha
Channel: Selection #1
Selections > Promote Selection to Layer.
Selections > Select None.
Fechar a visibilidade da layer Promote Selection.
Active layer Raster 1.
8 - Selections > Load/Save Selection > Load Selection From Alpha
Channel: Selection #2
Selections > Promote Selection to Layer.
Selections > Select None.
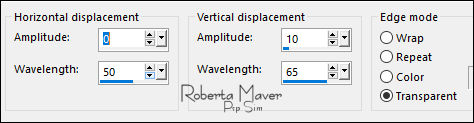
9 - Effects > Distortion Effects > Wave:
10 - Selections > Load/Save Selection > Load Selection From Alpha
Channel: Selection #3
Layers > New Raster Layer.
Edit > Copy the Misted Landscape.
Edit > paste into selection.
Selections > Select None.
11 - Layers > Duplicate.
Image > Mirror > Mirror Horizontal.
Layers > Merge > Merge Down.
Continue with the Raster 2 layer activated.
12 - Selections > Load/Save Selection > Load Selection From Alpha
Channel: Selection #4
Edit > Copy the Misted Landscape.
Edit > paste into selection.
Selections > Select None.
Adjust > Sharpness > Sharpen.
Activate the Promoted Selection 1 layer (Wave effect)
13 - Selections > Select All.
Selections > Float.
Selections > Defloat.
14- Layers > New Raster Layer.
Layer > Arrange > Move UP.
Selections > Modify > Contract: Select Selection Borders:
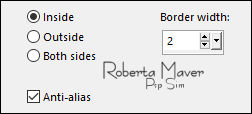
Paint this selection with the Background color #d88b2f
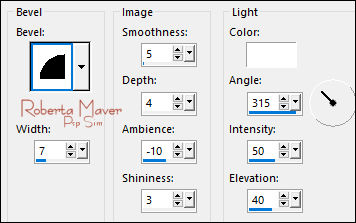
15 - Effects > 3D Effects > Inner Bevel:
Selections > Select None.
Layers > Merge > Merge Down.
Repetir >
Layers > Merge > Merge Down.
Effects > 3D Effects > Drop Shadow: 0, 0, 80, 40, cor preta.
Activate and open layer visibility Promoted Selection.
16 - Effects > Distortion Effects > Wave:
17 - Effects > Geometric Effects > Cylinder - Vertical:
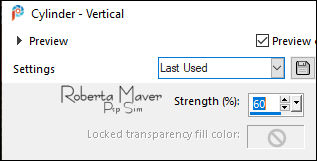
Image > Resize: 80% - all layers unchecked.
Repeat >
Image > Resize: 80% - all layers unchecked.
With the Pick Tool Tool, position: Position X: - 4 Position Y:
17

Layers > Duplicate.
With the Pick Tool Tool, position: Position X: - 4 Position Y:
192

Layers > Merge > Merge Down.
Effects > 3D Effects > Drop Shadow: 0 > 0 > 80 > 40 > Color #000000
18 - Layers > Duplicate.
Image > Mirror > Mirror Horizontal.
With the Pick Tool Tool, position: Position X: 779 Position Y:
8

Active layer Raster 1
19 - Selections > Load/Save Selection > Load Selection From Alpha
Channel: Selection #5
Selections > Promote Selection to Layer.
Selections > Select None.
20 - Effects > Plugins > Toadies > Weaver: Default
Layers > Duplicate.
Image > Mirror > Mirror Horizontal.
Layers > Merge > Merge Down.
Effects > 3D Effects > Drop Shadow: 0, 0, 80, 40, color:
#000000
Layers > Properties > General > Blend Mode: Overlay or Soft Light.
21 - Effects > Plugins > Carolaine & Sensibility > CS-LDots:
22 - Edit > Copy Deco1_byRoberta
Edit > Paste a New Layer.
Layers > Properties > General > Blend Mode: Overlay
Activate layer Raster 1
23 - Layers > Duplicate.
Layers > Arrange > Bring To Top.
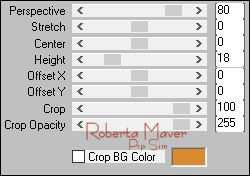
Effects > Plugins > MuRa's Filters Meister > Perspective Tiling:
Effects > 3D Effects > Drop Shadow: 0, 0,100, 40, Color #000000
Edit > Repeat Drop Shadow: 0, 0,100, 40, Color #000000
24 - Edit > Copy Deco2_byRoberta
Edit > Paste as New Layer.
With the Pick Tool Tool, position: Position X: 72 Position Y:
33

Note: If using other colors:
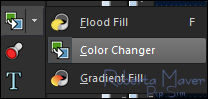
With the Color Changer tool paint the Decor with the Background
color #d88b2f
25 - Layers > Duplicate.
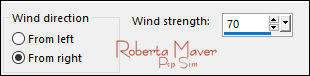
Effects > Distortion Effects > Wind:
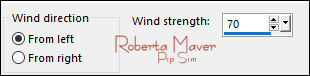
Effects > Distortion Effects > Wind:
Layers > Arrange > Move Down.
26 - Image > Add Borders: Symmetric:
1 px - color: Foreground #7c1727
2 px - color: Background #d88b2f
1 px - color: Foreground #7c1727
Selections > Select All.
Edit> Copy.
Image > Add Broders > Symmetric: 50 px with any
color.
Selections > invert.
Edit > paste into selection.
27 - Adjust > Blur > Gaussian Blur: 35.
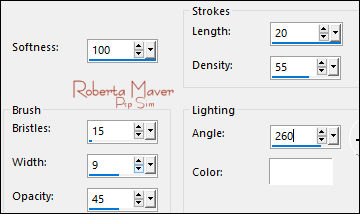
Effects > Art Media Effects > Brush Strokes.
Selections > Invert.
Effects > 3D Effects > Drop Shadow: 0, 0, 100, 50, Color: #000000
Selections > Select None.
28 - Edit > Copy the Main Tube.
Edit > Paste as New Layer.
Image > Resize if necessary.
Position of your choice.
Effects > 3D Effects > Drop Shadow: your choice.
29 - Edit > Copy Titulo_Waitingforyou_byRoberta
Edit > Paste a New Layer.
Position of your choice.
Effects > 3D Effects > Drop Shadow: your choice.
30 - Edit > Copy the Decorative Tube.
Edit > Paste a New Layer.
Image > Resize if necessary.
Position of your choice.
Effects > 3D Effects > Drop Shadow: your choice.
31 - Image > Add Borders > Symmetric: 1px color: Preto
32 - If you wish, resize your work.
Apply your watermark or signature.
File > Export > JPEG Optimizer.
CREDITS:
Tutorial by
Roberta Maver
English Translation by Moderation
SIM-PSP
Main Tube: Tubed by
LB Tube & Mistis
Decorative Tube:
Tubed by Verlaine
Misted Landscape:
abraham hunter53
Feel free to send your versions.
I will be happy to publish them on our website.


|
Tutorial created by RobertaMaver, in
August
/ 2021, for SIM PSP. Translated into English in August / 21, by the Moderation of SIM-PSP. It cannot be
copied, removed from its place, translated
or used in learning lists or groups without
the author's
prior consent. |
|