|
Tutorial By Roberta Maver English Translation by Soxikibem Original Tutorial
MATERIAL 1 Main Tube Principal of your choice 1 Misted Landscape of your choice 1 Decorative tube of your choice Decor_1_thalyssa_by Roberta Decor_2_thalyssa_by Roberta Titulo_Thalyssa_by Roberta Narah_mask_Abstract129
PLUGINS AAA Frames Distortions Filter Todies MuRa's Meister
Tutorial: 1 - Open the material on the PSP, duplicate and close the original. Choose two colors to work with.
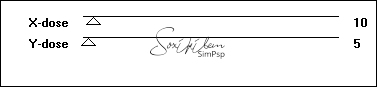
Foreground #584600 Background #c9ac13
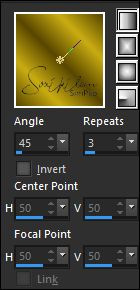
2 - Open a 900 x 600 px transparent image. Paint with a linear gradient formed by the chosen colors.
3 - Adjust > Blur > Gaussian Blur: 25.
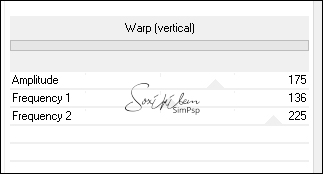
4- Filter Unlimetd 2.0 > Distortions Filter > Warp [vertical].
5 - Effects > Edge Effects > Enhance.
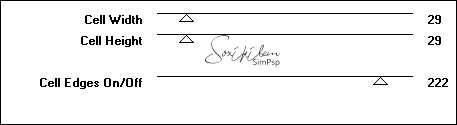
6 - Effects > Plugin > Murra's Meister > Copies.
With the pick tool pull a little to the 4 sides to cover the transparent spaces that were left.
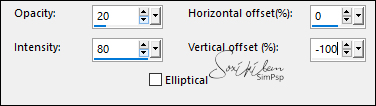
7- Effects > Reflections Effects > Feedback
8 - Effects > Edge Effects > Enhance.
9 - Effects > Distortion Effects > Twirl: 250.
10 -
Edit > Copy
on the misted landscape.
Edit > Paste
As New Layer,
Position it in the center. Rezise if necessary.
Adjust > Sharpness >
Sharpen
11- Layers > Properties > General > Blend Mode: Hard Ligth, Opacity 60%.
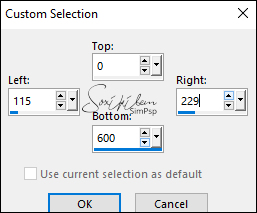
12- Layers > New Raster Layer Selection Tool > Custom Selection:
Paint with
the gradient in use.
13 - Plugin >Toadies >
Weaver.
 Selections > Select None.
14- Effects > 3D Effects > Drop Shadow: 0, 0, 60, 25 Foreground Color.
15- Plugin > Toadies > What Are You?
16- Effects > Edge
Effects > Enhance.
Layers > Duplicate. Image > Mirror > Mirror Horizontal. Layer > Merge > Merge Down. 17- Effects > Geometric
Effects > Spherize.
 Layers >
Duplicate.
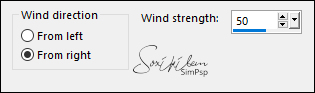
Activate the raster layer 3. 18-
Effects > Distortion Effects >
Wind
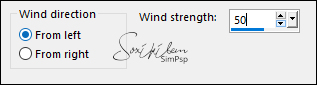
Effects > Distortion Effects >
Wind, changing to from right
 19- Plugin >Toadies > Blast' em!.
 Layers > Duplicate. Layer > Merge > Merge Down. Activate Layer Copy of Raster 3.
20 - Effects > 3D Effects > Drop Shadow: 0, 0, 100, 25, Foreground Color.
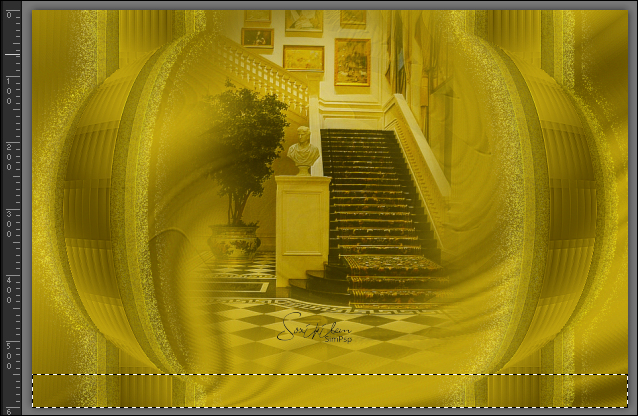
21- Activate Layer Raster 1. With the Selection Tool, select as shown in the print.
Selections > Promote Selection to Layer. Layers > Arrange > Bring to Top
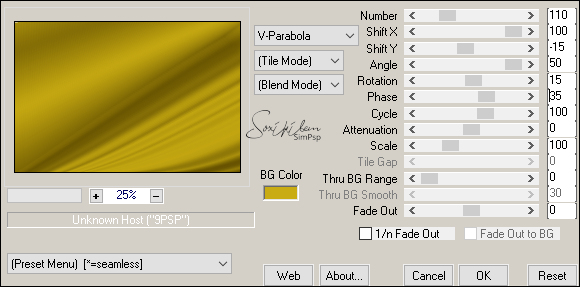
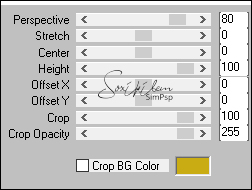
22- Effects > Plugins > Mura's Meister > Perspective Tiling > Default
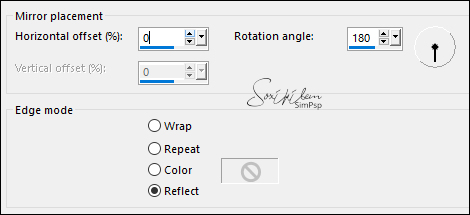
23- Effects > Reflections Effects > Rotating Mirror.
Selections > Select None. With the Magic Wand click on the transparent part with
the Feather set to 15.
24- Effects > 3D Effects > Drop Shadow: 0, 0, 100, 40 Foreground Color.
25- Layers > New Raster Layer Paint the layer with the color #ffffff (white )Layers > New mask layer > From image >Narah_mask_Abstract129 Layers > Merge > Merge Group. Adjust > Sharpness > Sharpen.
26 - Layers > Properties > General > Blend Mode: Overlay
27- Image > Add Borders: 2px foreground color 2 px background color 2px foreground color Edit > Copy...
28- Selections > Select All. Image > Add Borders: 50 px with any color. Selections > Invert. Edit > Paste Into Selection.
28- Adjust > Blur > Gaussian Blur > 25.
30- Effects > Plugin > Toadies > Blast' em!.
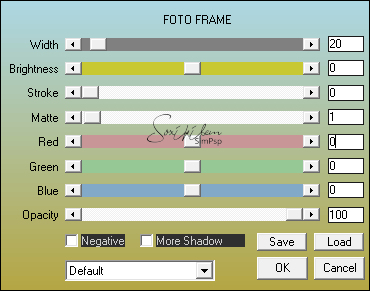
31- Effects > Plugin AAA Frames > Foto Frame.
Selections > Invert. 32- Effects > 3D Effects > Drop Shadow: 0, 0, 100, 40, Black Color Selections > Select None.
33- Edit > Copy on the decor_thalyssa_byRoberta. Edit > Paste a New Layer.
34 - Edit > Copy on the decor_2_thalyssa_byRoberta. Edit > Paste a New Layer. Pick Tooll: Position X 80, Position Y 225
35- Edit> Copy on Decorative Tube. Edit > Paste a New Layer. Position to the left. Adjust > Sharpness > Sharpen. Effects > 3D Effect > Drop Shadow of your choice.
36- Edit > Copy on the titulo_thalyssa_byRoberta. Edit > Paste a New Layer. Position to the right as you prefer.
37- Edit > Copy on the main tube. Edit > Paste a New Layer. Adjust > Sharpness > Sharpen. Position to your choice. Effects > 3D Effect > Drop Shadow as you prefer.
38- Image > Add Borders: 2px Foreground color
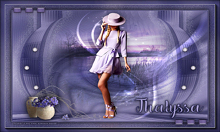
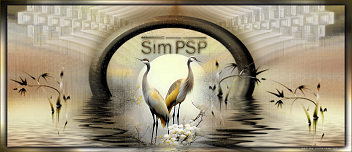
39- If desired, resize your work. Apply your watermark or signature. File> Export> JPEG Optimizer. 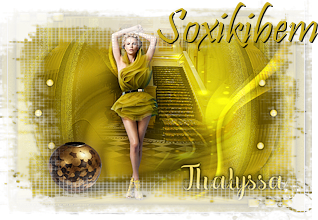 CREDITS
Tutorial by Roberta
Maver
Tube by Occhi Blu
Grafica - Landscape by Luz Cristina - Tube Decorative by Nena Silva -
Narah_mask_Abstract129 - Remaining material provided
by Roberta Maver
Feel free to send your versions. I will be happy to publish them on our website.
|