|
 Material
Main Tube of your choice
Misted Landscape of your choice
Decorative tube of your choice.
Texture MyDream (save
to the PSP Textures folder)
Tutorial Title
 Plugins
Brush Strokes >
Crosshatch
FM Tile Tools >
Saturation Emboss
Filter Factory
Gallery "A" > Mirror, Mirror
Mura's Seamless >
Shift at Zigzag
Flaming Pear >
Flood
AAA Frames > Frame
Works
Alien Skin Eye Candy
5 - Impact > Perspective Shadow
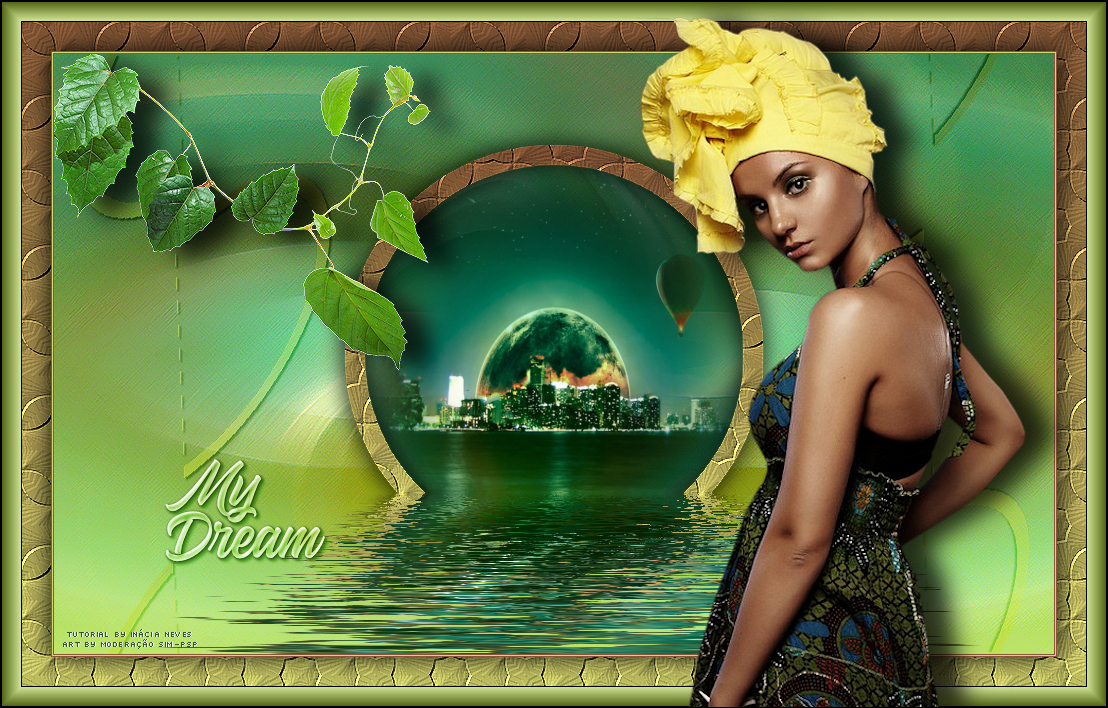
Effects of PSP 2020 TUTORIAL
1- Choose 2
colors that are not predominant in the tube
I chose the colors Foreground:
#d7d96f
Background:
#895737
Form a gradient Style Linear > Angle 0 > Repeats 0
2- Open a transparent image of 1000 x 600 px
Paint with the gradient.
3- Layer > New
Raster Layer
Selections >
Select All
Edit > Copy in the misted landscape Edit > Paste > Into Selection Selections > Select None
4- Effects > Image
Effects > Seamless Tiling > Default
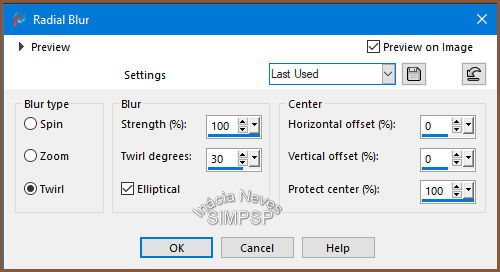
Adjust > Blur >
Radial Blur
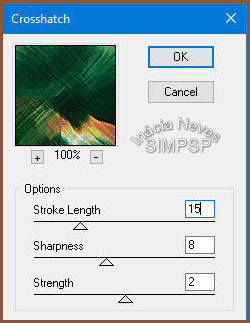
 Effects > Plugin
> Brush Strokes > Crosshatch
 5- Layers >
Duplicate
Activate
layer Raster
2
Effects > FM Tile
Tools > Saturation Emboss
Layers >
Properties > General > Blend Mode: Overlay or of your choice
6-
Activate
layer
Copy of Raster 2 (top layer)
Layers >
Duplicate
Close visibility of layer Copy (2) of Raster 2
Activate
layer Copy
of Raster 2
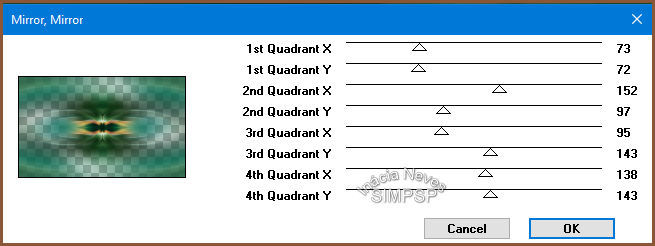
Effects > Plugin
> Filter Factory Gallery "A" > Mirror, Mirror
 Layers >
Properties > General > Blend Mode: Screen or of your choice
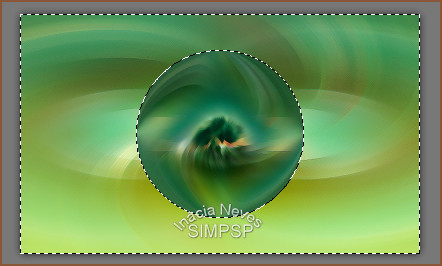
7- Open
visibility and activate the layer Copy (2) of Raster 2
Effects >
Geometric Effects > Circle > Transparent marked
Image >
Resize > 70% > All Layers unchecked
8- With the
Magic Wand tool, configured as below, select the outside of the circle:
  Selections >
Invert
Edit > Copy in the misted landscape Edit > Paste > Into Selection Selections >
Modify > Select Selection Borders
 Layers > New
Raster Layer
Paint with the gradient.
9- Layers >
Duplicate
Activate
layer Copy
of Raster 3 (top layer)
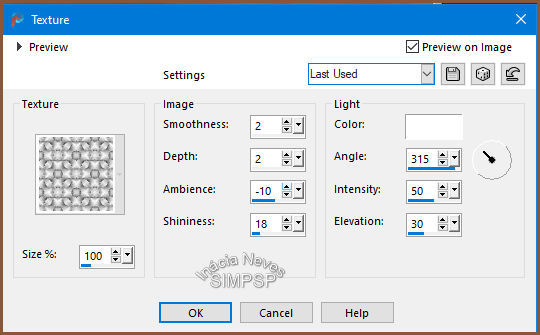
Effects > Texture
Effects > Texture, using the texture > mydreams
 Effects > 3D
Effects > Drop Shadow
 Adjust > Sharpness
> Sharpen
Selections >
Select None
10-
Activate
layer
Raster 3
Image > Resize
> 60% > All Layers unchecked
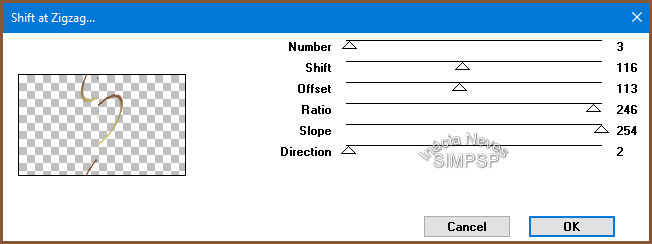
Effects > Plugin
Mura's Seamless > Shift at Zigzag
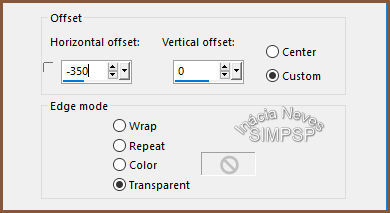
 Effects > Image
Effects > Offset
 Adjust > Sharpness
> Sharpen
Layers >
Properties > General > Blend Mode: Soft Light or of your choice.
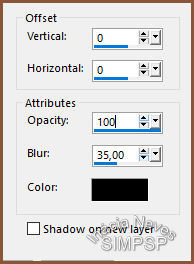
Effects > 3D >
Drop Shadow > 2/2/100/2 Color #000000
11- Layers >
Duplicate
Image > Mirror
> Mirror Horizontal
Image > Flip >
Flip Vertical
12-
Activate
layer Copy (2) of Raster 2 (Landscape layer)
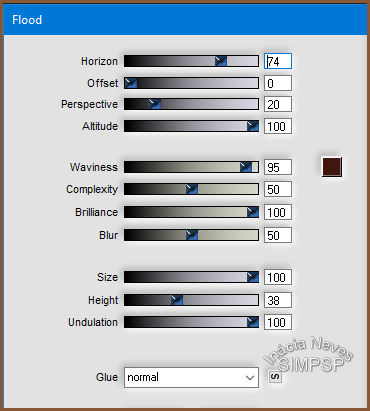
Effects > Plugin
Flaming Pear > Flood
 13-
Activate
layer
Copy of Raster 3 (top layer)
Repeat the Flaming
Pear > Flood Plugin in the same settings as in step 12
14- Edit >
Copy in the decorative tube.
Edit > Paste as New
Layer.
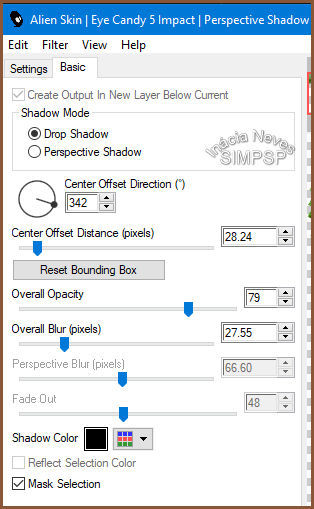
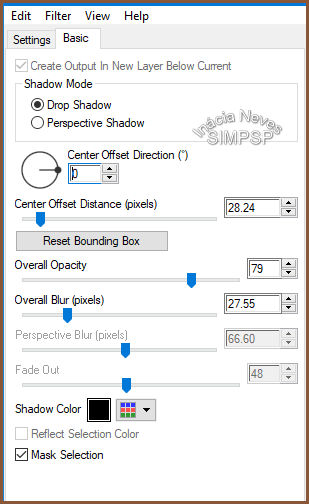
Resize the tube to your liking. Effects > Plugin
> Alien Skin Eye Candy 5 - Impact > Perspective Shadow
 Adjust > Sharpness
> Sharpen
15- Edit > Copy in titulo my dream. Edit > Paste as New Layer. Position to your choice. Effects > 3D Effects > Drop Shadow of your choice.
Layers >
Properties > General > Blend Mode: of your choice
Layers > Merge
> Merge All
16- Create at
the edges:
Image > Add
Borders > 1 px > Symmetric > Dark color of use
Image > Add
Borders > 1 px > Symmetric > Light color of use
Image > Add
Borders > 1 px > Symmetric > Dark color of use
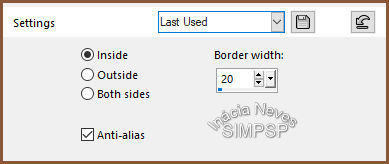
17- Selections >
Select All
Image > Add
Borders > 50 px > Symmetric > Any color
Selections >
Invert
Paint with the gradient
of use.
Effects > Texture
Effects > Texture:
Adjust > Sharpness
> Sharpen
Effects > Plugin
> AAA Frames > Frame Works
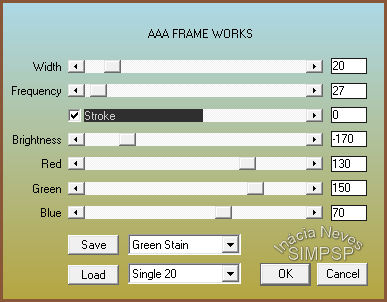 (change the
color Green Stain, to the one that best suits your work)
18- Selections >
Invert
Effects > 3D
Effects > Drop Shadow:
Selections >
Select None
19 - Edit > Copy the main tube Activate your work Edit > Paste as New Layer Resize the tube as you wish. Adjust > Sharpness > Sharpen. 20- Effects >
Plugin > Alien Skin Eye Candy 5 - Impact > Perspective
Shadow
 21- Image > Add
Borders > 1 px Symmetric > Color #000000
22-
If desired, resize your work.
Apply your watermark or signature. File > Export > JPEG Optimizer. 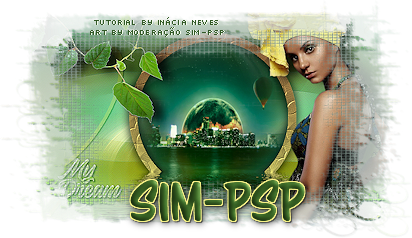 Credits:
Main Tube:
Verlaine
Misted Landscape:
@Matou
Decorative tube: Received
in group of exchanges, without authorship
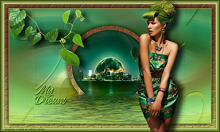
Feel free to send your versions.
I will be happy to publish them on our website.
|