|
 TRADUÇÕES:
Obrigada aos nossos tradutores!
Material
Tube
Principal à sua escolha
Tube Misted de
Paisagem à sua escolha
Tube
Decoração à sua escolha
Textura MyDream
(salvar na pasta Textures do PSP)
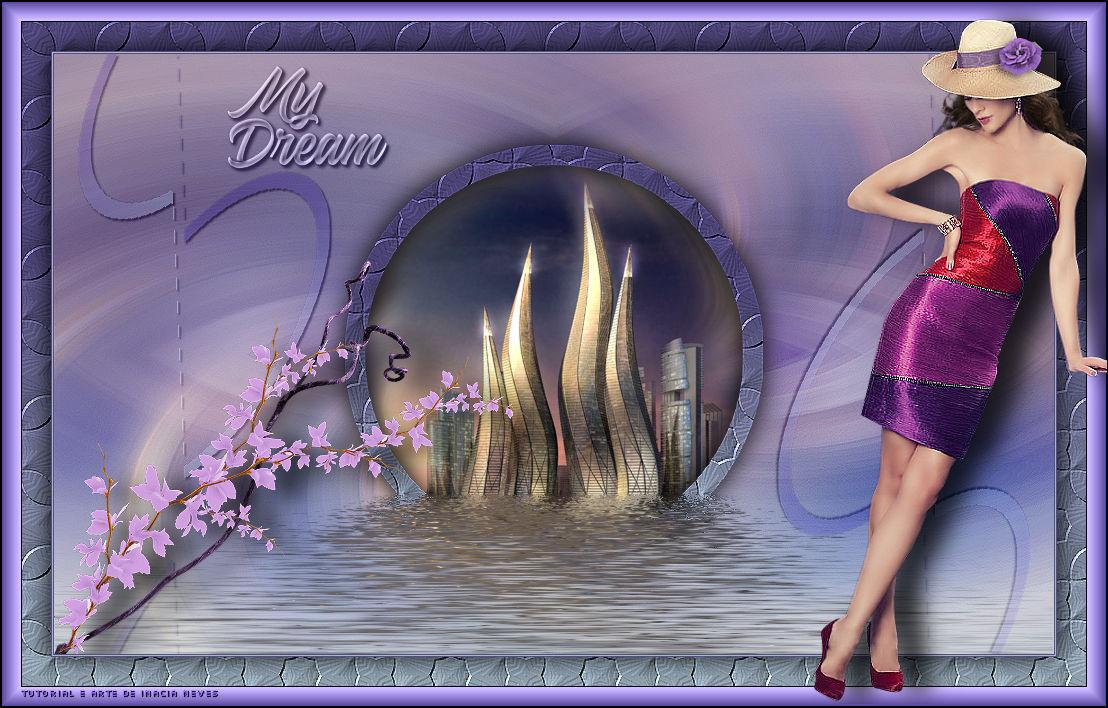
Titulo do Tutorial
 Plugins
Brush Strokes >
Crosshatch
FM Tile Tools >
Saturation Emboss
Filter Factory
Gallery "A" > Mirror, Mirror
Mura's Seamless >
Shift at Zigzag
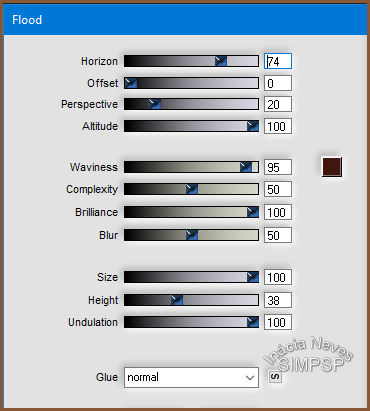
Flaming Pear >
Flood
AAA Frames > Frame
Works
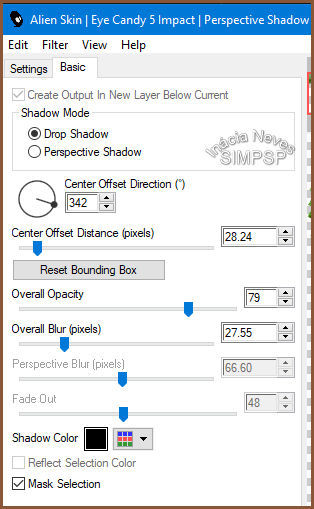
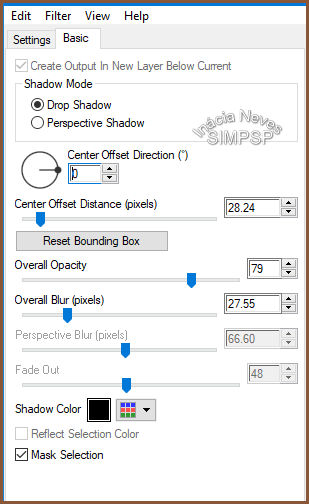
Alien Skin Eye Candy
5 - Impact > Perspective Shadow
Efeitos do PSP
2020
Roteiro
1- Escolher 2 cores
que não sejam predominantes no tube
Eu escolhi as
cores
Foreground:
#d7d96f
Background:
#895737
Formar um gradiente
Style: Linear > Angle: 0 > Repeats: 0
2- Abrir uma
transparência de 1000 x 600 px
Pintar com o
gradiente
3- Layer > New
Raster Layer
Selections >
Select All
Abrir o tube da
paisagem escolhido
Edit >
Copy
Ativar o
trabalho
Edit > Paste Into
Selection
Selections >
Select None
4- Effects > Image
Effects > Seamless Tiling > Default
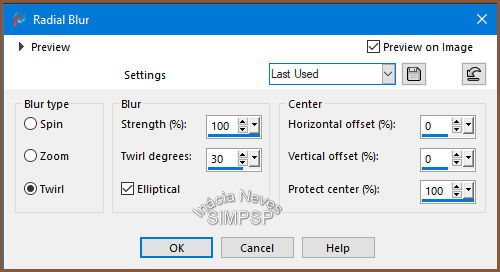
Adjust > Blur >
Radial Blur
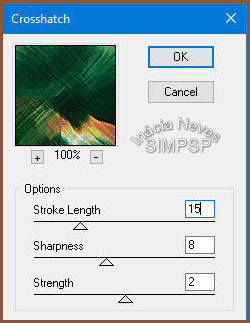
 Effects > Plugin
> Brush Strokes > Crosshatch
 5- Layers >
Duplicate
Ativar a layer Raster
2
Effects > FM Tile
Tools > Saturation Emboss
Layers >
Properties > General > Blend Mode: Overlay ou outro ao seu
gosto
6- Ativar a layer
Copy of Raster 2 (layer do topo)
Layers >
Duplicate
Fechar a visibilidade
da layer Copy (2) of Raster 2
Ativar a layer Copy
of Raster 2
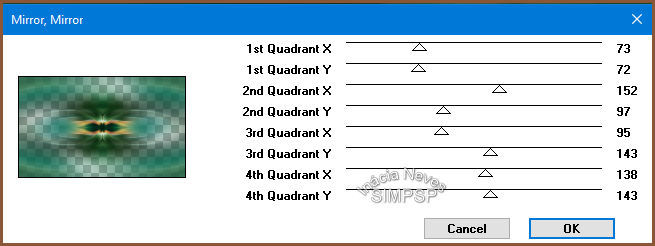
Effects > Plugin
> Filter Factory Gallery "A" > Mirror, Mirror
 Layers >
Properties > General > Blend Mode: Screen ou outro ao seu
gosto
7- Abrir a
visibilidade e ativar a layer Copy (2) of Raster 2
Effects >
Geometric Effects > Circle > Transparent Marcado
Image >
Resize > 70% > All Layers
desmarcado
8- Com a ferramenta Magic Wand, configurada como abaixo, selecionar a parte de fora do
círculo:
 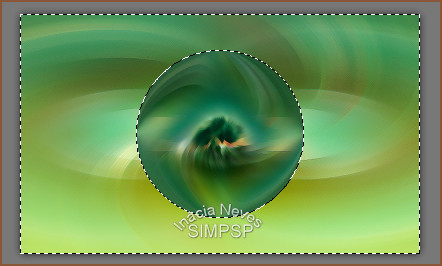 Selections >
Invert
Ativar o tube da
paisagem
Edit >
Copy
Ativar o
trabalho
Edit > Paste Into
Selection
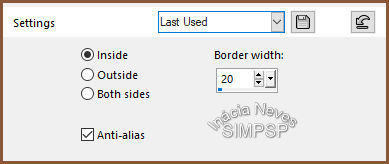
Selections >
Modify > Select Selection Borders
 Layers > New
Raster Layer
Pintar com o
gradiente de uso
9- Layers >
Duplicate
Ativar a layer Copy
of Raster 3 (Layer do topo)
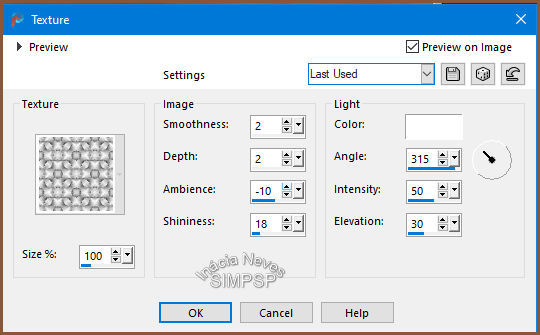
Effects > Texture
Effects > Texture, usando a textura mydreams
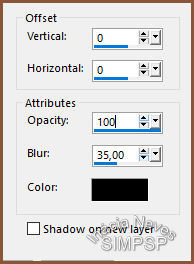
 Effects > 3D
Effects > Drop Shadow
 Adjust > Sharpness
> Sharpen
Selections >
Select None
10- Ativar a layer
Raster 3
Image > Resize
> 60% > All Layers desmarcado
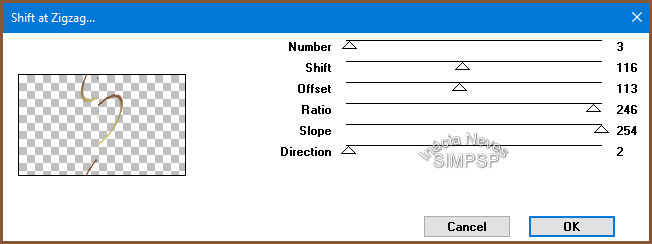
Effects > Plugin
Mura's Seamless > Shift at Zigzag
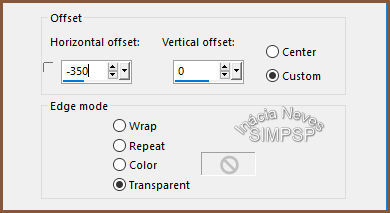
 Effects > Image
Effects > Offset
 Adjust > Sharpness
> Sharpen
Layers >
Properties > General > Blend Mode: Soft Light ou outro ao
seu gosto
Effects > 3D >
Drop Shadow > 2/2/100/2 Color #000000
11- Layers >
Duplicate
Image > Mirror
> Mirror Horizontal
Image > Flip >
Flip Vertical
12- Ativar a Layer Copy (2) of Raster 2 (layer da Paisagem)
Effects > Plugin
Flaming Pear > Flood
 13- Ativar a layer
Copy of Raster 3 (layer do topo)
Repetir o Plugin
Flaming Pear > Flood nas mesmas configurações do item 12
14- Ativar o tube
Decor, se for usar
Edit >
Copy
Ativar o
trabalho
Edit > Paste >
As New Layer
Reduzir e posicionar
a gosto
Effects > Plugin
> Alien Skin Eye Candy 5 - Impact > Perspective Shadow
 Adjust > Sharpness
> Sharpen
15- Ativar o
titulo do
trabalho "My Dream"
Edit >
Copy
Ativar o
trabalho
Edit > Paste >
As New Layer
Posicionar, usar um
Drop Shadow e trocar o Blend Mode a gosto
Layers > Merge
> Merge All
16- Fazer as
bordas:
Image > Add
Borders > 1 px > Symmetric > Cor escura de uso
Image > Add
Borders > 1 px > Symmetric > Cor clara de uso
Image > Add
Borders > 1 px > Symmetric > Cor escura de uso
17- Selections >
Select All
Image > Add
Borders > 50 px > Symmetric > Qualquer cor
Selections >
Invert
Pintar com o
gradiente de uso
Effects > Texture
Effects > Texture:
Adjust > Sharpness
> Sharpen
Effects > Plugin
> AAA Frames > Frame Works
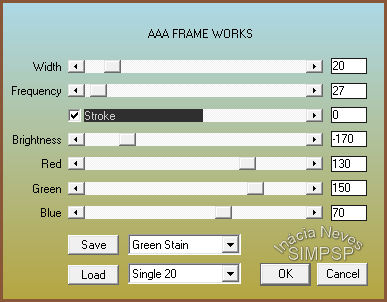 (trocar a cor Green
Stain, para a que melhor se adequar ao seu trabalho)
18- Selections >
Invert
Effects > 3D
Effects > Drop Shadow:
Selections >
Select None
19- Ativar o tube
Principal
Edit >
Copy
Ativar o
trabalho
Edit > Paste >
As New Layer
Reduzir e posicionar
a Gosto
20- Effects >
Plugin > Alien Skin Eye Candy 5 - Impact > Perspective
Shadow
 21- Image > Add
Borders > 1 px Symmetric > Color #000000
22- Se desejar,
redimensionar o trabalho
Aplicar sua marca
d'água ou assinatura
File > Export
> JPEG Optimizer.
Tutorial criado, para
o SIM PSP, por Inácia Neves em 06/03/2021
 Créditos:
Tube Principal:
Mary
Tube Paisagem:
@Matou
Tube Decor: Recebido
em grupo de trocas, sem autoria
Tutorial e Arte de
Inácia Neves
Alvorada-RS -
06/03/2021
Versão
 Créditos:
Tube Principal: 53,
sem autoria
(se souber a autoria,
por favor, avise que será dado o devido crédito)
Tube Paisagem:
Ket.México
Tubes Decor: Scrap A
Little Piece of You - PtiteSouris Design
Tutorial e Arte de
Inácia Neves
Alvorada-RS -
06/03/2021
Agradecimento:
Agradeço as Tubers pelo lindo material
compartilhado
Sinta-se à vontade para enviar suas versões. Terei todo o prazer em publicá-las em nosso site.
|