|
Tutorial by Soxikibem English Translation by Moderation SIM-PSP Original Tutorial:
MATERIAL 1 Main Tube of your choice titulo2022ByXiki decorTextXiki brindeNY Pngtree_cartoon_gold_ribbon bow_3365077 NarahsMasks_1624 Selections: (Save selections in PSP Selection folder) 2022_1Xiki - 2022_2Xiki
PLUGINS Italian Editors Effect AAA Frames
NOTE:
-
Feel free to change the Blends and Opacity
according to the material
TUTORIAL
1 – Open the material on the PSP, duplicate and close the original. Choose three colors to work with: Foreground: #6a3017 Background: #c59424 Color 3: #ffffff
2 - Open a 1000x500px transparent image. Paint it with the foreground color. Selections > Select All. Edit > Copy in Pngtree_cartoon_gold_ribbon bow_3365077. Edit > Paste Into Selection. Selections > Select None.
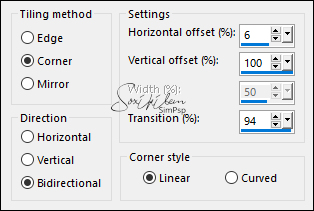
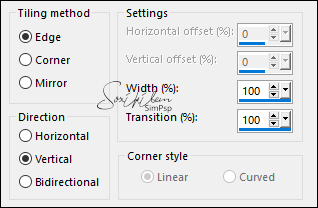
3 - Effects > Image Effects > Seamless Tiling: Side by side.
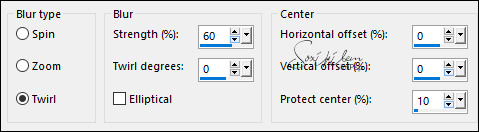
4 - Adjust > Blur > Radial Blur:
5 - Effects > Distortion Effects > Polar Coordinates: Polar to rectangular. Effects > Edge Effects > Enhance.
6 - Selections > Load/Save Selection > Load Selection From Disk: 2022_1Xiki. Selections > Promote Selection to Layer. Selections > Select None.
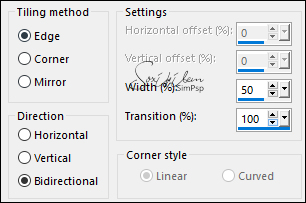
7 - Effects > Image Effects > Seamless Tiling: Back agressive.
8 - Effects > Plugins > Italian Editors Effect > Vignetta:
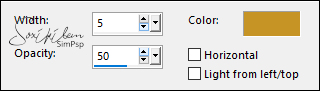
Effects > 3D Effects > Drop Shadow: 30, 0, 100, 50, Color: #FFFFFF (white).
9 - Layers > Duplicate. With the Pick Tool tool, position: Position X: 0, Position Y: 124. Effects > Texture Effects > Blinds: Color: Background color.
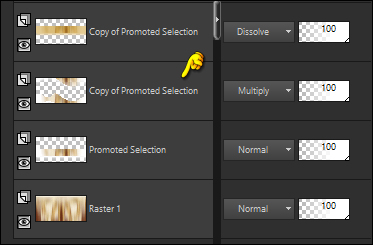
Layers > Properties > General: Blend Mode: Dissolve.
10 - Layers > New Raster Layer. Selections > Load/Save Selection > Load Selection From Disk: 2022_2Xiki. Paint this selection with the Background color. Selections > Modify > Contract: 5. Paint it with the Foreground color. Selections > Modify > Contract: 3. Paint this selection with the Background color. Selections > Modify > Contract: 5. Press the keyboard's Delete key. Selections > Select None.
11 - Layers > Duplicate. Adjust > Blur > Gaussian Blur: 20. Layers > Properties: General > Blend Mode: Dissolve.
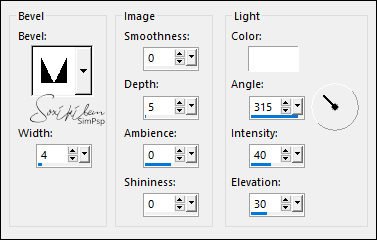
12 - Activate the layer Raster 2. Effects > 3D Effects > Inner Bevel:
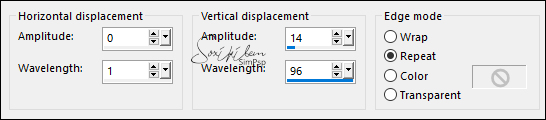
13 - Activate the layer Promoted Selection. Layers > Duplicate. Effects > Distortion Effects > Wave:
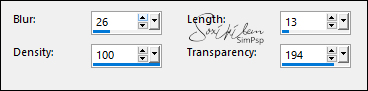
14 - Layers > Duplicate. Image > Mirror > Mirror Vertical. Layers > Arrange > Move Up. Effects > Texture Effects > Fur:
Layers > Properties > General > Blend Mode: Screen.
15 - Activate the first layer Copy of Promoted Selection.
Effects > Image Effects > Seamless Tilling:
Layers > Properties > General > Blend Mode: Multiply.
16 - Selections > Load/Save Selections > Load Selection From Disk: 2022_2Xiki. Press the keyboard's Delete key. Activate the layer Copy (2) of Promoted Selection. Press the keyboard's Delete key.
17 - Still selected: Layers > New Raster Layer. Effects > 3D Effects > Drop Shadow: 0, 0, 100, 50, Color: Background color. Edit > Repeat Drop Shadow.
18 - Layers > New Raster Layer. With the Clone Brush tool configure as below, Right-click on the toastNY image or on the image of your choice. Go back to work and left click inside the selection. Click as many times as you like to get it to your liking.
Adjust > Sharpness > Sharpen. Selections > Select None.
19 - Activate the layer Copy (2) of Promoted Selection. Layers > New Raster Layer. Paint it with the Background color. Layers > New Mask Layer > From Image: NarahsMasks_1624. Layers > Merge > Merge Group. Layers > Properties > General > Blend Mode: Multiply, Opacity: 50%.
20 - Activate the top layer. Edit > Copy in titulo2022ByXiki. Edit > Paste as New Layer. With the Pick Tool tool, position: Position X: 551, Position Y: 77.
21 - Edit > Copy the Main Tube. Edit > Paste as New Layer. Position of your choice. Effects > 3D Effects > Drop Shadow: your choice.
22 - Edit > Copy in decorTextXiki. Edit > Paste a New Layer. With the Pick Tool tool, position: Position X: 674, Position Y: 253. Layers Properties > General > Blend Mode: Luminance (L).
23 - Image > Add Borders > Symmetric: 1px - color: Foreground color. 10px - color: #ffffff (White) 2px - color: Foreground color 2px - color: #ffffff (White) 2px - color: Foreground color 40px - color: #ffffff (White)
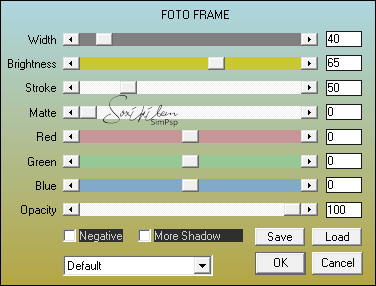
24 - Effects > Plugins > AAA Frames > Foto Frame:
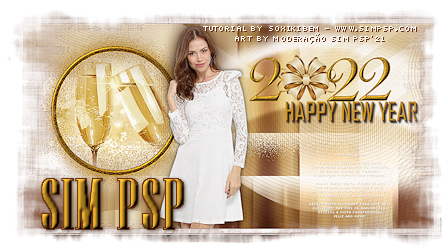
25 - Apply your watermark or signature.File > Export > JPEG Optimizer.
CREDITS: Tutorial by Soxikibem English Translation by Moderation SIM-PSP Main Tube: Tubed by Marcinha Tube ribbon Here Mask by Narah
Feel free to send your versions. I will be happy to publish them on our website.
|