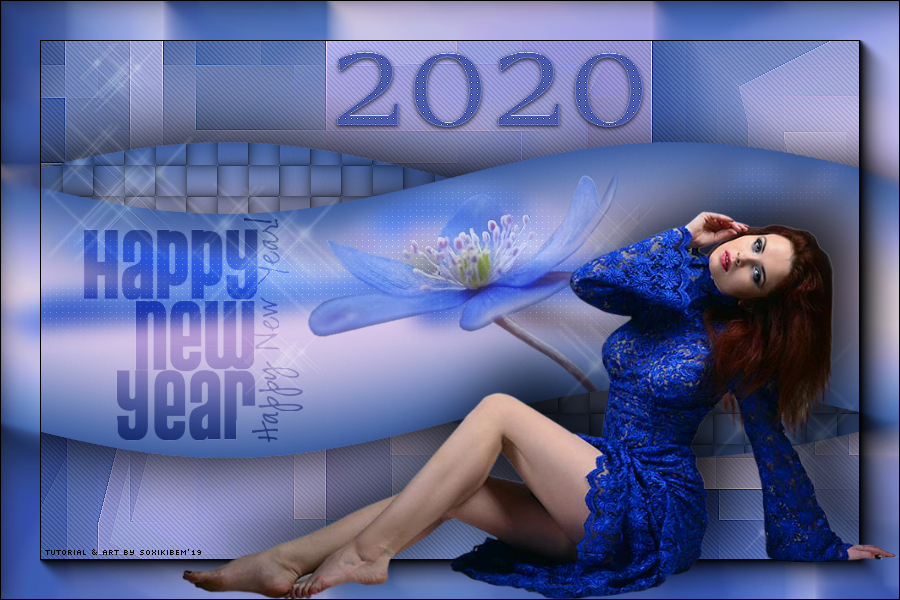
|
English Translation by Soxikibem Original Tutorial
MATERIAL 1 Main Tube your choice 1 Flower Tube your choice 2020_bysoxikibem CHILI_DESIGNZ_Happy_New_Year_sparkles2 WAhappynewyear
Pluguins AAA Frames Carolaine and Sensibility Mehdi Toadies
ExecuTION
1 - Open the material in the PSP, duplicate and close the original. Choose two colors: Foreground #ea9f2c Background #beae16
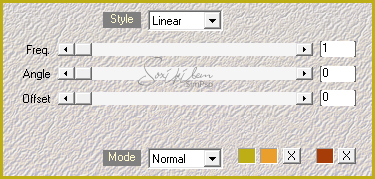
2 - Open a transparent 900x600px image. Effects > Plugin Mehdi > Wavy Lab. Color 1: #beae16 Color 2: #ea9f2c Color 3: #a63c08
3 - Layers > Duplicate. Close visibility of Layer Copy of Raster. Enable Raster Layer 1.
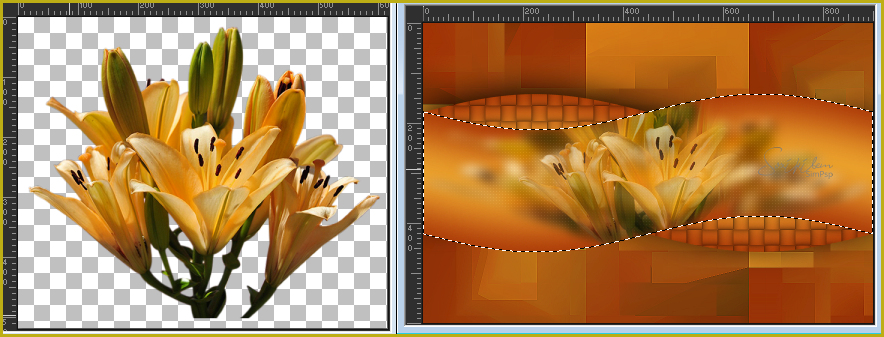
4 - Layers > New Raster Layer. Selections > Select All. Edit > Copy in flower tube. Edit > paste Into Selection. Selections > Select None.
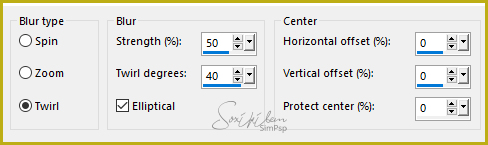
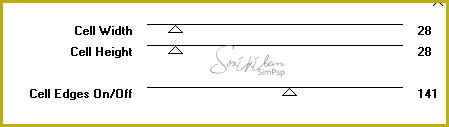
5 - Effects > Image Effects > Seamless Tiling: Default. Adjust > Blur > Radial Blur.
6 - Layers > Properties > General > Blend Mode: Multiply - Opacity: 60% Layers > Merge > Merge Down.
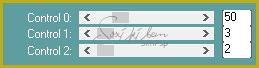
7 - Effects > Plugin Toadies > Plain Mosaic Blur.
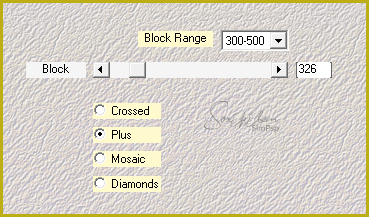
8 - Effects > Plugin Mehdi > Sorting Tiles.
9 - Effects > Edge Effects > Enhance. Effects > Plugin Carolaine and Sensibility > CS-DLines.
10 - Turns on and open visibility of Layer Copy of Raster 1. Effects > Geometric Effects > Perspective-Horizontal.
Effects > Geometric Effects > Perspective-Horizontal changing the value to -60.
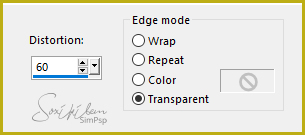
11 - Effects > Distortion Effects > Wave.
12 - Layers > Duplicate. Image > Mirror > Mirror Horizontal. Close visibility of layer Copy (2) of Raster 1. Enable the Copy of Raster 1 layer.
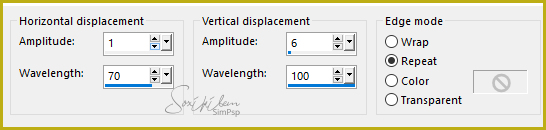
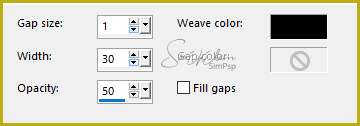
13 - Effects > Texture Effects > Weave.
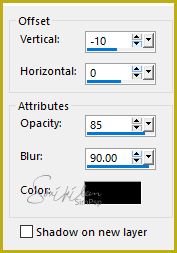
14 - Effects > 3D Effects > Drop Shadow.
15 - Enable and open the visibility of the Copy (2) of Raster 1 layer. Selections > Select All. Selections > Float. Selections > Defloat. Layers > New Raster Layer.
16 - Edit > Copy no tube de flores. Edit > Paste Into Selection. Adjust > Blur > Gaussian Blur: 10.
17 - Effects > Plugin Carolaine and Sensibility > CS-LDots.
18 - With the Clone Brush Tool enabled click Right-click on the flower to clone. Get back to work and left-click inside the selection. See how it was below.
19 - Selections > Select None. Layers > Merge > Merge Down. Effects > 3D Effects > Drop Shadow.
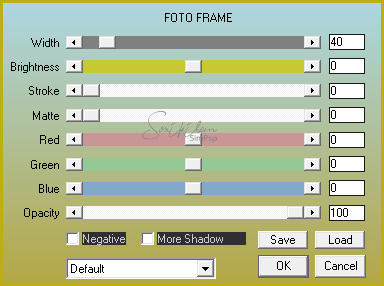
20 - Layers > Merge > Merge Visible. Effects > Plugin AAA Frames > Foto Frame.
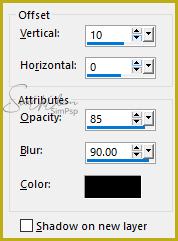
21 - Edit > Copy on 2020_bysoxikibem. Colorize if desired. Edit > Paste a New Layer. Effects > Image Effects > Offset.
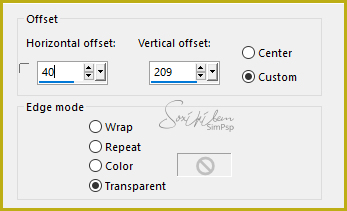
22 - Edit > Copy no CHILI_DESIGNZ_Happy_New_Year_sparkles2. Edit > Paste a New Layer. Image > Resize em 20%, all layers unchecked. Effects > Image Effects > Offset.
Adjust > Sharpness > Sharpen. Layers > Properties > General: Blend Mode: Soft Light. Layers > Duplicate. Image > Mirror > Mirror Horizontal. Image > Mirror > Mirror Vertical.
23 - Edit > Copy on main tube. Edit > Paste a new layer. Position. Effects > 3D Effect > Drop Shadow as you wish.
24 - Edit > Copy on WAhappynewyear. Edit > Paste a New layer. Image > Resize em 20%, all layers unchecked. Layers > Properties > General > Blend Mode: Soft Light. Position left.
25 - If you want to resize your work now. Apply your watermark or signature. File > Export > JPEG Optimizer...
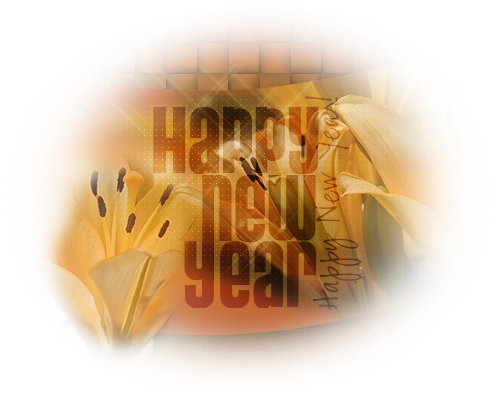
CREDITS: Tube by Adrimar - Tube Flor by LB Tubes - Word Art by Betanny - Sparkle by Scrap Chili Design Version 2: Main Tube & Flor by Csilla
Tutorial by Soxikibem'19
Feel free to submit your versions. I'll be happy to post them on our site.
Send your version to the email: soxikibem.simpsp@gmail.com
|