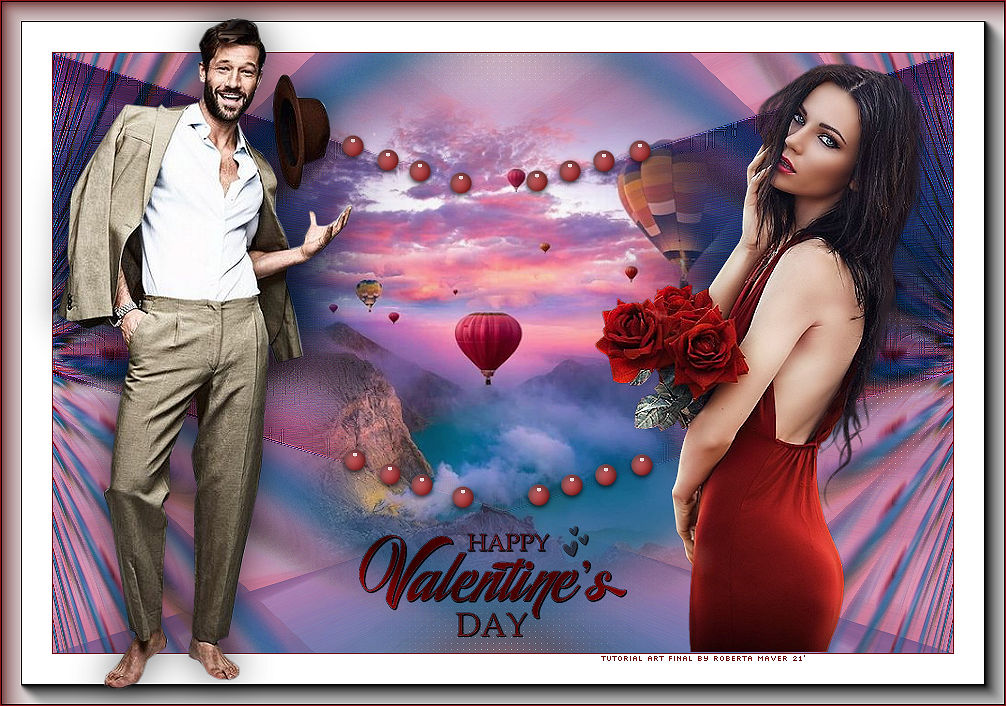
Tutorial criado para o Desafio 05 SimPsp Este desafio foi proposto por Marcinha com o Tema: Valentine"s
TRADUÇÕES:
Obrigada aos nossos tradutores!
MATERIAL 2 Tubes Principal à sua escolha 1 Misted Paisagem à sua escolha Decor_by Roberta Titulo__by Roberta
PLUGINS AAA Frames Carolaine & Sensibility AP
ROTEIRO
1 - Abrir o material no PSP, duplique e feche o original. Escolher duas cores para trabalhar. Foreground #ad0e0f Background # FFFFFF
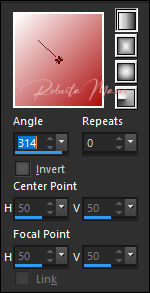
2 - Abra uma imagem transparente de 900 x 600 px. Pintar com o gradiente Linear, Angle 314, Repeats 0. formado pelas cores em uso.
3 - Effects > Plugin Carolaine & Sensibility > CS-LDots.  4 - Layers > New Raster Layer. Selections > Select All.
5 - Edit > Copy no Misted Paisagem Edit > Paste Into Selection. Selections > Select None. 6 - Effects > Image Effects
> Seamless Tiling: Default
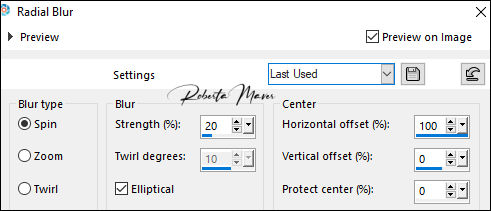
7 - Adjust > Blur > Radial
Blur.
 8- Effects
> Edges efects > Enhance
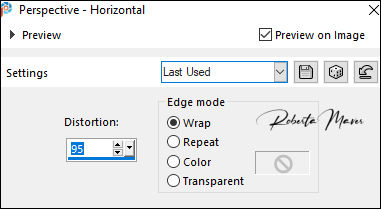
9- Effects > Geometric Effects > Perspective -
Horizontal.
 10 - Layers > Duplicate.
Image > Mirror > Mirror Horizontal.
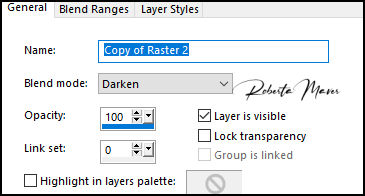
11 - Layers > Properties:
Blend Mode: Darken.
 Layers > Merge > Merge Down.
12 - Com a ferramenta Freehand
Selection, selecione como mostro no print.
 Selections > Promote Selection to Layer.
Layers > Duplicate.
,Selections > Select None
13 -
Fechar a visibilidade da layer copy Promoted
Selection
Ativar a
layer Promoted Selection
14- Effects > Plugins > AP (Paint) > Paint -
Patchy.

Layers > Properties > General: Opacity 50%
15 - Effects > Edges efects > Enhance
16 - Abrir e ativar a layer copy Promoted Selection
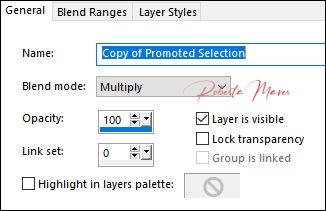
17 - Layers > Properties: Blend Mode: Multiply ou outro a sua escolha.
18 - Effects > Edges efects > Enhance
19 - Edit >
Copy no Misted Paisagem
Edit > Paste as new layer. Adjust > Sharpness > Sharpen
20 - Edit > Copy no decor_ByRoberta. Edit > Paste a New Layer. Posicione
21 - Edit > Copy no Tube Principal. Edit > Paste a new Layer. De resize se necessário Posicione Effects > 3D Effects > Drop Shadow como preferir.
22- Image > Add Borders:
1 px cor escura > #ad0e0f 50 px cor clara > #FFFFFF 2 px cor escura > #ad0e0f
23 - Edit > Copy no Titulo. Edit > Paste a New Layer. Posicione como desejar. Layers > Properties: Blend Mode: Multiply ou outro que desejar Layers > Merge All.
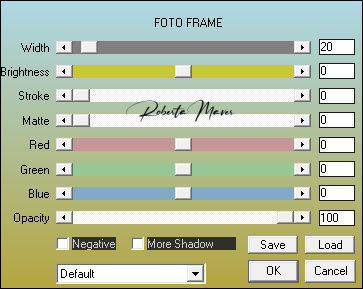
24- Effects > Plugins > AAA Frames > Foto Frame.
25- Edit > Copy no Tube Principal. (Masculino) Edit > Paste a new Layer. De resize se necessário Posicione Layers > Merge > Merge Visibile.
26- Se você desejar, redimensiona seu
trabalho.
Aplicar sua marca d'água ou assinatura. File > Export > JPEG Optimizer. 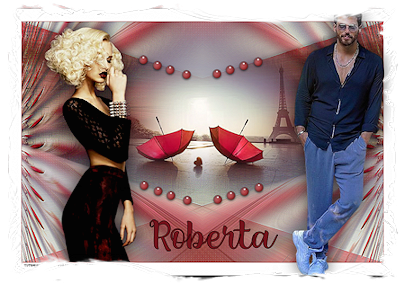 Créditos
Tutorial e art final criado por
Roberta Maver
Tube:3354 - Can Yaman
- LB TUBES
5575-luzcristina
Paisagem:1868 -
paisaje misted - LB TUBES
03/02/2021
 Créditos: Tube
Maryse ; CaliTubes_24H; Paisagem: Callitubes-100misted2021
Sinta-se à vontade para enviar suas versões. Terei todo o prazer em publicá-las em nosso site.
|