 Tutorial by Leni English Translation by Soxikibem Original Tutorial
MATERIAL 1 Main Tube 1 Misted Landscape 1 Decor Tube Decor_desafionatal_by Roberta Decor_flocosdeneve Titulo_MerryChristmas_by Roberta Titulo_FelizNatal_by Roberta
PLUGINS Plugin AFS Import Plugin Backgroundmaniac Plugin Eye Candy 5 Plugin Graphics Plus MuRa's Meister Plugin Simple Filter Unlimetd 2.0 Sapphire 03 (importar Filter Unlimetd 2.0) Plugin Ulead Particle
TUTORIAL 1 - Open the material on the PSP, duplicate and close the original. Choose two colors to work with. Foreground #581323 Background #a32731
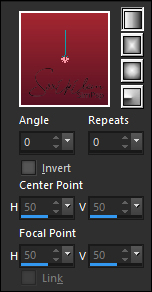
2 - Open a 900 x 550 px transparent image. Paint with the gradient formed by the chosen colors: Linear - Angle: 0 - Repeats: 0 - Invert: unchecked
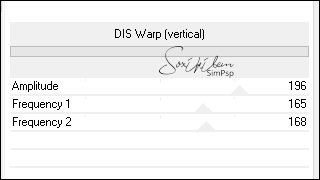
3- Effects > Filter Unlimetd 2.0 > BKG Designer 10sfII > Dis Was Warp (vertical)
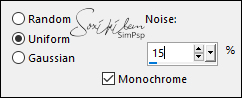
4- Adjust > Add/Remove Noise > Add Noise
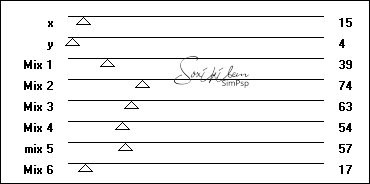
5- Effects > Filter Unlimetd 2.0 > Sapphire 03 > Sapphire Plugin 0268
6- Layers > New Raster Layer Paint the layer with the foreground color
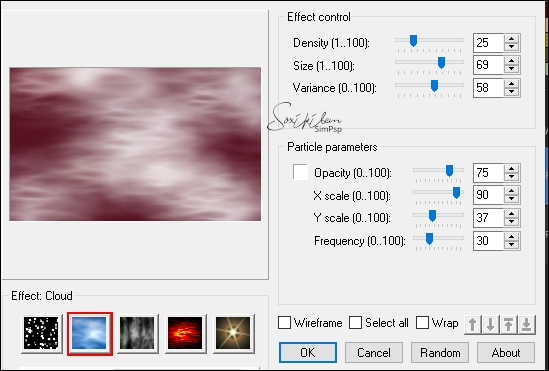
7- Effects > Plugin Ulead Effects > Particle
Layers > Properties > General > Blend Mode: Overlay Layer > Merge > Merge Visible
8 - Selections > Select All. Selections > Modify > Contract 60px Selections > Promote Selection to Layer. Still selected
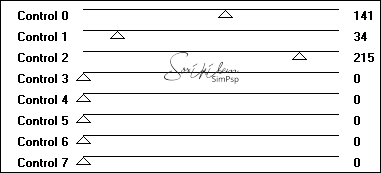
9- Effects > Plugin > Plugin Backgroundmaniac > Oriental Lines'n Dots
10 - Effects > Plugin Graphics Plus > Vertical Mirror
Selections > Select None.
11 - Effects > Edge Effects > Enhance.
12- Effects > Plugin Simple> Left Right Wrap.
13- Selections > Select All.Selections > Float Selections > Defloat.
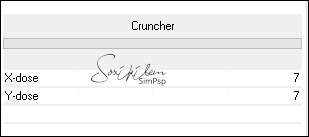
14- Effects > Filter Unlimetd 2.0 > BKG Designer 10sfI > Cruncher
Selections > Select None.
15- Effects > 3D Effects > Drop Shadow: 0, 0, 80, 40, black color
16- Enable Layer Merged
17 - Edit > Copy in
landscape misted.
Edit > Paste
As New Layer
Position Rezise if
necessary. (I gave 80%)
Adjust > Sharpness >
Sharpen
18-
Effects > Image Effects > Seamless Tiling: Deault.
19 - Layers > Properties > Opacity
40%
20 - Enable layer promoted Selection.
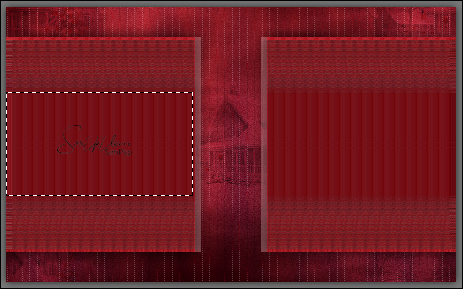
21- Layers > New Raster Layer With the selection tool select as shown in the print Paint with background color
22- Effects > Plugin AFS Import > Sqborder2
23- Layers > New Raster Layer
Edit > Copy in landscape misted. Edit > Paste Into Selection.
Still selected:
Selections > modify > select selection borders
Paint with the color #ffffff (white) Selections > Select None. Close the visibility of this layer (Raster 3)
24- Activate layers raster 2 With the selection tool select the smallest rectangle Selections > Promote Selection to Layer. Layers > Arrange > Bring to TopEdit > Copy in landscape misted. Edit > Paste Into
Selection.
25
- Effects > Eye Candy 5 > Impact >
Glass
Settings: Clear 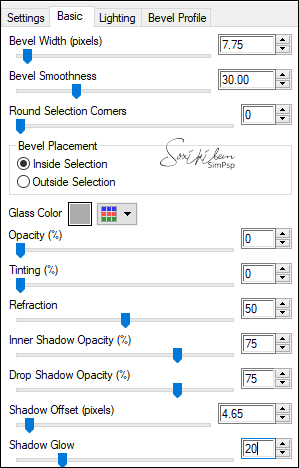 Selections > Select None 26- Effects > 3D Effects > Drop Shadow: 0, 0, 60, 30, black color. Open the visibility of the Raster 3 layer. Activate the Promoted Selection layer 1 Layer> Merge> Merge Down. (2 times) 27 - Layers > Duplicate. Image > Mirror > Mirror Horizontal. Layer > Merge > Merge Down.
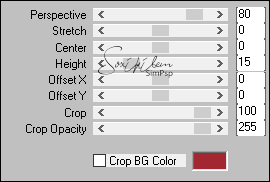
28- Enable raster 1 Layer > Merge > Merge Down. Layers > Duplicate 29- Effects > Plugins Mura's Meister > Perspective Tiling.
Layers> Arrange> Bring to Top Adjust > Sharpness > Sharpen.
30- Adjust > Add/Remove Noise > Add Noise
31- Effects > 3D Effects > Drop Shadow: 0 /0/100/40, black color.
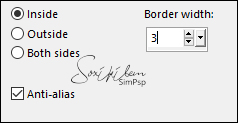
32- Image > Add Borders: 2 px foreground color 5 px color #fffff (white) 2 px foreground color
33- Selections > Select All.Image > Add Borders: 50 px color #ffffff (white)
34- Effects > 3D Effects > Drop Shadow: 0 /0/100/40, black color Selections > Select None. Image > Add Borders: 2 px foreground color
35- Edit > Copy in decor_flocos de neve. Edit > Paste a New Layer.
36 - Edit > Copy in the deco_natal_byRoberta.Edit > Paste a New Layer.
37- Edit> Copy on the decoration tube.Edit > Paste a New Layer. Position as you like at work .Adjust > Sharpness > Sharpen. Effects > 3D Effect > Drop Shadow of your choice.
38- Edit > Copy in titulo_Merry Christmas_byRoberta. Edit > Paste a New Layer. Position to the left as you prefer.
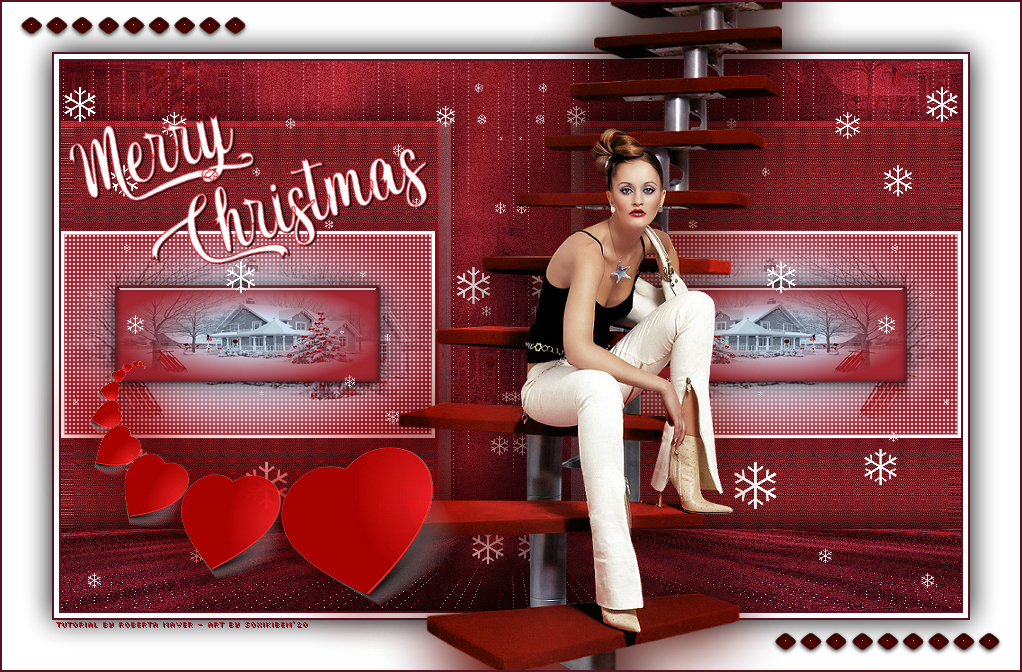
39- Edit > Copy in the main tube. Edit > Paste a New Layer. Resize the tube to taste .Adjust > Sharpness > Sharpen. Position to your choice. Effects > 3D Effect > Drop Shadow of your choice. 40- If desired, resize your work. Apply your watermark or signature. File > Export > JPEG Optimizer.
Credits
Tube
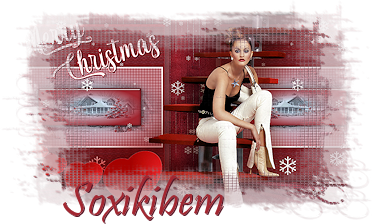
by L&B Tubes - Decor by Verlaine - Misted by Soxikibem
Deco_flocosdeneve( Kit de Scrap
Naral)
Deco_natal_by Roberta - Titulo_Merry Christmas_by Roberta
Feel free to submit your versions. I will be happy to publish them on our website.   
|