|

Tutorial By AnaMariaC
English Translation by SIM-PSP moderation
Original Tutorial
MATERIAL
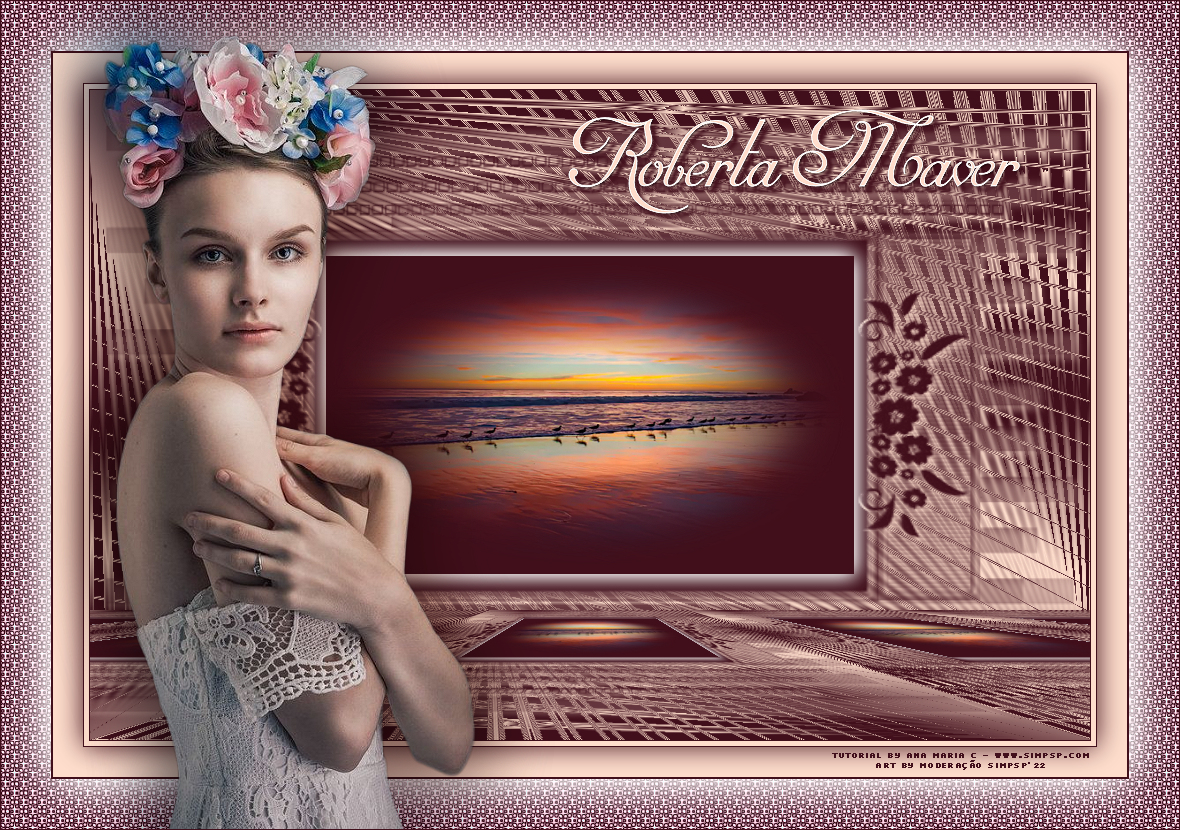
1 Main Tube of your choice
1 Misted Landscape of
your choice
Mask_magnolias
WorArt_título_by AnaMariaC
Selections: roberta_2byAnaMariaC*
*Save the selections
in the Selection folder of your PSP.
PLUGINS
MuR’as Meister > Perspective Tiling
AP (Distorts/Patterns) > Patterns > Fragments
(attached to material)
TUTORIAL
1- Open the material on your PSP, duplicate and close the
original.
Choose two colors to work with.
Foreground > #feddcc
Background > #410f1b

2- Open a 1000x650px transparency.
Paint with color: #410f1b (background)
3- Layers > Layers New Raster Layer.
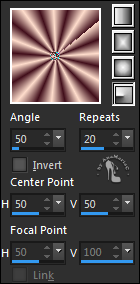
Fill with a Gradient > Radial.
4- Effects > Distortion Effects > Spiky Halo.
5- Layers > Duplicate.
Image > Mirror > Mirror Horizontal.
Image > Mirror > Mirror Vertical.
Layers > Merge > Merge Down.
6- Layers > New Raster Layer.
Fill with color: #410f1b (Background).
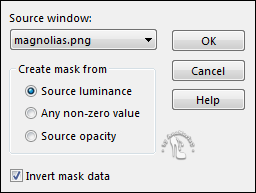
7- Layers > New Mask Layer > From Image: magnolias
invert
mask checked.
Layers > Merge > Merge Group.
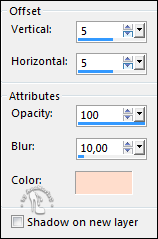
8- Effects > 3D Effects > Drop Shadow: Color: #feddcc (Foreground).
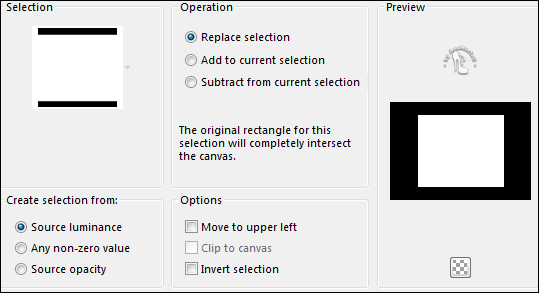
9- Selections > Load/Save Selections > Load Selection From Disk:
Roberta_2byAnaMariaC
10- Edit > Copy in misted landscape.
Edit > Past Into Selection.
Adjust > Sharpness > Sharpen.
11- Effects > 3D Effects > Drop Shadow: Color: #ffffff
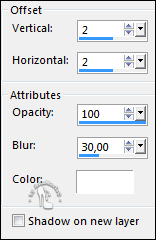
Repeat > Drop Shadow (V -2) and (H-2).
Selections > Selection None.
12- Layers > Merge > Visible.
Layers > Duplicate.
13- Effects > Plugin > MuR’as Meister > Perspective Tiling:
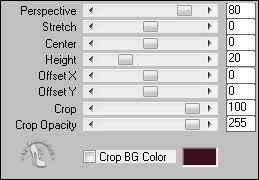
Layers > Merge > Merge All (Flaten).
14- Image Add Borders > Symmetric:
1px - Color: #410f1b (Background).
5 px - Color: #feddcc (Foreground).
1px - Color: #410f1b (Background).
15- Selections > Select All.
Image > Add Borders Symmetric: 30 px - Color: #feddcc (Foreground).
16- Effects > 3D Effects > Drop Shadow: Color: #410f1b (Bakground).

Selections > Select None.
17- Image > Add Borders > Symmetric: 2 px - Color: #410f1b
(Background).
Selections > Select All.
18- Image > Add Borders > Symmetric: 50 px - Color: #feddcc
(Foreground).
Selections > Invert.
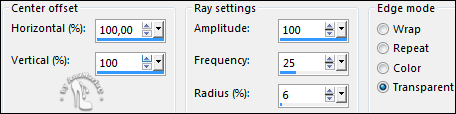
19- Effects > Plugins > AP
13 [Distortion/Patterns] > Pattern - Fragments:
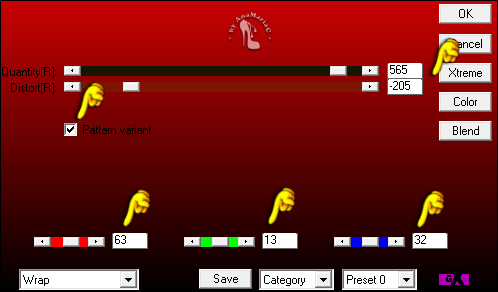
Note: Change the settings in Red, Green and
Blue according to the color of your work.
or colorize in > Adjust > Hue and Saturations > Colorize...
20- Adjust > Sharpness > Sharpen.
Selections > Invert.
21- Effects > Effects 3D > Drop Shadow: Color #ffffff.
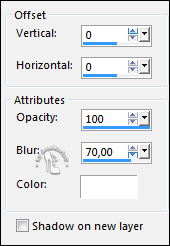
Edit > Repeat Drop Shadow.
Selections > Select None.
22- Edit > Copy in the main tube.
Edit > Past As New Layer.
Image > Resize if
necessary.
Adjust > Sharpness > Sharpen.
Position of your choice.
Effects > 3D Effects > Drop Shadow: your choice.
23- Edit > Copy in wordart_by-AnaMariaC.
Edit > Past As New Layer.
Position of your choice.
Effects > 3D Effects > Drop Shadow: your choice.
24- Image > Add Borders > Symmetric: 1 px - Color: #410f1b (Background).
25- If you wish, resize your work.
Apply your watermark or signature.
File > Export > JPEG Optimizer.

Credits
Turorial
AnaMariaC
English Translation by Moderation SIM-PSP
Tube & Misted by
Pqna&Alice
Mask by
magnolias
WorArt by
AnaMariaC
Feel free to submit your
versions.
I will be happy to publish them on our website.
Send your version to the email address:
sempre.dorinha.2015@gmail.com

SimPSP Social Networks:


|
Tutorial created by
AnaMariaC, in February/2022.
Translated into English in February/22, by Moderation of
SIM-PSP.
It cannot be copied, removed from this place,
translated or use in learning lists or groups without the
author's prior consent. |
|