|
Tutorial By AnaMariaC English Translation by SIM-PSP moderation Original Tutorial
MATERIAL: AlfaChannel_colors_byAnaMariaC
1 main tube of your choice.
PLUGINS: Plugins > Flaming Pear > Flexify 2 / Flexify Effects > Plugins > Toadies > Boost. Plugins > Special Effects > Shiver. Plugins > Simple > Half Warp. Efeitos do PSP
********* This tutorial was written
by Ana Maria C, any resemblance is purely coincidental. ******** Tutorial tested by Soxikibem and reviewed by Márcinha. ********
Tutorial created in PSP X9. ********
02-
Choose the colors to work with:
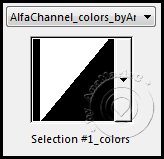
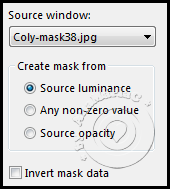
03- Activate the Alpha Channel, duplicate it, and close the original. Selections > Load/Save Selections > Load Selection from Alpha Channel: seleção1_colors.
Paint with the color: #6c3e5a (Foreground). Selections > Select None.
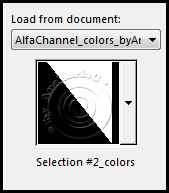
04- Selections > Load/Save Selections > Load Selection from Alpha Channel: selection#2_color
Paint with color 3: #b2a324 Selections > Select None.
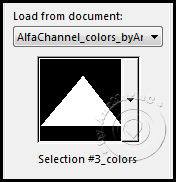
05- Selections > Load/Save Selections > Load Selection from Alpha Channel: selection#3_color
Paint with color 4: #93b896. Selections > Select None.
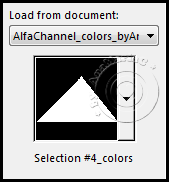
06- Selections > Load/Save Selections > Load Selection from Alpha Channel: selection#4_color
Paint with color 5: #3477aa Selections > Select None.
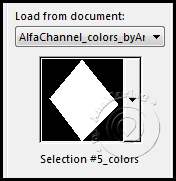
07- Selections > Load/Save Selections > Load Selection from Alpha Channel: selection#5_color
Paint with color: #af96b6 (Background). Selections > Select None.
08- Adjust > Blur > Gaussian Blur > Radius: 50
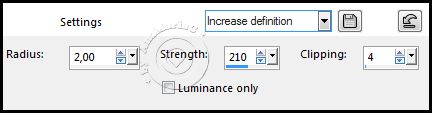
09- Adjust > Sharpness > Unsharp Mask.
Layers > Duplicate.
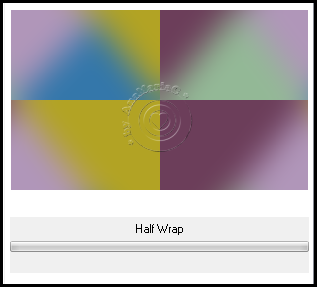
10- Effects > Plugins > Simple > Half Warp.
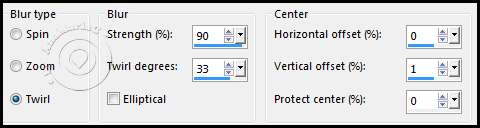
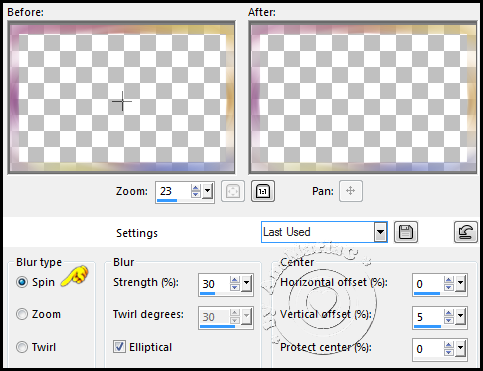
11- Adjust > Blur > Radial Blur.
Layers > Properties > General > Blend Mode: Overlay > Opacity: 100 Or choose another blend mode that suits your work.
12- Layers > Merge > Merge Down.
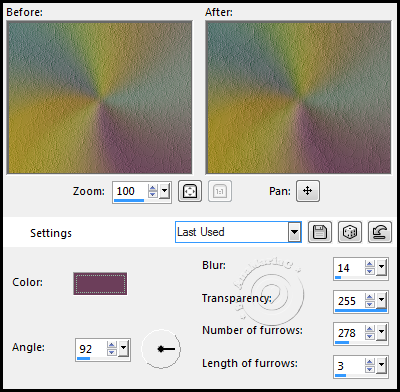
13- Effects > Texture Effects > Fine Leather.
Adjust > Sharpness > Sharpen More.
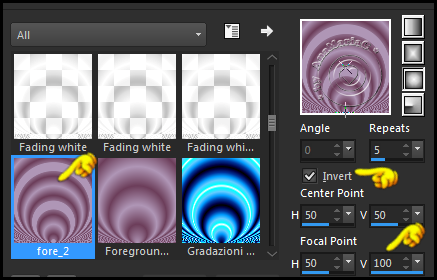
14- Layers > New Raster Layer. Paint with a gradient > Sunburst_Fore_2
Layers > Layer Duplicate. Image > Mirror > Mirror Vertical. Layers > Properties > General > Blend Mode: Solf Light > Opacity: 100 Layers > Merge > Merge Down.
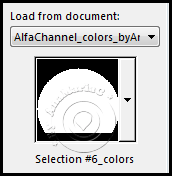
15- Selections > Load/Save Selections > Load Selection from Alpha Channel: selection#6_color
Press the delete key on your keyboard.. Selections > Select None. Layers > Properties > General > Blend Mode: Soft Light > Opacity: 100
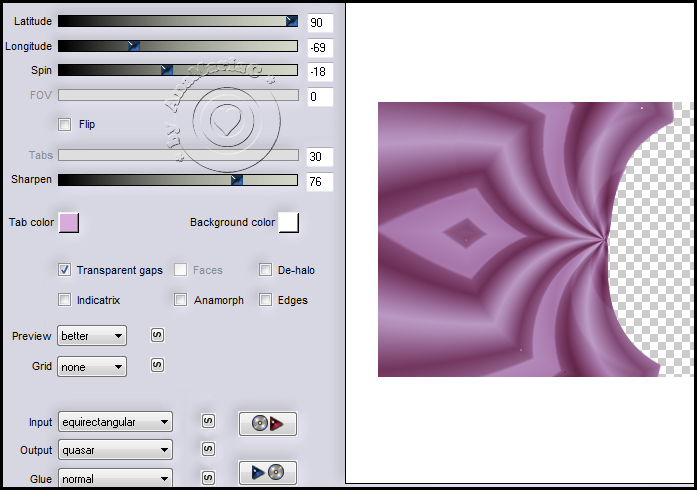
16- Effects > Plugins > Flaming Pear > Fexify 2.
17- Layers > Duplicate. Image > Mirror > Mirror Horizontal. Layers > Merge > Merge Down.
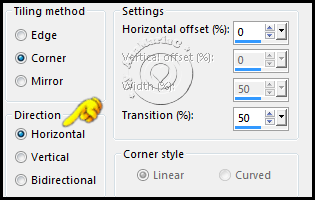
18- Effects > Image Effects > Seamless Tiling.
Layers > Duplicate.
19- Effects > Plugins > Flaming Pear > Fexify.
Layers > Properties > General > Blend Mode: Hard Light > Opacity: 70 Layers > Merge > Merge Down. Effects > Edge Effects > Enhance More.
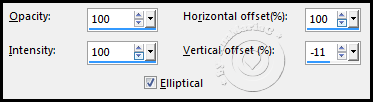
20- Effects > Reflection Effects > Feedback.
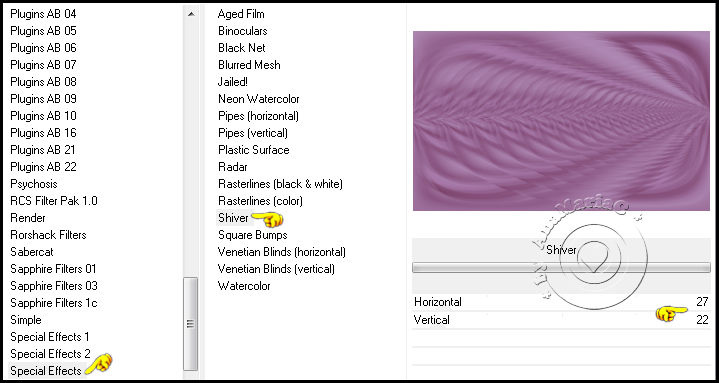
21- Effects > Plugins > Special Effects > Shiver.
Layers > Properties > General > Blend Mode: Hard Light > Opacity: 70
NOTE: Here you can change the Blend mode according to your work. Adjust > Sharpness > Sharpen More. Edit > Repeat Sharpen More.
22- Layers > New Raster Layer. Paint with color: #FFFFFF Layers > New Mask Layer > From Image.
Layers > Merge > Merge Group.
23- Activate > Raster Layer 1. Edit > Copy Especial > Copy Merged.
24- Image > Add Bordes > Symmetric: 1 px > color: #6c3e5a (Foreground). 2 px > color: #af96b6 (Background). 1 px > color: #6c3e5a (Foreground). Selections > Select All.
25- Image > Add Borders > Symmetric: 40 px > any color. Selections > Invert. Edit > Paste Into Selection.
26- Selections > Promoted Selection to Layer. Adjust > Blur > Radial Blur.
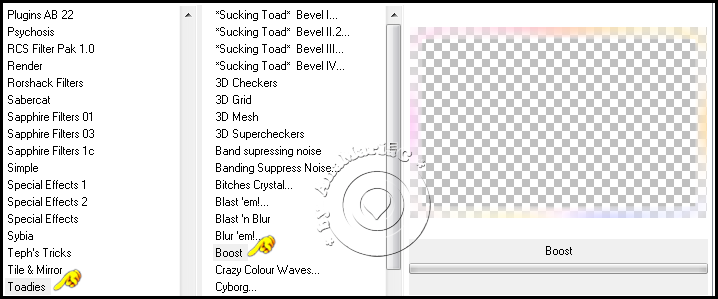
27- Effects > Plugins > Toadies > Boost.
Selections > Invert. Effects > 3D Effects > Drop Shadow: 0 / 0 / 100 / 60 / Color: #6c3e5a (Foreground). Selections > Select None.
28- Edit > Copy the Decor1_simpsp_forever. Edit > Paste as New Layer.
29- Open the WordArt "base_decor2_titulo_simpsp_forever".
30-
Hide the visibility of the Layers: Background / Credits.
31- Edit > Copy the main tube_SIMPSP.
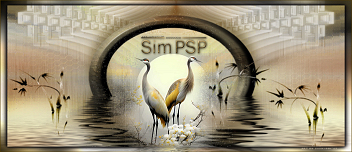
32- Finalize:
Version by Soxikibem - Owner SIM PSP
Credits: Turoeial by AnaMariaC Main Tag: Materials by AnaMariaC Version Credits: Main Tube: Tubedy by Pqna&Alice
I will be delighted to publish them on our website.
|