|
TRADUÇÕES:
Obrigada aos nossos Tradutores
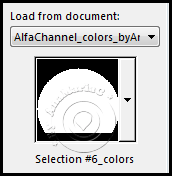
MATERIAL: AlfaChannel_colors_byAnaMariaC 1 tube principal à sua escolha. 1 Misted à sua escolha 1 gradiente_fore_2 Outros Materiais by AnaMariaC
PLUGINS: Plugins > Flaming Pear > Flexify 2 / Flexify Effects > Plugins > Toadies > Boost. Plugins > Special Effects > Shiver. Plugins > Simple > Half Warp. Efeitos do PSP
********* Este Tutorial foi escrito
por Ana Maria C, qualquer semelhança é mera coincidência. ******** Tutorial testado por Soxikibem e revisado por Márcinha. ********
********
02- Escolha as cores para trabalhar: Foreground: #6c3e5a / Background: #af96b6 Cores extras: cor 3: #b2a324 / cor 4: #93b896 / cor 5: #3477aa
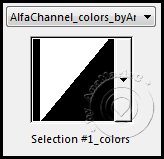
03- Ative o Alfa Channel, duplique e feche o original. Selections > Load/Save Selections > Load Selection from Alpha Channel: seleção1_colors.
Pintar com a cor: #6c3e5a (Foreground). Selections > Select None.
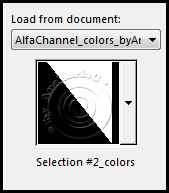
04- Selections > Load/Save Selections > Load Selection from Alpha Channel: selection#2_color
Pintar com a cor 3: #b2a324 Selections > Select None.
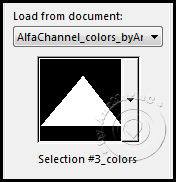
05- Selections > Load/Save Selections > Load Selection from Alpha Channel: selection#3_color
Pintar com a cor 4: #93b896 Selections > Select None.
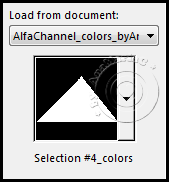
06- Selections > Load/Save Selections > Load Selection from Alpha Channel: selection#4_color
Pintar com a cor 5: #3477aa Selections > Select None.
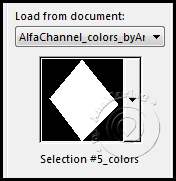
07- Selections > Load/Save Selections > Load Selection from Alpha Channel: selection#5_color
Pintar com a cor: #af96b6 (Background). Selections > Select None.
08- Adjust > Blur > Gaussian Blur > Radius: 50
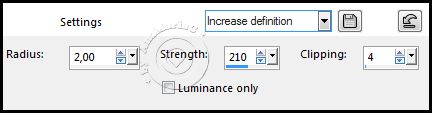
09- Adjust > Sharpness > Unsharp Mask.
Layers > Duplicate.
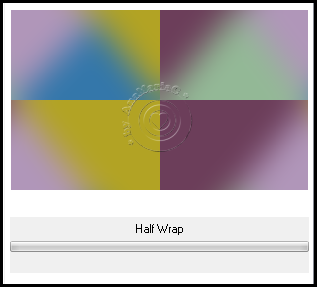
10- Effects > Plugins > Simple > Half Warp.
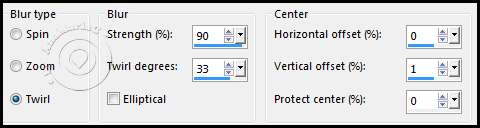
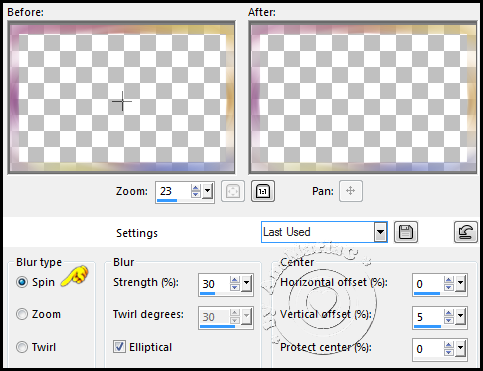
11- Adjust > Blur > Radial Blur.
Layers > Properties > General > Blend Mode: Overlay > Opacity: 100 Ou outro que combine com seu trabalho.
12- Layers > Merge > Merge Down.
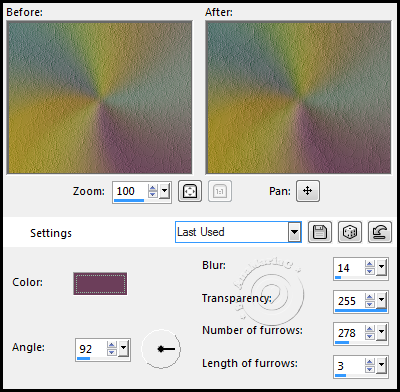
13- Effects > Texture Effects > Fine Leather.
Adjust > Sharpness > Sharpen More.
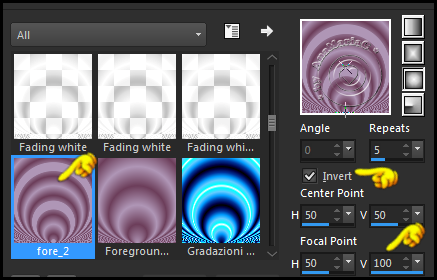
14- Layers > New Raster Layer. Pintar com um gradiente > Sunburst _Fore_2.
Layers > Layer Duplicate. Image > Mirror > Mirror Vertical. Layers > Properties > General > Blend Mode: Solf Light > Opacity: 100 Layers > Merge > Merge Down.
15- Selections > Load/Save Selections > Load Selection from Alpha Channel: selection#6_color
Aperte a tecla delete no seu teclado. Selections > Select None. Layers > Properties > General > Blend Mode: Soft Light > Opacity: 100
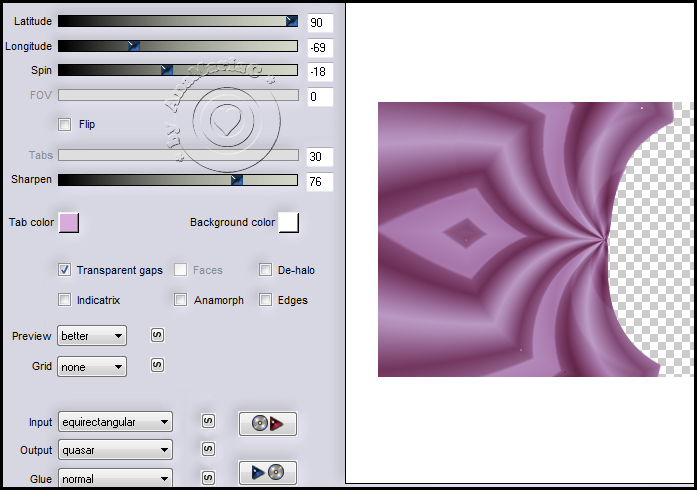
16- Effects > Plugins > Flaming Pear > Flexify 2.
17- Layers > Duplicate. Image > Mirror > Mirror Horizontal. Layers > Merge > Merge Down.
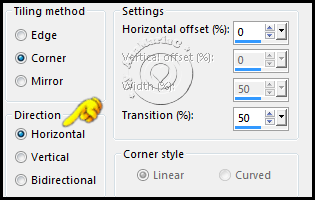
18- Effects > Image Effects > Seamless Tiling.
Layers > Duplicate.
19- Effects > Plugins > Flaming Pear > Flexify.
Layers > Properties > General > Blend Mode: Hard Light > Opacity: 70 Layers > Merge > Merge Down. Effects > Edge Effects > Enhance More.
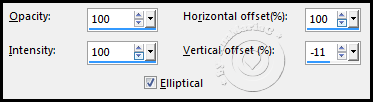
20- Effects > Reflection Effects > Feedback.
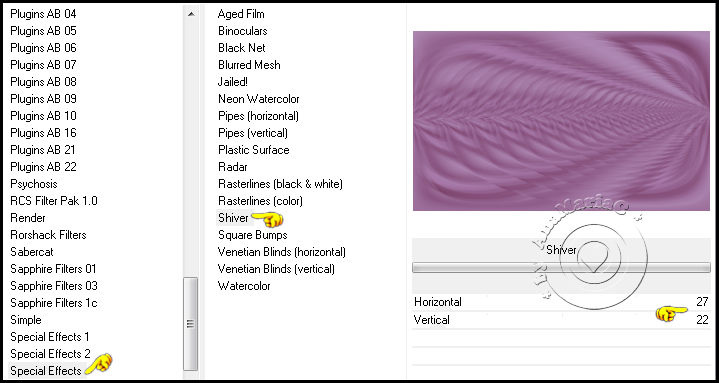
21- Effects > Plugins > Special Effects > Shiver.
Layers > Properties > General > Blend Mode: Hard Light > Opacity: 70 NOTA: Aqui você pode mudar o Blend de acordo com seu trabalho. Na versão eu mudei para Luminance (Legacy) > Opacity: 70 Adjust > Sharpness > Sharpen More. Edit > Repeat Sharpen More.
22- Layers > New Raster Layer. Pintar com a cor: #FFFFFF Layers > New Mask Layer > From Image.
Layers > Merge > Merge Group.
23- Ativar > Layer Raster 1. Edit > Copy Especial > Copy Merged.
24- Image > Add Bordes > Symmetric: 1 px > cor: #6c3e5a (Foreground). 2 px > cor: #af96b6 (Background). 1 px > cor: #6c3e5a (Foreground). Selections > Select All.
25- Image > Add Bordes > Symmetric: 40 px > qualquer cor. Selections > Invert. Edit > Paste Into Selection.
26- Selections > Promoted Selection to Layer. Adjust > Blur > Radial Blur.
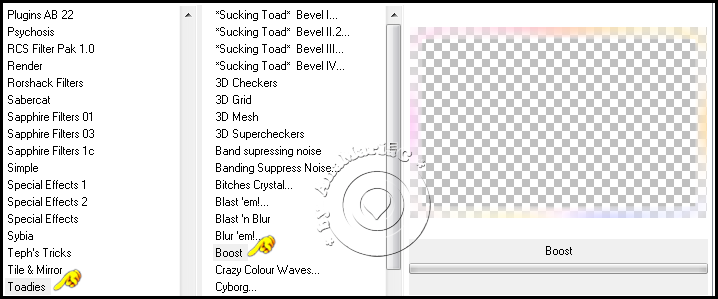
27- Effects > Plugins > Toadies > Boost.
Selections > Invert. Effects > 3D Effects > Drop Shadow: 0 / 0 / 100 / 60 / Cor: #6c3e5a (Foreground). Selections > Select None.
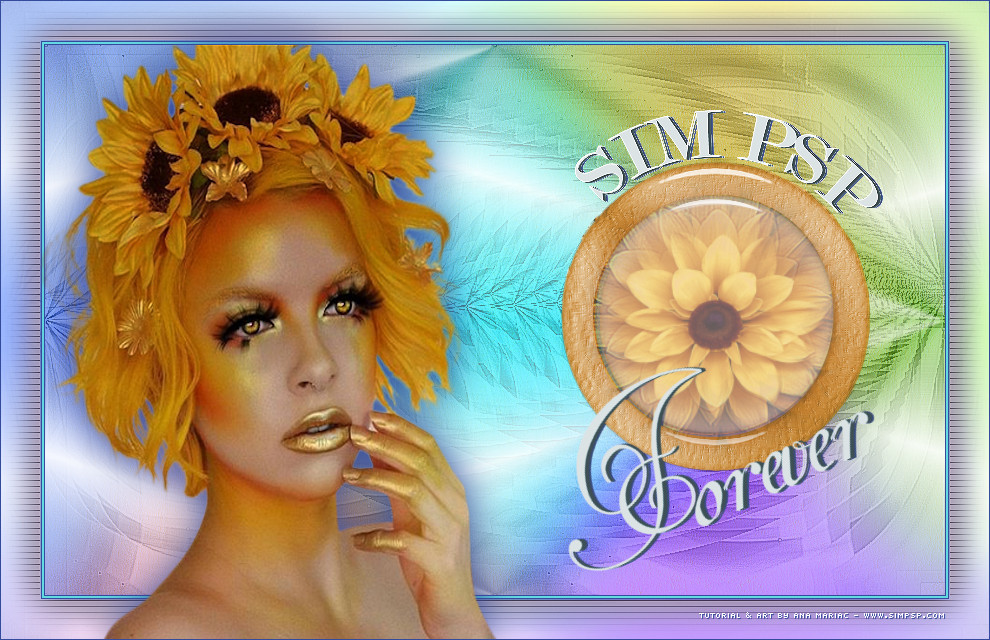
28- Edit > Copy no Decor1_simpsp_forever. Edit > Paste as New Layer.
29- Abra o WordArt base_ decor2_titulo_simpsp_forever.
30- Feche a visibilidade das Layers: Fundo / Créditos. Ative a Layer > Seleção. Edit > Copy no misted ou tube. Edit > Paste Into Selection. Resize ou posicione a seu gosto. Adjust > Sharpness > Sharpen no tube. Selections > Select None . Layers > Merged > merged Visible. Edit > Copy. Edit > Paste Paste As New Layer no seu trabalho. Posicione a seu gosto.
31- Edit > Copy no tube principal_SIMPSP. Edit > Paste as New Layer. Adjust > Sharpness > Sharpen. Posição > Rezise > Drop Shadow a seu gosto. Apliquei o Drop Shadow: 0 / 0 / 100 / 60 / Cor: #6c3e5a (Foreground).
32- Finalizar Image > Add Borders > Symmetric: 1 px > cor: #6c3e5a (Foreground).
33- Se você desejar redimensione seu trabalho. Aplicar sua marca d'água ou assinatura. File > Export > JPEG Optimizer...
Versão:
Créditos: Formatação, Arte Final e Tutorial by AnaMariaC Tag Principal Materiais by AnaMariaC Versão: Tube principal: by NaiseM Misted flor: by Pqna&Alice
Sinta-se à vontade para enviar suas versões. Terei todo o prazer em publicá-las em nosso site.
|