|
Tutorial By Roberta Maver English Translation by Soxikibem Original Tutorial
MATERIALS:
Decor_byRobertaMaver
AlphaChannel_byRobertaMaver
Penta > Dot and Cross Simple > Diamonds. Mehdi > Sorting Tiles Photo Effex > Scanlines
Mura's Meister > Perspective Tiling
This tutorial was created by Roberta Maver, any resemblance is
purely coincidental.
*****************************
TUTORIAL
1 - Open the material in PSP, duplicate it, and close
the original.
3 - Selections > Select All. Edit > Copy the tube_mulher01.
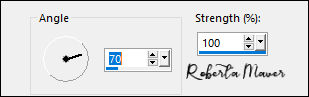
Edit > Paste Into Selection. Adjust > Blur > Motion Blur:
Edit > Repeat > Motion Blur.
4 - Layers > Duplicate. Image > Mirror > Mirror Horizontal. Layer > Properties > General > Blend Mode: Overlay - Opacity: 100% Layers > Merge > Merge Down.
5 - Adjust > Add/Remove Noise > Add Noise:
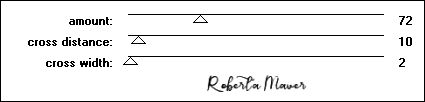
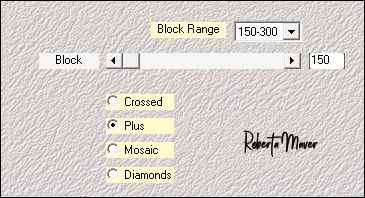
6 - Effects > Plugins > Penta > Dot and Cross:
7 - Effects > Plugins > Simple > Diamonds.
8- Effects > Plugins > Mehdi > Sorting Tiles:
9- Adjust > Add/Remove Noise > Add Noise:
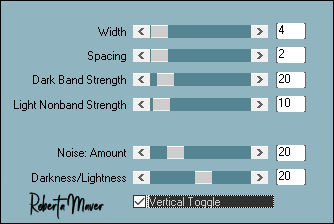
10 - Effects > Plugins > Photo Effex > Scanlines: Check the Vertical Toggle.
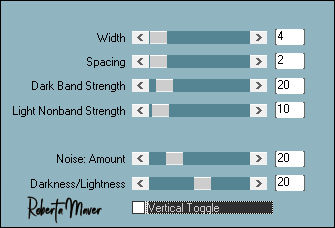
11- Effects > Plugins > Photo Effex > Scanlines: Uncheck the Vertical Toggle.
12 - Layers > New Raster Layer.
13 - Layers > New Raster Layer. Edit > Copy the Graphic. Edit > Paste Into Selection. Layer > Properties > General > Blend Mode: Luminance L - Opacity: 100% Still with the selection...
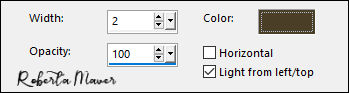
14 - Layers > New Raster Layer. Selections > Modify > Select Selection Borders:
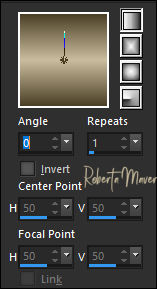
Paint with the Linear gradient formed by the colors in use.
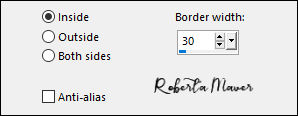
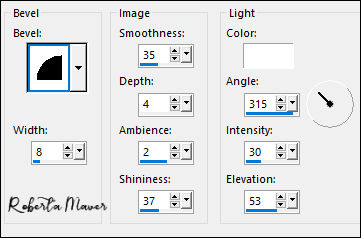
15 - Effects > 3D Effects > Inner Bevel.
Selections > Select None. Effects > 3D Effects > Drop Shadow: 0 / 0 / 100 /50, Color: #00000
16 - Activate the Raster 2 layer.
17 - Activate the Raster 4
layer (Top).
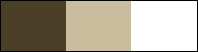
18 - Layers > New Raster Layer. Selections > Load/Save Selection > Load Selection From Alpha Channel: Selection #3 Paint with the color of the Foreground #4b3f27. Selections > Modify > Contract: 30 Edit > Copy the Graphic. Edit > Paste Into Selection. Selections > Select None. Effects > 3D Effects > Drop Shadow: 0 / 0 / 100 /50, Color: #00000 Layer > Properties > General > Blend Mode: Hard Hight - Opacity: 100%
19 - Layers > New Raster Layer. Selections > Load/Save Selection > Load Selection From Alpha Channel: Selection #4 Paint with the color of
the Background #cabd9e. Color: Foreground #4b3f27
20 - Effects > 3D Effects > Inner Bevel.
Selections > Select None. Effects > 3D Effects > Drop Shadow: 0 / 0 / 100 /10, Color: #00000
21 - Activate the Raster 1 layer. Layers > Duplicate. Layers > Arrange > Bring to Top.
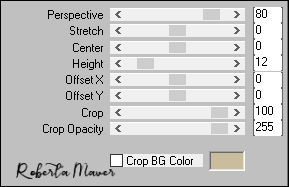
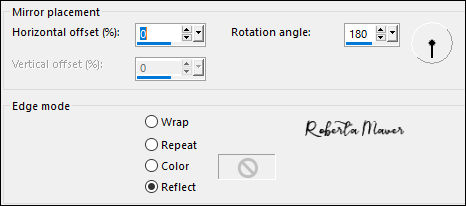
22- Effects > Plugin > Mura's Meister > Perspective Tiling:
Effects > 3D Effects > Drop Shadow: 0 / 0 / 100 /50, Color: #4b3f27 Edit > Repeat > Drop Shadow.
24 - Edit > Copy the Decor01_byRoberta. Activate the Raster 1 layer. Edit > Paste as New Layer. Layer > Properties > General > Blend Mode: Luminance L - Opacity: 100% Layers > Duplicate. Layer > Properties > General > Blend Mode: Overlay - Opacity: 100%
25 - Image > Add Borders > Symmetric:
26 - Image > Resize > By Pixels > 1000 Width (Check
"Resize All Layers").
27 - Edit > Copy the Tube Mulher02_byRobertaMaver. 30 - Image > Add Borders > Symmetric: 1 px - color: Foreground #4b3f27
Version by Márcinha - Owner SIM PSP
Credits: Tutorial by RobertaMaver
Main Tube: Tubed by
RobertaMaver Main Tube: Tubedy by Pqna&Alice
Feel free to submit your versions.
|