|
TRADUÇÕES:
Obrigada aos nossos Tradutores
MATERIAL:
AlphaChannel_byRobertaMaver
Penta > Dot and Cross Simple > Diamonds. Mehdi > Sorting Tiles Photo Effex > Scanlines
Mura's Meister > Perspective Tiling
*****************************
Tutorial testado e revisado por Márcinha (Moderação SIM PSP).
1 - Abrir o material no PSP, duplique e feche o original.
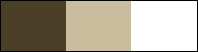
cor 3 # FFFFFF Pintar com a cor Background #cabd9e
3 - Selections > Select All. Edit > Copy no tube_mulher01.
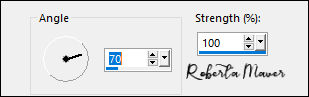
Edit > Paste Into Selection. Adjust > Blur > Motion Blur:
Edit > Repeat > Motion Blur.
4 - Layers > Duplicate. Image > Mirror > Mirror Horizontal. Layer > Properties > General > Blend Mode: Overlay - Opacity: 100% Layers > Merge > Merge Down.
5 - Adjust > Add/Remove Noise > Add Noise:
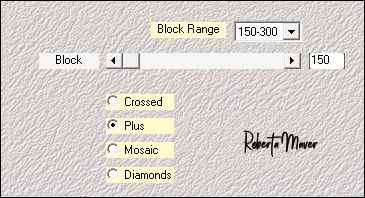
6 - Effects > Plugins > Penta > Dot and Cross:
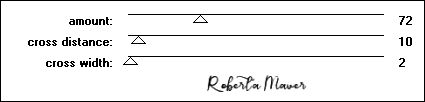
7 - Effects > Plugins > Simple > Diamonds.
8- Effects > Plugins > Mehdi > Sorting Tiles:
9- Adjust > Add/Remove Noise > Add Noise:
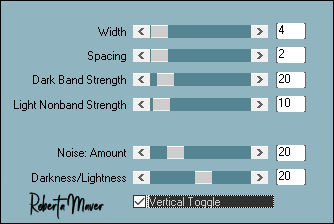
10 - Effects > Plugins > Photo Effex > Scanlines: Marcado o Vertical Toggle
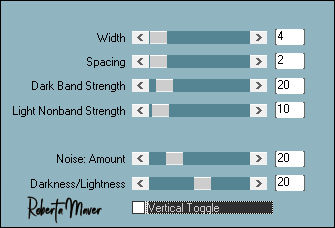
11- Effects > Plugins > Photo Effex > Scanlines: Desmarcado o Vertical Toggle
12 - Layers > New Raster Layer.
13 - Layers > New Raster Layer. Edit > Copy o Gráfico Edit > Paste Into Selection. Layer > Properties > General > Blend Mode: Luminance L - Opacity: 100% Ainda com a seleção...
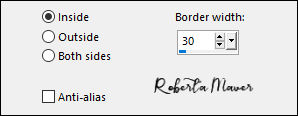
14 - Layers > New Raster Layer. Selections > Modify > Select Selection Borders:
Pintar com o gradiente Linear, formado pelas cores em uso.
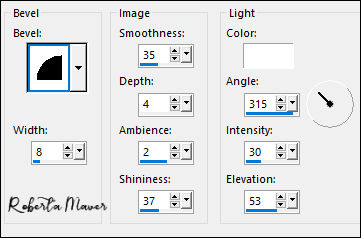
15 - Effects > 3D Effects > Inner Bevel.
Selections > Select None. Effects > 3D Effects > Drop Shadow: 0 / 0 / 100 /50, Color: #00000
16 - Ativar a layer Raster 2. Layers > Duplicate. Ativar layer Raster 2. Adjust > Blur > Gaussian Blur: 30 Layer > Properties > General > Blend Mode: Dissolve - Opacity: 100% Ativar a Copy of Raster 2. Effects > 3D Effects > Drop Shadow: 0 / 0 / 100 /50, Color: #4b3f27
17 - Ativar a layer Raster 4. (Topo) Layers > New Raster Layer. Selections > Load/Save Selection > Load Selection From Alpha Channel: Selection #2 Pintar com a cor do Background #cabd9e Selections > Modify > Contract: 30 Edit > Copy no Gráfico. Edit > Paste Into Selection. Selections > Select None. Effects > 3D Effects > Drop Shadow: 0 / 0 / 100 /50, Color: #00000 Layer > Properties > General > Blend Mode: Overlay - Opacity: 100%
18 - Layers > New Raster Layer. Selections > Load/Save Selection > Load Selection From Alpha Channel: Selection #3 Pintar com a cor do Foreground #4b3f27 Selections > Modify > Contract: 30 Edit > Copy no Gráfico Edit > Paste Into Selection. Selections > Select None. Effects > 3D Effects > Drop Shadow: 0 / 0 / 100 /50, Color: #00000 Layer > Properties > General > Blend Mode: Hard Hight - Opacity: 100%
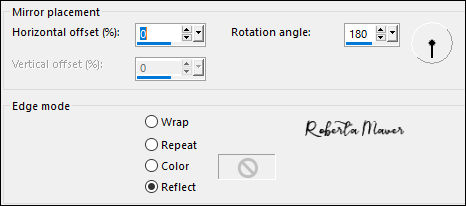
19 - Layers > New Raster Layer. Selections > Load/Save Selection > Load Selection From Alpha Channel: Selection #4 Pintar com a cor do Background #cabd9e Effects > Texture Effects > Blinds. Cor Foreground #4b3f27
20 - Effects > 3D Effects > Inner Bevel.
Selections > Select None. Effects > 3D Effects > Drop Shadow: 0 / 0 / 100 /10, Color: #00000
21 - Ativar a Raster 1. Layers > Duplicate. Layers > Arrange > Bring to Top.
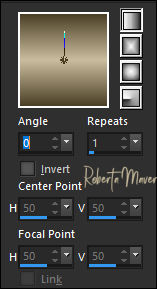
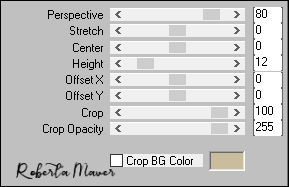
22- Effects > Plugin > Mura's Meister > Perspective Tiling:
Effects > 3D Effects > Drop Shadow: 0 / 0 / 100 /50, Color: #4b3f27 Edit > Repeat > Drop Shadow.
24 - Edit > Copy no Decor01_byRoberta. Ativar a Raster 1. Edit > Paste as New Layer. Layer > Properties > General > Blend Mode: Luminance L - Opacity: 100% Layers > Duplicate. Layer > Properties > General > Blend Mode: Overlay - Opacity: 100%
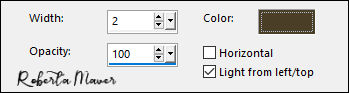
25 - Image > Add Borders > Symmetric:
26 - Image > Resize > By Pixels > 1000 Width (Marcando
"Resize All Layers").
27 - Edit > Copy no Tube Mulher02_byRobertaMaver.
30 - Image > Add Borders > Symmetric: 1 px - color: Foreground #4b3f27
Créditos
Sinta-se à vontade para enviar suas versões. Terei todo o prazer em publicá-las em nosso site.
|