|
Tutorial By Inácia Neves and Soxikibem English Translation by SIM-PSP moderation Original Tutorial
MATERIAL 1 Main Tube of your choice 1 Image landscape JPG of your choice 1 Tube landscape of your choice Narah_Mask_1496 NarahsMasks_1521
PLUGINS AAA Frames Mura's Meister PSP Effects and Tools
TUTORIAL
01- Open the material on the PSP, duplicate and close the original.
02- Open a transparent image of 1000x550px. Selections > Select All. Edit > Copy at Image Landscape. Edit > Paste Into Selection. Selections > Select None.
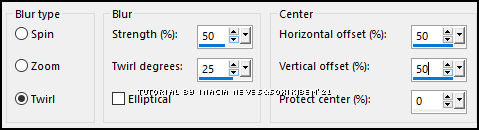
03 - Adjust > blur > Radial Blur.
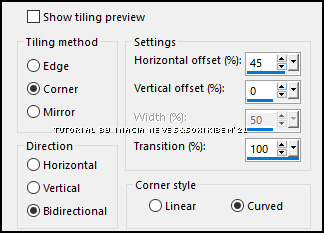
04 - Effects > Image Effects > Seamless Tiling.
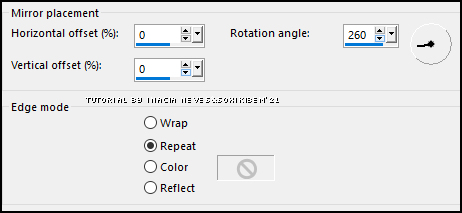
05 - Effects > Reflection Effects > Rotating Mirror.
06 - Layers > Duplicate. Activate the Layer Raster 1. Adjust > Add/Remove Noise > Add Noise: Uniform, Noise 20, Monochrome checked.
07 - Activate the Laye Copy of Raster 1. Effects > Plugins > Mura's Meister > Pole Transform.
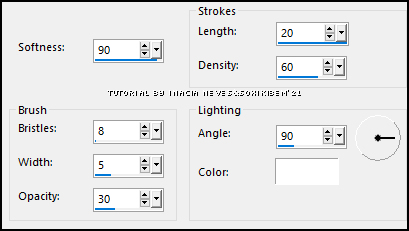
08 - Effects > Distortion Effects > Polar Coordinates: Polar to rectangular. Effects > Art Media effects > Brush Strokes.
Layers > Properties > General: Opacity 75%.
09 - Layers > New Raster Layer. Paint with color #FFFFFF (White) Layers > New Mask Layer > From Image: Narah_Mask_1496. Layers > Merge > Merge Group. Layers > Properties > General > Blend Mode: Overlay.
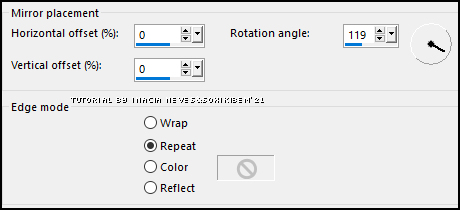
10 - Effects > Reflection Effects > Rotating Mirror.
Effects > Image Effects > Seamless Tiling: Default.
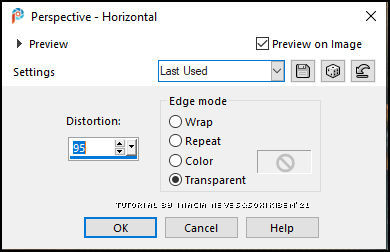
11 - Activate the Layer Raster 1. Layers > Duplicate Layers > Arrange > Bring to Top Effects > Geometric Effects > Perspective - Horizontal
Image > Mirror > Mirror Horizontal Repeat the Effects > Geometric Effects > Perspective - Horizontal with the same values.
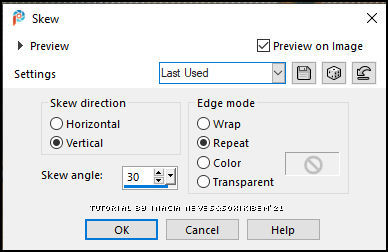
12 - Effects > Geometric Effects > Skew
Layers > Duplicate Image > Mirror > Mirror Horizontal Layers > Merge Down
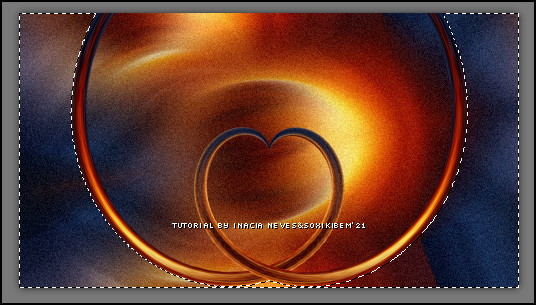
13 - Effects > Mura's Meister > Pole Transform
14 - With the tool Magic Wand, Tolerance e Feather: 0, select the outside of the effect, indicated on the print.
Selections > Modify > Expand > Number of pixels: 5 Layers > New Raster Layer With the tool Food Fill (bucket)
Paint with color #FFFFFF (White) (Return the opacity value to 100) Selections > Select None.
15 - Layers > New Mask Layer > From Image: Narah_Mask_1521. Effects > Edge Effects > Enhance More Layers > Merge > Merge Group. Layers > Arrange > Move Down Repeat Layers > Arrange > Move Down Layers > Properties > General > Blend Mode: Hard Light or of your choice
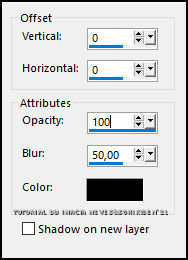
16 - Activate the top layer (heart effect layer = Copy of Raster 1) Effects > 3D Effects > Drop Shadow
17 - Apply the Nevoa mask or other mask you prefer to the JPG Image you are using. Edit > Copy Activate your work Edit > Paste as new layer With the Pick tool, adjust this image to your liking. Adjust > Sharpness > Sharpen Layers > Arrange > Move Down
18 - Activate the Misted Landscape, or the decor of your choice Edit > Copy Activate your work Edit > Paste as New Layer (depending on the tube chosen, a Blend Mode of your choice can be used to blend into the image) Position and, if you want, use Drop Shadow to your liking. Layers > Arrange > Move Down
19 - Activate the main tube Edit > Copy Activate the job and the top layer Edit > Paste as New Layer. With the Pick tool, position the tube Effects > 3D Effects > Drop Shadow of your choice.
20 - Layers > Merge > Merge All
21 - Image > Add Borders > 1 px > Symmetric > Color #000000 (black)
22 - Image > Add Borders > 60 px > Symmetric > Color #FFFFFF (White)
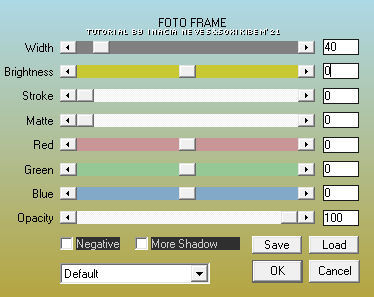
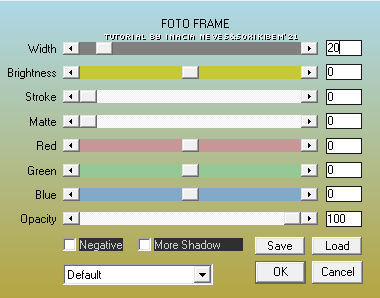
23 - Effects > Plugins > AAA Frames > Foto Frame
24 - Effects > Plugins > AAA Frames > Foto Frame
25 - Apply your watermark or signature. File > Export > JPEG Optimizer.
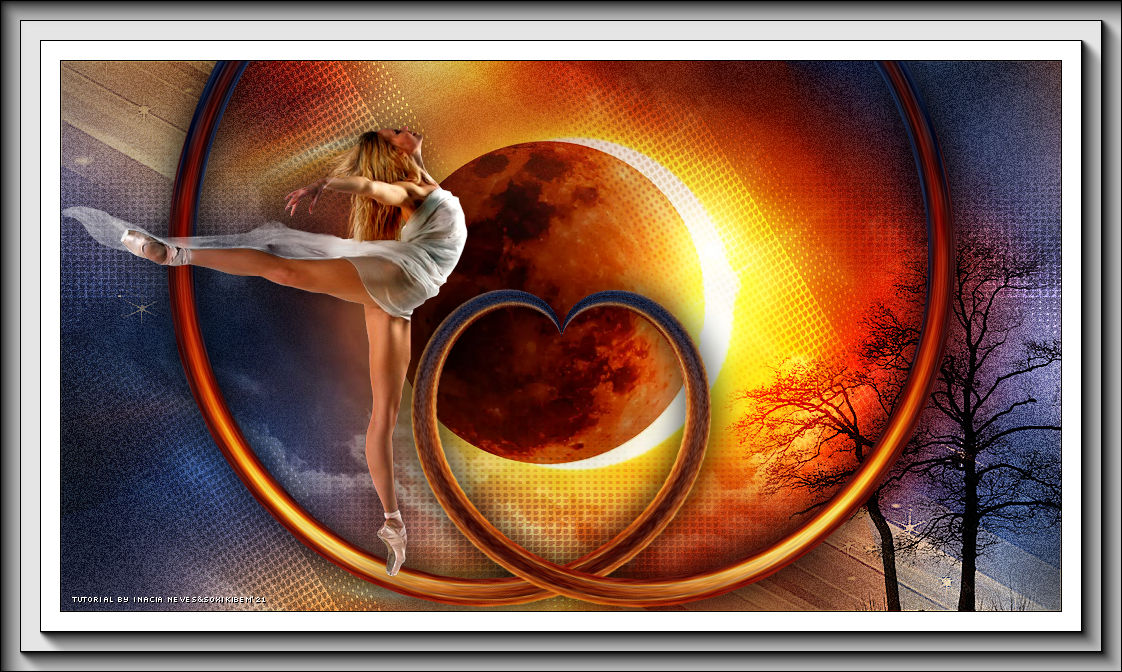
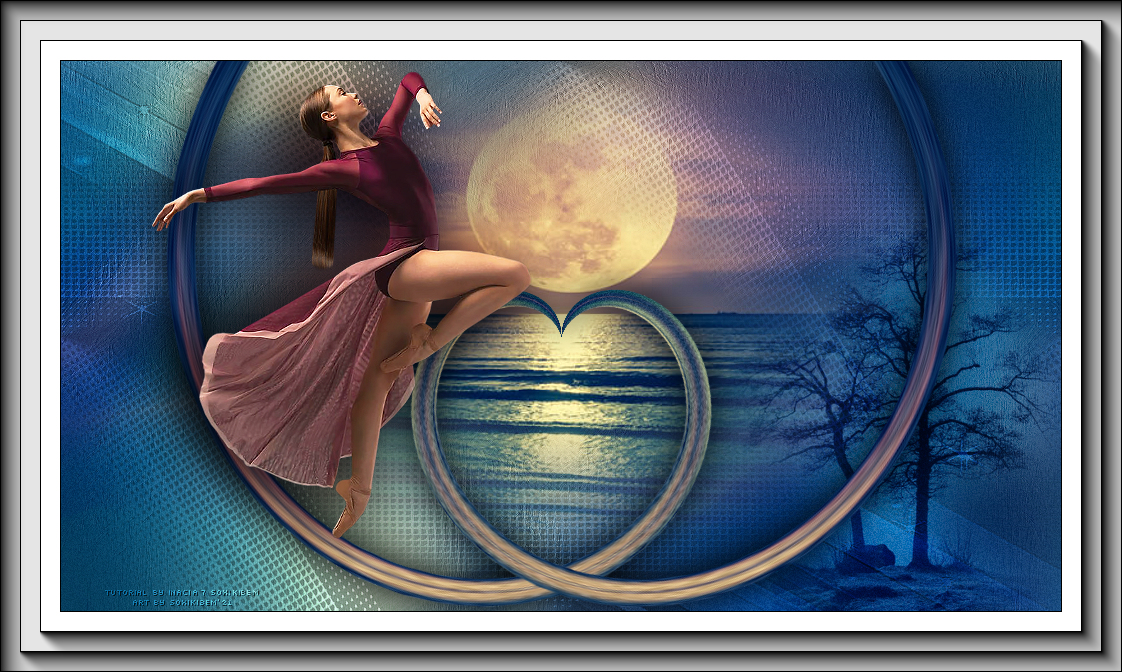
CRÉDITS Tutorial & Art by InaciaNeves & Soxikibem'21 Tube by anna.br - Solar Eclipse Landscape here Misted Landscape by Nicole
Version by Inacia Neves 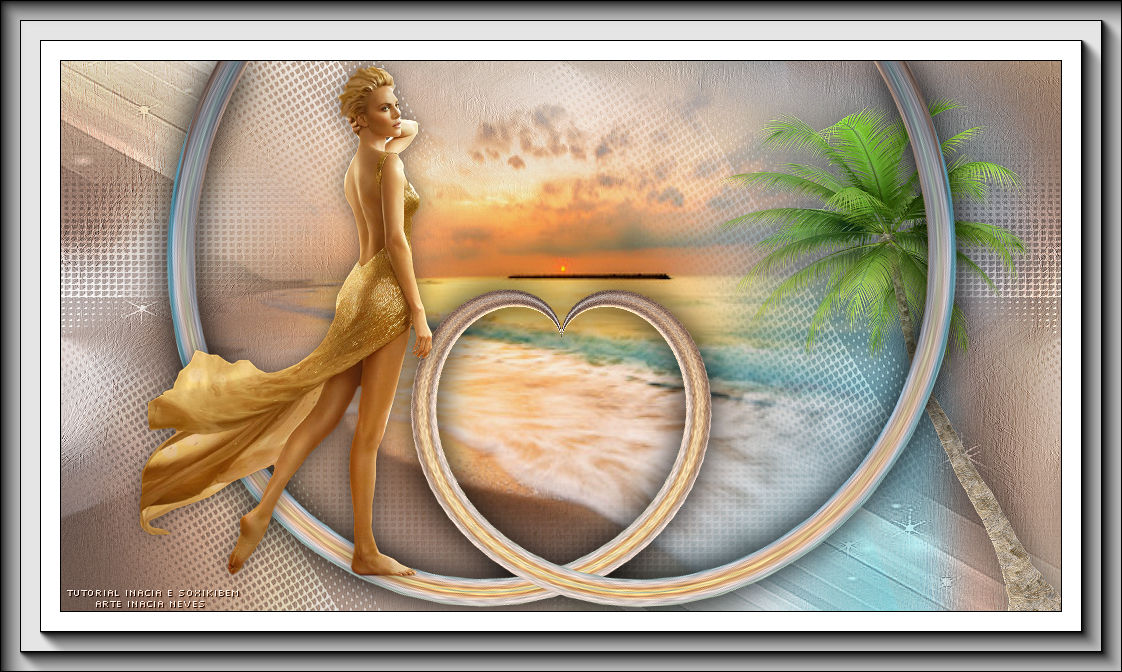
CRÉDITS Art by InaciaNeves Tube by C-Josy - Landscape Sunrise Here Misted Coconut tree received in group of exchanges without authorship
Version by Soxikibem
CRÉDITS Art by Soxikibem Tube by Lily - Landscape HereMisted by Nicole
Feel free to send your versions.
|