|
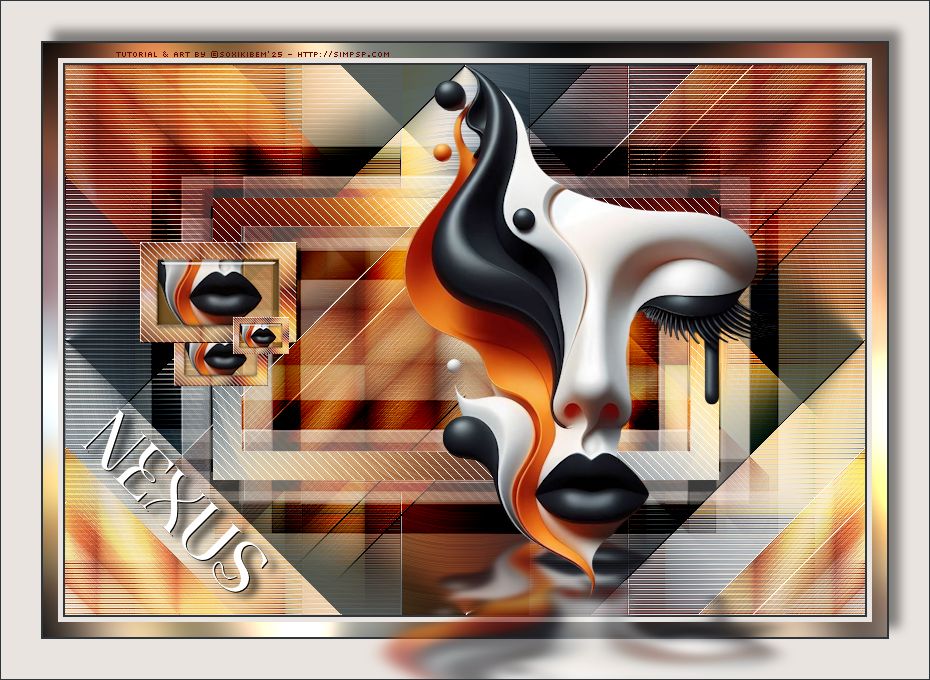
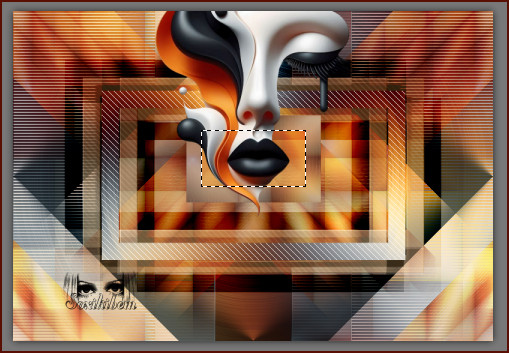
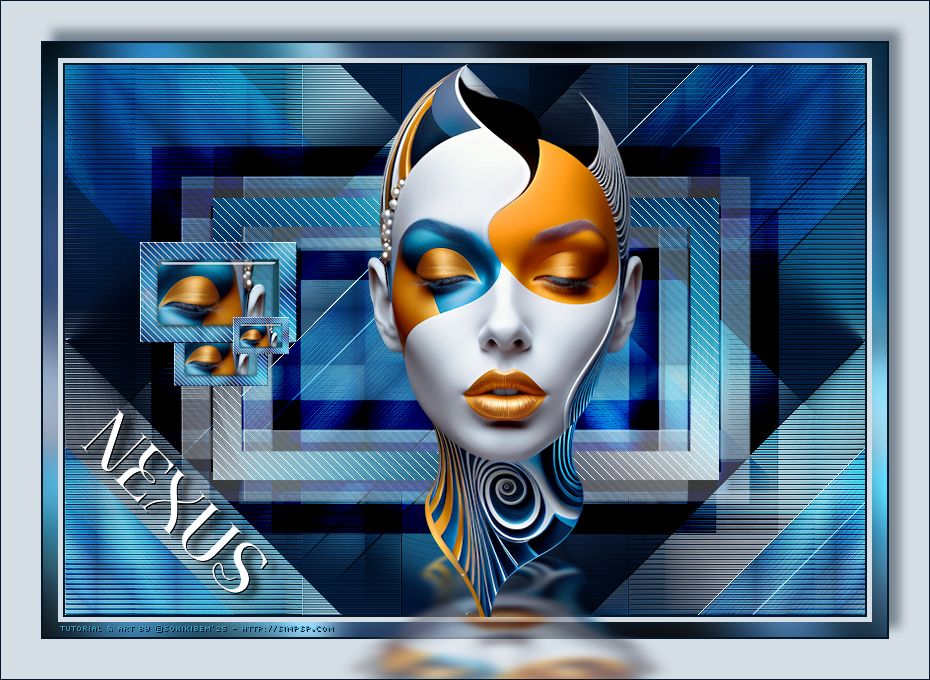
In the heart of chaos, a silent connection. "Nexus" is the place where color and form embrace, where the fleeting moment and eternity dance together. A visual whisper that connects what we see with what we feel. TRANSLATIONS:
SIM PSP
values and recognizes the work of the translators who make these
tutorials accessible in different languages.
MATERIAL: 1 Main Tube or any character of your choice Mask by Narah Other Materials by Soxikibem
PLUGINS: Alien Skin Eye Candy 5 > Impact > Glass, Perspective Shadow AP [Lines] > Silver Lining Filters Unlimited 2.0 > Bkg Designer sf10 I > Circus Maximus, Cruncher Graphics Plus > Cross Shadow Mehdi > Wavy Lab 1.1, Sorting Tiles Mura's Seamless > Emboss at Alpha
Tutorial created with PSP 2022 Tested and reviewed by Márcinha using PSP 2020.
I would like to thank all tube artists for their beautiful Tubes and Masks, as this tutorial would
not have been possible without their work. and preserve all proper
credits.
TUTORIAL 1 - Open all the supplied materials in PSP, duplicate them, and close the originals.
*Delete the watermark from all supplied
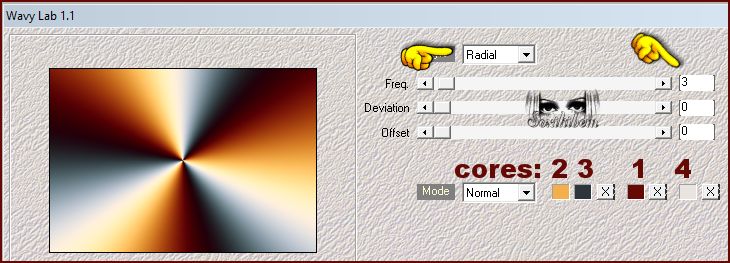
materials. Color 3: #2e363b Color 4: #e9e4e0
2 - Open Alpha313_Xiki.
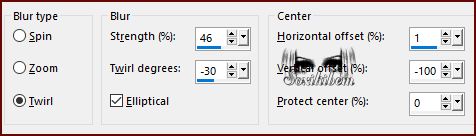
3 - Adjust > Blur > Radial Blur.
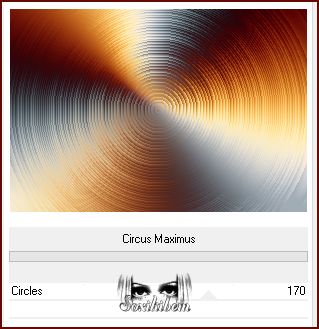
4 - Filters Unlimited 2.0 > Bkg Designer sf10 I > Circus Maximus.
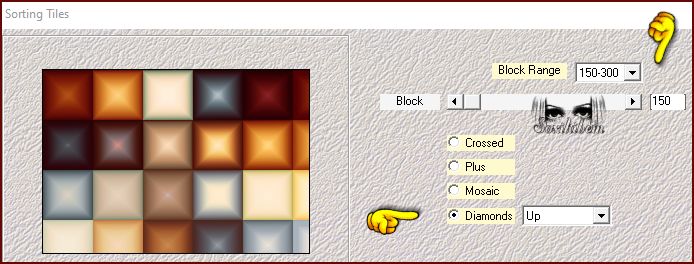
5 - Layers > Duplicate. Plugin Mehdi > Sorting Tiles.
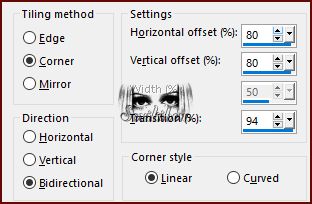
6 - Effects > Image Effects > Seamless Tiling.
7 - Layers > New Mask Layer > From Image: Narah_Mask_1338. Effects > Edge Effects > Enhance. Layers > Merge > Merge Group.
8 - Effects > 3D Effects > Drop Shadow: 1, 1, 100, 0, Color 4.
9 - Selections > Load/Save Selections > Load Selection From Alpha Channel: Selection #1. Activate Raster 1. Selections > Promote Selection to Layer. Layers > Arrange > Move Up.
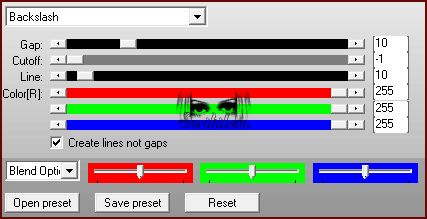
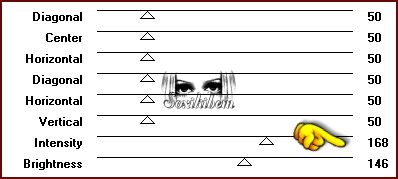
10 - Plugin AP [Lines] > Lines - SilverLining.
Selections > Select None.
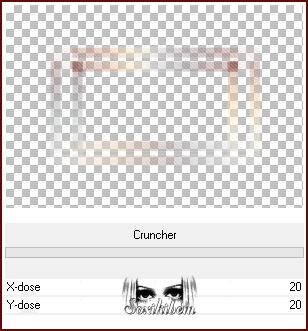
11 - Layers > Duplicate. Activate the Promote Selection layer. Filters Unlimited 2.0 > Bkg Designer sf10 I > Cruncher: Default.
12 - Plugin Mura's Seamless > Emboss at Alpha: Default.
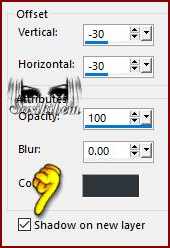
13 - Effects > 3D Effects > Drop Shadow. Color 3.
Layers > Properties > General > Blend Mode: Burn, Opacity 100%.
14 - Layers > Duplicate. Image > Mirror > Mirror Horizontal. Image > Mirror > Mirror Vertical.
15 - Selections > Load/Save Selections > Load Selection From Alpha Channel: Selection #2. Activate the layer Group - Copy of Raster 1. Selections > Promote Selection to Layer. Selections > Select None.
16 - Effects > Image Effects > Seamless Tiling.
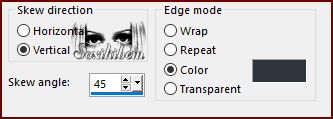
17 - Effects > Geometric Effects > Skew. Color 3.
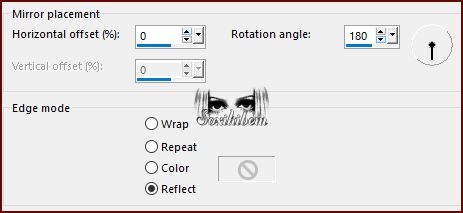
18 - Effects > Reflection Effects > Rotating Mirror.
19 - Effects > Image Effects > Seamless Tiling: Default. Layers > Properties > General > Blend Mode: Hard Light, Opacity 100%.
20 - Plugin Mura's Seamless > Emboss at Alpha: Default.
21 - Selections > Load/Save Selections > Load Selection From Alpha Channel: Selection #2. Activate layer Group - Copy of Raster 1. Selections > Promote Selection to Layer. Selections > Select None. Layers > Arrange > Bring to Top.
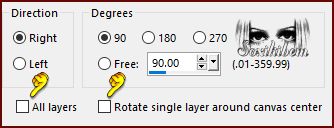
22 - Image > Free Rotate.
23 - Selections > Load/Save Selections > Load Selection From Alpha Channel: Selection #3. Press Delete on your Keyboard (or Edit > Cut). Selections > Select None.
24 - Selections > Load/Save Selections > Load Selection From Alpha Channel: Selection #4. Press Delete on your Keyboard (or Edit > Cut). Layers > New Raster Layer.
25 - Flood Fill > Opacity 50%. Fill the selection with the Background color. Return the Flood Fill opacity to 100%
26 - Edit > Copy your chosen tube. Edit > Paste As New Layer.
If you are using the supplied tube, resize it to 50%.
27 - Selections > Invert. Press Delete on your Keyboard (or Edit > Cut). Selections > Invert.
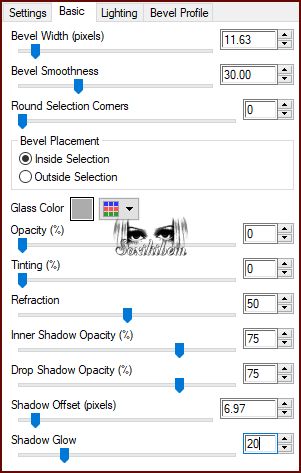
28 - Plugin Alien Skin Eye Candy 5 > Impact > Glass. Settings: Clear Basics: Use the same settings in the screenshot below.
Selections > Select None.
29 - Activate the Layer Promoted Selection 2. Selections > Load/Save Selections > Load Selection From Alpha Channel: Selection #5. Plugin AP [Lines] > Lines - SilverLining.
30 - Layers > Duplicate. Layers > Properties > General > Blend Mode: Overlay, Opacity 100%. Selections > Select None. Layers > Merge > Merge Down.
31 - Activate Layer Raster 3 (Top Layer). Layers > Merge > Merge Down twice.
32 - Image > Resize: 70%, Resize all layers Unchecked. Plugin Mura's Seamless > Emboss at Alpha: Default.
33 - Pick Tool: Position X: 75, Position Y: 177. Layers > Duplicate.
34 - Image > Resize: 60%, Resize all layers Unchecked. Pick Tool: Position X: 109, Position Y: 260. Layers > Arrange > Move Down.
35 - Layers > Duplicate. Image > Resize: 60%, Resize all layers Unchecked. Layers > Arrange > Bring to Top. Pick Tool: Position X: 168, Position Y: 252. Adjust > Sharpness > Sharpen.
36 - Edit > Copy Special > Copy Merged.
37 - Image > Add Borders > Symmetric: 2px Color 3 5px Color 4
38 - Selections > Select All. Image > Add Borders > Symmetric: 15px, any color. Selections > Invert. Edit > Paste Into Selection.
39 - Adjust > Blur > Gaussian Blur: 15.
40 - Plugin Graphics Plus > Cross Shadow.
Selections > Select None.
41 - Image > Add Borders > Symmetric: 2 px, Color 3. Selections > Select All.
42 - Image > Add Borders > Symmetric: 40px, Color 4.
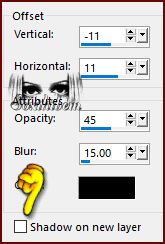
43 - Effects > 3D Effects > Drop Shadow, Color black.
Selections > Select None.
44 - Edit > Copy your chosen tube. Edit > Paste As New Layer. Resize if necessary. If you are using the supplied tube, resize it to 55%. Adjust > Sharpness > Sharpen.
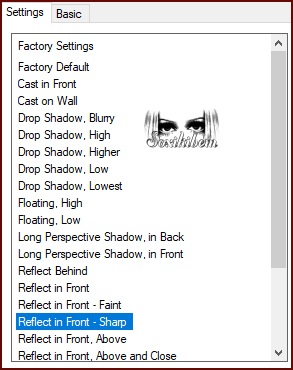
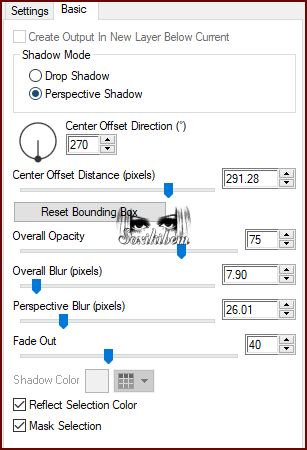
45 - Position the tube as desired and apply your preferred Drop Shadow or any effect. I used: Plugin Alien Skin Eye Candy 5 > Impact: Perspective Shadow. * Settings: Reflect in Front - Sharp
46 - Edit > Copy: TituloNexus_Soxikibem. Edit > Paste As New Layer. Pick Tool: Position X: 79, Position Y: 406.
47 - Image > Add Borders > Symmetric: 1px, Color 3.
48 - resize your work if desired.
49 - Edit > Copy: Creditos-bySoxikibem. Edit > Paste As New Layer. Position it wherever you prefer.
50 -
Add your watermart or signature.
Because every detail
matters... as a little gift for you
to use in your creations.
Version:
Credits: Formatting, Artwork & Tutorial by Soxikibem Main Tube: Tubed by Pqna&Alice Mask: by Narah Other Materials: by Soxikibem
Feel free to send me your version. It will be my pleasure to showcase your work on our website.
Send your version to: soxikibem.simpsp@gmail.com
SimPSP Social Media
|