|
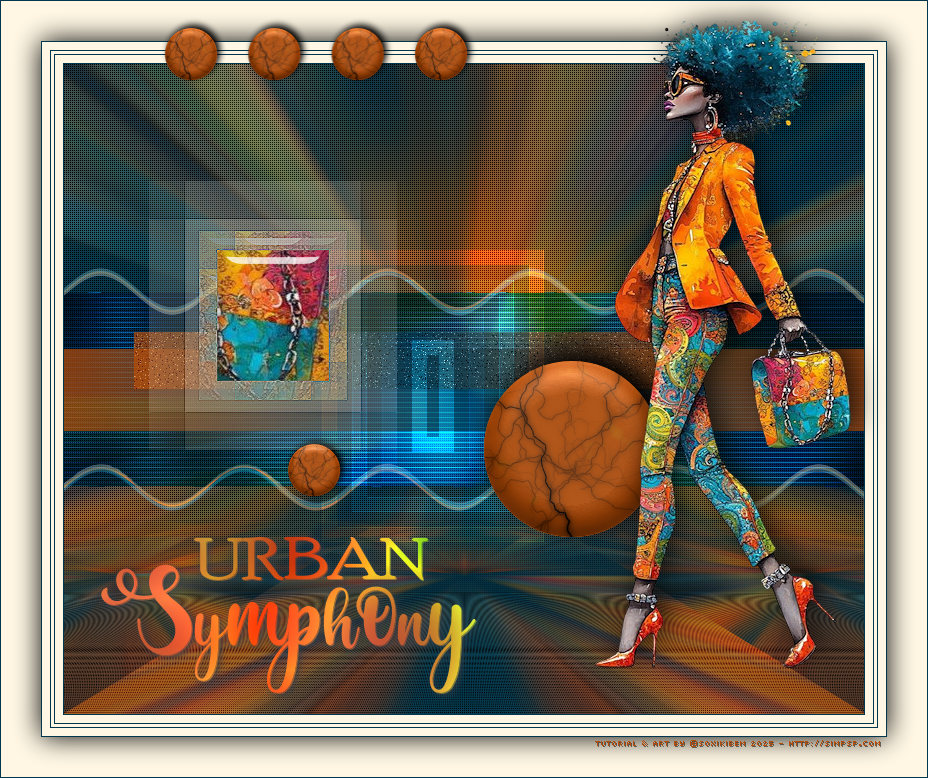
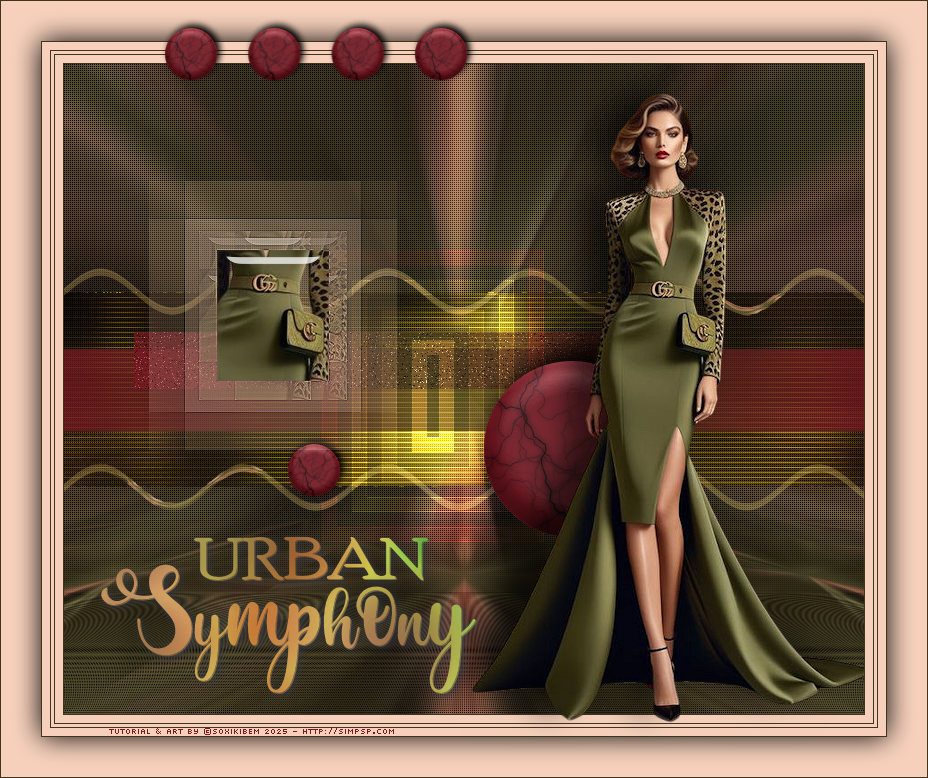
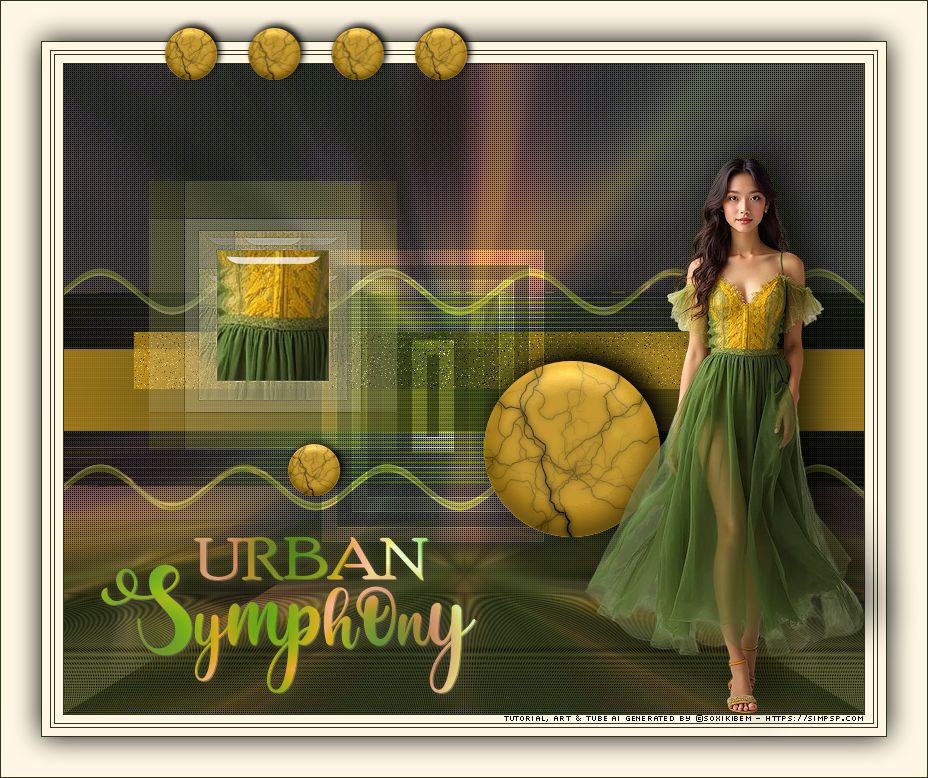
Cada passo é uma nota, cada olhar, um acorde. Sua elegância compõe a sinfonia urbana, onde arte e estilo se encontram no compasso perfeito. Her elegance composes the urban symphony, where art and style meet in perfect cadence.
TRADUÇÕES:
O Sim
PSP valoriza e reconhece o trabalho das tradutoras que tornam os
tutoriais acessíveis a diferentes idiomas.
MATERIAL: 1 Tube Principal ou Personagem à sua escolha Outros Materiais by Soxikibem
PLUGINS: AFS Import > sqborder2 Alien Skin | Eye Candy 5 > Impact > Glass Alien Skin | Eye Candy 5 > Textures > Marble Carolaine and Sensibility > cs_texture Mura's Meister > Copies Toadies > What Are You? Unlimited 2.0 > Background Designers IV > @Night Shadow
Tutorial elaborado no PSP 2022 Testado e revisado por Márcinha no PSP 2020.
Agradeço às Tubeiras pelos Tubes e Masks, pois sem eles não seria
possível criar este trabalho.
VÍDEO AULA
Se preferir acompanhar em vídeo no Youtube, clique no link
abaixo: Se este tutorial te inspirou: Deixe seu like Ative o sininho Compartilhe com outros amantes do PSP E deixe um comentário contando o que achou!
TUTORIAL Cor 3: #bb4e07 Cor 4: #fff7e4
2 - Ative a cópia
do AlphaChannel_Xiki. Selections > Select All.
3 - Edit > Copy no Tube Personagem. Edit > Paste Into Selection. Selections > Select None. Effects > Image Effects > Seamless Tiling: Default.
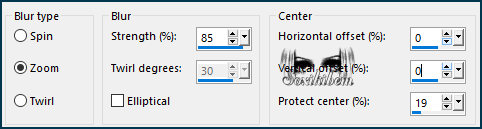
4 - Adjust > Blur > Radial Blur.
5 - Layers > Duplicate. Fechar a visibilidade da layer Copy of Raster 1. Ativar a Layer Raster 1. Plugin AFS Import > sqborder2.
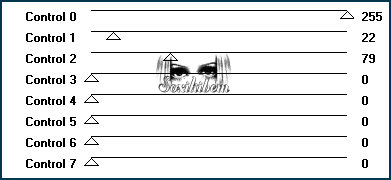
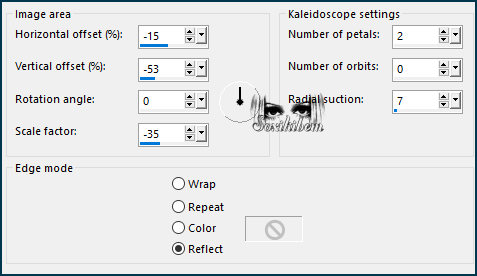
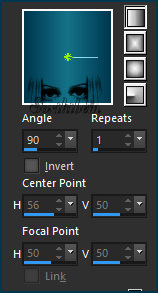
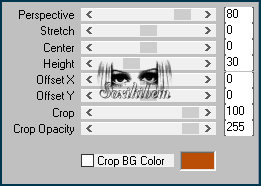
6 - Abrir e a tivar a Layer Copy of Raster 1. Effecs > Geometric Effects > Perspective - Horizontal: 99, Transparente. Repita o Perspective - Horizontal mudando para -99. Effects > Reflection Effects > Kaleidoscope.
7 - Ative a ferramenta Magic Wand > Tolerance e Feather: 0, e clique meio destas linhas para selecionar. Selections > Modify > Expand: 3. Layers > New Raster Layer. Pintar com um Gradiente Linear formado pelas cores do Foreground e Background.
8 - Plugin Carolaine and Sensibility > cs_texture.
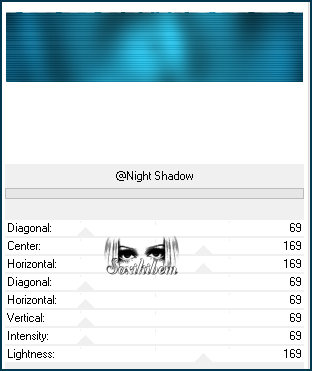
9 - Filters Unlimited 2.0 > Background Designers IV > @Night Shadow. Selections > Select None. Layers > Arrange > Move Down. Layers > Properties > General > Blend Mode: Hard Light.
10 - Ativar a Layer Copy of Raster 1. Effects > Distortion Effects > Wave. Layers > Properties > General > Blend Mode: Screen.
11 - Selections > Load/Save Selections > Load Selection From Alpha Channel: Selection #1. Layers > New Raster Layer. Ative a ferramenta Flood Fill Tool > Opacity: 70%. Pintar com um gradiente Linear formado pelas cores do Foreground e com a cor 3. Selections > Select None.
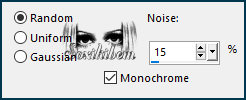
12 - Layers > Duplicate. Image > Resize: 70%, all layers desmarcado. Pick Tool: Position X: 70, Position Y: 268. Adjust > Add/Remove Noise > Add Noise.
13 - Selections > Load/Save Selections > Load Selection From Alpha Channel: Selection #2. Layers > New Raster Layer. Flood Fill Tool > Opacity: 30%. Pintar a Seleção com a cor 4. Selections > Modify > Contarct: 50.
14 - Edit > Copy no Tube Personagem. Edit > Paste as New Layer. Com a Ferramenta Move: Mova o tube deixando uma parte dentro da seleção. Eu coloquei uma parte bem colorida da bolsa. Selections > Invert. Edit > Cut ou Delete.
15 - Selections > Invert. Plugin Alien Skin | Eye Candy 5 > Impact > Glass.
Selections > Select None.
16 - Layers > Merge > Merge Down. Selections > Load/Save Selections > Load Selection From Alpha Channel: Selection #2. Selections > Modify > Contarct: 50. Selections > Invert. Plugin Toadies > What Are You?. Effects > Edge Effects > Enhance. Selections > Select None.
17 - Ativar a Layer Copy of Raster 3. Layers > New Raster Layer. Selections > Load/Save Selections > Load Selection From Alpha Channel: Selection #3. Sempre com a ferramenta Flood Fill Tool na Opacity: 40% > Pintar a Seleção com a cor 3.
Selections > Modify > Contarct: 15. Edit > Cut ou Delete.
Selections > Modify > Contarct: 15. Pintar a Seleção com a cor do Background.
Selections > Modify > Contarct: 15. Edit > Cut ou Delete.
Selections > Modify > Contarct: 15. Pintar a Seleção com a cor do Foreground.
Selections > Modify > Contarct: 15. Edit > Cut ou Delete.
Selections > Modify > Contarct: 15. Pintar a Seleção com a cor 4.
Selections > Modify > Contarct: 15. Edit > Cut ou Delete. Selections > Select None.
Layers > Properties > General > Blend Mode: Dodge. Effects > Edge Effects > Enhance.
18 - Layers > New Raster Layer. Selections > Load/Save Selections > Load Selection From Alpha Channel: Selection #4. Flood Fill Tool > Opacity: 100% > Pintar a Seleção com a cor 3.
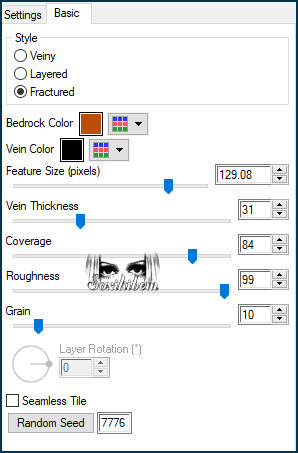
Plugin Alien Skin | Eye Candy 5 > Textures > Marble. Bedrock Color > com a cor 3 Vein Color > com a cor #000000 (Preto)
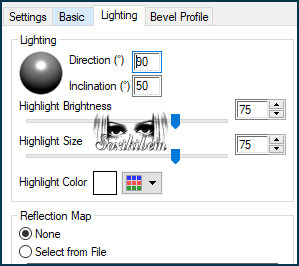
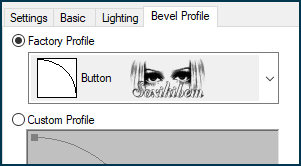
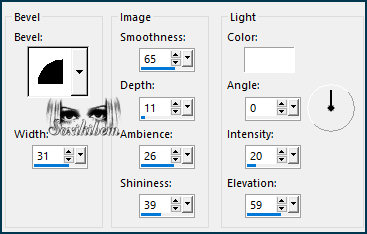
19 - Effects > 3D Effects > Inner Bevel. Selections > Select None. Effects > 3D Effects > Drop Shadow: -11, 10, 100, 35, cor #000000 (Preto).
20 - Layers > Duplicate. Image > Resize: 30%, all layers desmarcado. Adjust > Sharpness > Sharpen. Pick Tool: Position X: 219, Position Y: 369.
21 - Edit > Copy. Edit > Paste as New Image. Reserve para usarmos depois.
22 - Retornando ao nosso trabalho. Ativar a Layer Raster 1. Layers > Duplicate. Plugin Mura's Meister > Perspective Tiling.
23 - Magic Wand > Tolerance: 0, Feather: 100, clique na parte transparente da layer. Edit > Cut ou Delete 3 vezes. Selections > Select None. Effects > Reflection Effects > Rotating Mirror.
24 - Image > Add Borders > Symmetric: 1px com a cor do Foreground 8px com a cor 4 1px com a cor do Foreground 3px com a cor 4 1px com a cor do Foreground 8px com a cor 4 1px com a cor do Foreground Selections > Select All 40px com a cor 4
25 - Effects > 3D Effects > Drop Shadow: 0, 0, 100, 40, cor preta. Selections > Select None.
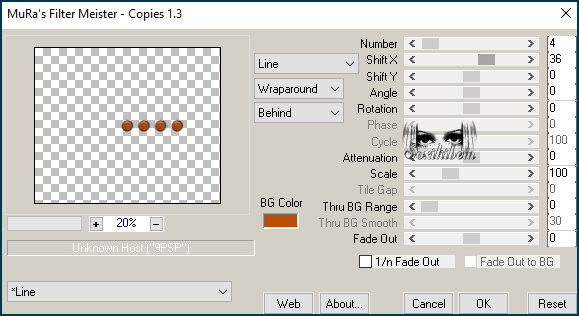
26 - Edit Copy na imagem que reservamos no passo 21. Edit > Paste as New Layer. Plugin Mura's Meister > Copies.
Pick Tool: Position X: 159, Position Y: 16.
27 - Edit > Copy no Tube Personagem. Edit > Paste as New Layer. Image > Mirror > Mirror Horizontal. Image > Resize se necessário, no tube do material o resize foi de 55%. Posicione à direita do trabalho. Aplique Drop Shadow como preferir.
28 - Edit > Copy no TituloUS_Xiki. Edit > Paste as New Layer. Pick Tool: Position X: 92, Position Y: 527.
29 - Image > Add Borders > Symmetric: 1px com a cor do Foreground.
30 -
Aplicar sua marca d'água ou assinatura.
VERSÃO 2:
Créditos Versao 1 & 2: Formatação, Arte Final e Tutorial by Soxikibem Tube Principal: Tubed by Pqna&Alice Outros Materiais: by Soxikibem
VERSÃO 3:
Créditos Versão 3: Formatação, Arte Final e Tutorial by Soxikibem Tube Principal: AI Generated by SoxikibemOutros Materiais: by Soxikibem
Sinta-se à vontade para enviar suas versões. Terei todo o prazer em publicá-las em nosso site.
Envie sua versão o e-mail:
|