|
TRADUÇÕES:
O Sim
PSP valoriza e reconhece o trabalho das tradutoras que tornam os
tutoriais acessíveis a diferentes idiomas.
MATERIAL: 1 Tube Personagem à sua escolha 1 Misted Paisagem à sua escolha NarahMasks: NarahsMasks_1569 Outros Materiais by Soxikibem
*Salvar as seleções na pasta Selections do PSP
PLUGINS: Unlimited 2.0 > &Bkg Kaleidoscope > 4QFlipZBottomL Italian Editors Effect > Effeto Fantasma Mehdi > Sorting Tiles Mock > Windo Mura's Meister > Perspective Tiling Simple > Pizza Slice Mirror
Tutorial elaborado no PSP 2022 Testado e revisado por Inácia Neves no PSP 2022.
Agradeço às Tubeiras pelos Tubes e Masks, pois sem eles não seria
possível criar este trabalho.
VÍDEO AULA
Se preferir acompanhar em vídeo no Youtube, clique no link
abaixo: Se este tutorial te inspirou: Deixe seu like Ative o sininho Compartilhe com outros amantes do PSP E deixe um comentário contando o que achou!
2 - Abra uma imagem
transparente de 800x550px. Selections > Select All. Edit > Copy no Misted Paisagem. Edit > Paste Into Selection. Selections > Select None.
3 - Effects > Image Effects > Seamless Tiling: Side by Side.
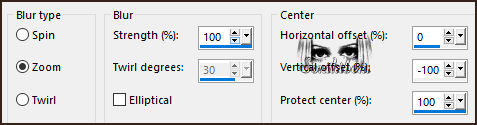
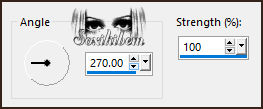
4 - Adjust > Blur > Radial Blur.
5 - Effects > Edge Effects > Enhance. Edit > Repeat Enhance Edges. Layers > Duplicate. Image > Mirror > Mirror Vertical. Layers > Properties > General > Blend Mode: Darken. Layers > Merge > Merge Down.
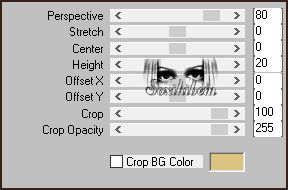
6 - Layers > Duplicate. Plugin Mura's Meister > Perspective Tiling.
7 - Objects > Align > Center in Canvas. Magic Wand > Tolerance: 0 - Feather: 60, clique na parte de baixo desse efeito. Aperte a tecla Delete por 5 vezes. Selections > Select None.
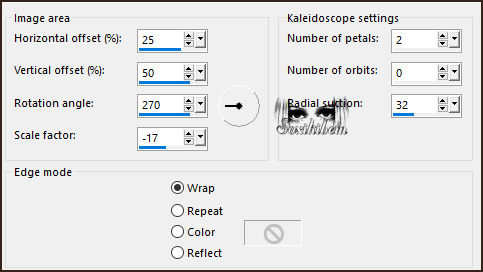
8 - Layers > Duplicate. Fechar a visibilidade da layer Copy (2) of Raster 1. Ativar a Layer Copy of Raster 1. Effects > Reflection Effects > Kaleidoscope.
9 - Layers > Duplicate. Plugin Italian Editors Effect > Effeto Fantasma. Layers > Properties > General > Blend Mode: Dodge
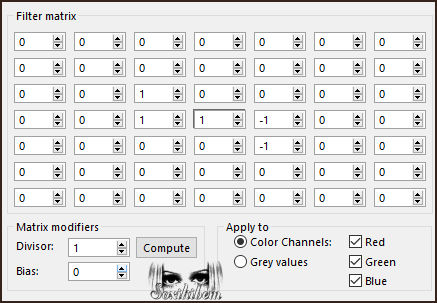
10 - Effects > User Defined Filter: Emboss_3.
11 - Ativar a Layer Raster 1. Layers > New Raster Layer. Selections > Load/Save Selections > Load Selection From Disk: TOL_Xiki1. Edit > Copy no Misted Paisagem. Edit > Paste Into Selection.
12 - Adjust > Blur > Motion Blur. Edit > Repeat Motion Blur. Effects > Edge Effects > Enhance. Edit > Repeat Enhance Edges. Selections > Select None. Layers > Duplicate. Image > Mirror > Mirror Horizontal. Layers > Merge > Merge Down.
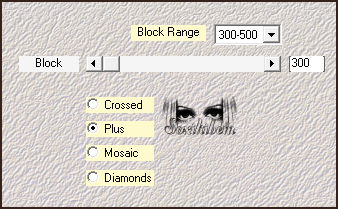
13 - Ativar a Layer Raster 1. Layers > Duplicate. Plugin Mehdi > Sorting Tiles.
14 - Plugin Simple > Pizza Slice Mirror. Effects > Edge Effects > Enhance. Layers > Properties > General > Blend Mode: Hard Light.
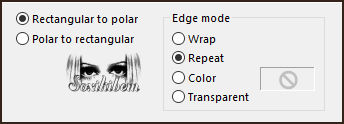
15 - Edit > Copy Special > Copy Merged. Ativar e abrir a visibilidade da layer Copy (2) of Raster 1. Effects > Distortion Effects > Polar Coordinates.
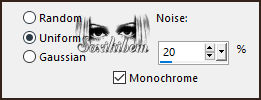
16 - Magic Wand > Tolerance e Feather: 0, selecionar o centro deste circulo. Edit > Paste Into Selection. Adjust > Blur > Average: 29. Adjust > Add/Remove Noise > Add Noise. Selections > Select None.
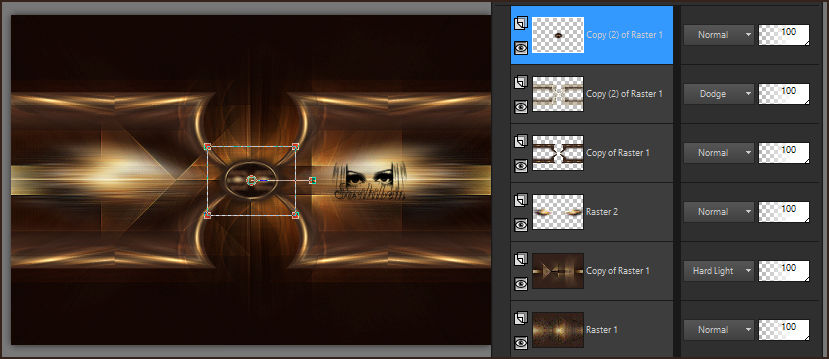
17 - Image > Resize: 25%, all Layers desmarcado. Adjust > Sharpness > Unsharp Mask. Effects > 3D Effects > Drop Shadow: 0, 0, 100, 25, cor #000000 (Preto).
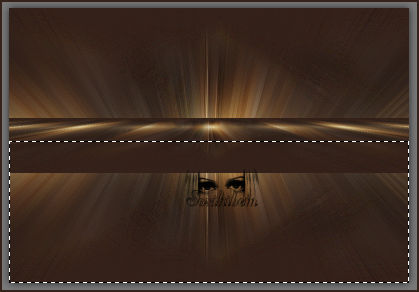
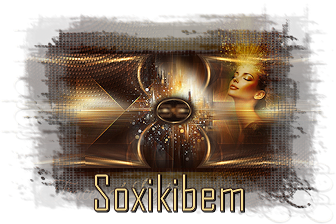
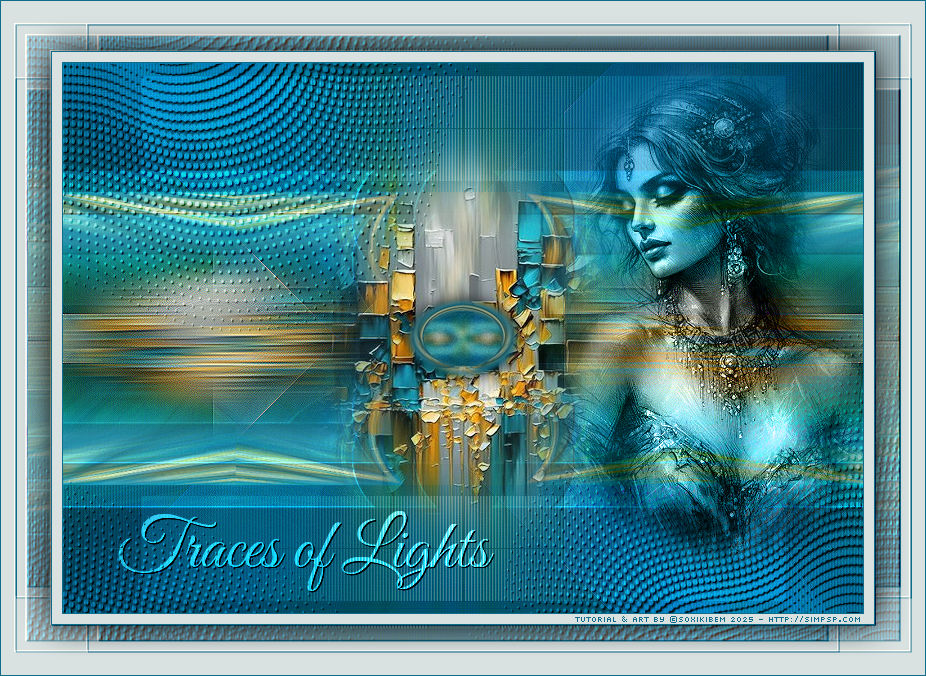
18 - Teremos esse resultado:
19 - Edit > Copy no Misted Paisagem. Edit > Paste as New Layer. Resize se for necessário. Layers > Arrange > Move Down. Layers > Properties > General > Blend Mode: Lighten ou outro que preferir.
20 - Layers > New Raster Layer. Selections > Load/Save Selections > Load Selection From Disk: TOL_Xiki2. Pintar a seleção com um gradiente Linear, formado pelas cores do Foreground e Background.
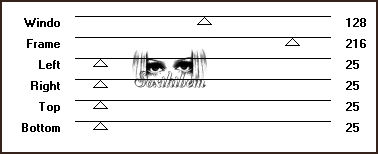
21 - Plugin Mock > Windo.
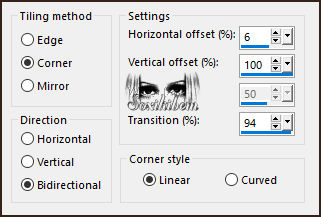
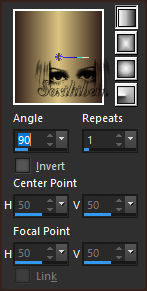
22 - Effects > Texture Effects > Blinds. Com a cor do Foreground. Selections > Select None.
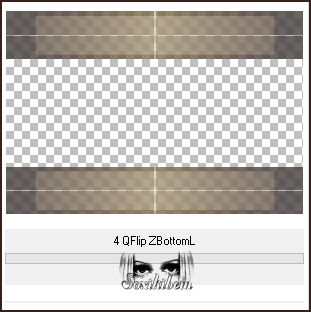
23 - Layers > Duplicate. Image > Mirror > Mirror Vertical. Layers > Merge > Merge Down. Filters > Unlimited 2.0 > &Bkg Kaleidoscope > 4QFlipZBottomL. Layers > Properties > General > Blend Mode: Hard Light - Opacity 60%.
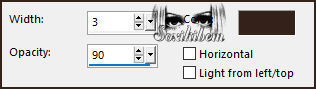
24 - Layers > New Raster Layer. Pintar a layer com a cor #ffffff (Branco). Layers > New Mask Layer > From Image: NarahsMasks_1569 Layers > Merge > Merge Group. Layers > Properties > General > Blend Mode: Overlay ou outro que preferir. Effects > 3D Effects > Drop Shadow: 1, 1 , 100, 0, cor #000000 (Preto).
25 - Edit > Copy no Tube ou Misted Personagem. Edit > Paste as New Layer. Redimensione se for necessário e posicione à direita do trabalho. Aplique Drop Shadow como preferir. Na minha primeira versão usei o BlendMode: Hard Light.
26 - Edit > Copy no TituloTOL_Xiki. Edit > Paste as New Layer. Pick Tool > Position X: 55, Position Y: 448. Layers > Properties > General > Blend Mode: Overlay. Layers > Duplicate. Layers > Properties > General > Blend Mode: Soft Light.
27 - Image > Add Borders > Symmetric: 1px com a cor do Foreground 10px com a cor do Background 1px com a cor do Foreground Selections > Select All 50px com a cor do Background
28 - Selections > Invert. Plugin Italian Editors Effect > Effeto Fantasma.
29 - Effects > User Defined Filter: Emboss_3.
30 - Selections > Invert. Effects > 3D Effects > Drop Shadow: cor #000000 (Preto). Selections > Select None.
31 - Image > Add Borders > Symmetric: 1px com a cor do Foreground.
32 -
Aplicar sua marca d'água ou assinatura.
VERSÃO:
Créditos: Formatação, Arte Final e Tutorial by Soxikibem Tube Principal: Tubed by Pqna&Alice Mask: by NarahMasks Outros Materiais: by Soxikibem
Sinta-se à vontade para enviar suas versões. Terei todo o prazer em publicá-las em nosso site.
|