Translated into English by Márcinha
Original Tutorial:


IMPORTANT:

Sim PSP and its tutorial authors kindly ask you to:

- Please preserve the original tutorial and do not add any effects that were not requested;
- The use of other images is allowed and encouraged, however, please do not modify the content of the original tutorial;
- Please acknowledge and give proper credit to those who write tutorials, translate them, and create the materials.

Note:

This tutorial was written by Roberta Maver, and is her sole responsibility.

Any resemblance to other tutorials is purely coincidental.

Sim PSP only hosts and shares this tutorial so that everyone can access and enjoy the content.

Sincerely,

SIM PSP and Roberta Maver


Tutorial created using PSP 2022
Tutorial tested, reviewed and translated into English by Marcinha in PSP 2020
 

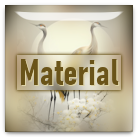
MATERIALS:
 One main tube of your choice
 One misted landscape of your choice
 
* Save the selection Marion_byRobertaM in the PSP Selections folder.


 PLUGINS:
Mura's Meister > Copies.
Mehdi > Sorting Tiles.

CS Carolaine and Sensibility > CS LDots.

 Mura's Meister >  Perspective Tiling.
 

**********

I would like to thank the tube artists for the tubes and masks; without them, this work would not have been possible.
When sharing or using these resources, please keep the tubes intact and give proper credit.


Feel free to adjust the blending to suit the colors you are using.
Recolor the decorative elements as needed to match your chosen colors.

 **********


TUTORIAL
 
 1 - Open the material in PSP, duplicate it, and close the original.

*Delete the Watermark from all materials. 
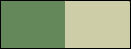
 Choose two colors to work with. 
 Foreground #65885a
 Background #cdcda7


 2 - Open a new transparent image, 900 x 550 px.
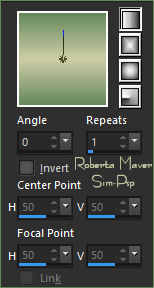
Fill with the Linear gradient, Angle 0, Repeats 1, made from the colors in use:


3 - Selections > Select All.

Edit > Copy from the Main Tube.

 Edit > Paste Into Selection.

Selections > Select None.


4 - Effects > Image Effects > Seamless Tiling: Default.


Adjust > Blur > Gaussian Blur: 20
Layers > Duplicate.


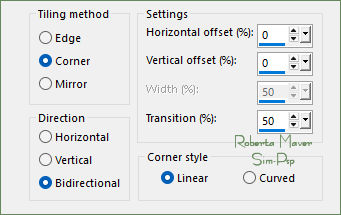
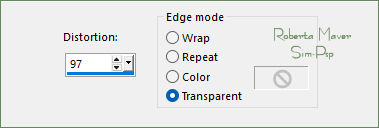
5 - Effects > Geometric Effects > Perspective Horizontal:


 6 - Image > Mirror > Mirror Horizontal.
Effects > Geometric Effects > Perspective Horizontal:


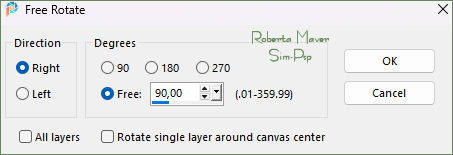
7 - Image > Free Rotate: Right, 90, all layers unchecked.

Edit > Copy

Delete the layer Copy of Raster 1 - Layers > Delete.


8 - Layers > New Raster Layer.  

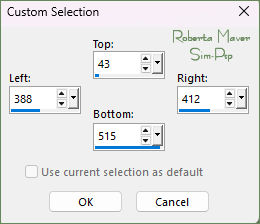
Activate the Selection tool > Custom Selection:

Edit > Paste Into Selection.

Still selected...


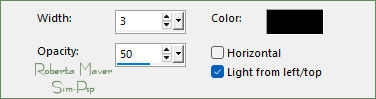
9 - Effects > Texture Effects > Blinds.

Selections > Select None.


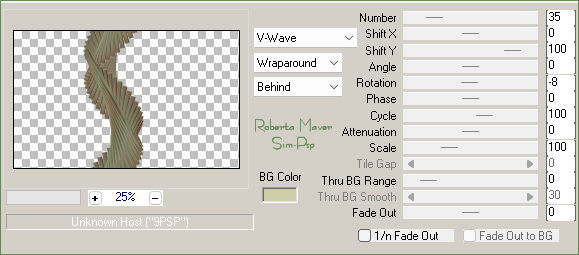
10 - Effects > Plugins > Mura's Meister > Copies:


Objects > Align > Left.


11 -  Layers > Duplicate.

Image > Mirror > Mirror Horizontal.

Layers > Merge > Merge Down.

Effects > 3D Effects > Drop Shadow: 0 / 0 / 80 / 60, Color: #000000


12 -Activate the layer Raster 1.

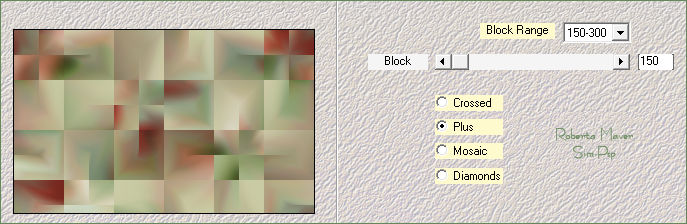
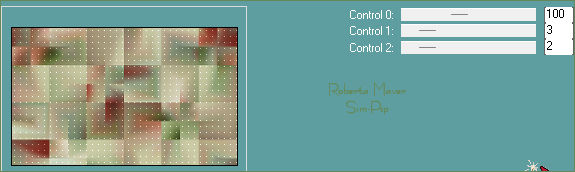
Effects > Plugins > Mehdi > Sorting Tiles:


Adjust > Sharpness > Sharpen More.


13 - Edit > Copy from the Landscape Misted.
Edit > Paste As New Layer.

Position it in the center.


 14 - Layers > Duplicate.

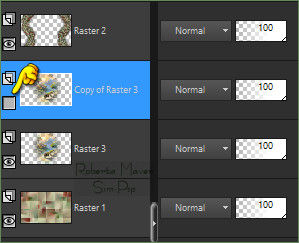
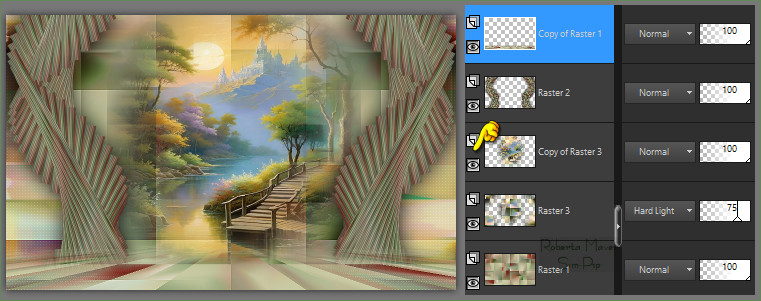
Close the visibility of the duplicate - Copy of Raster 3.


15 - Activate the layer Raster 3 - Landscape Misted

Effects > Image Effects > Seamless Tiling: Default.


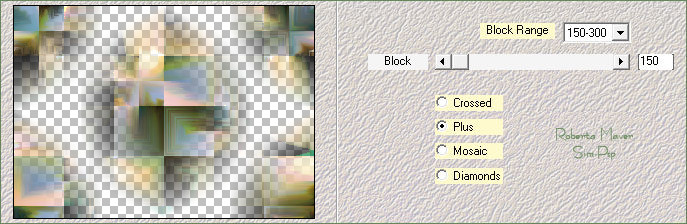
16 - Effects > Plugins > Mehdi > Sorting Tiles:

Adjust > Sharpness > Sharpen

Layers > Properties > General > Blend Mode: Hard Light - Opacity: 75%


17 - Activate the layer Raster 1.

Selection > Load/Save Selection > Load Selection From Disk: Marion_byRobertaMaver


18 - Effects > Plugins > CS Carolaine and Sensibility > CS LDots.

Selections > Select None.


19 - Layers > Duplicate.

Layers > Arrange > Bring to Top.

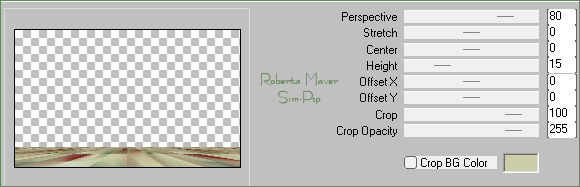
Effects > Plugins > Mura's Meister >  Perspective Tiling.

With the Magic Wand tool: Tolerance 0, Feather 50,
click the transparent area at the top of the effect to select it:
Press the Delete key on the keyboard 3 times.

Set Feather back to 0
Selections > Select None.

Adjust > Sharpness > Sharpen.

Turn the visibility of the Copy of Raster 3 layer back on:


20 - Image > Add Borders > Symmetric: 
1 px - color: Foreground #65885a
5 px - color: Background #cdcda7
1 px - color: Foreground #65885a
15 px - color: Background #cdcda7
1 px - color: Foreground #65885a
40 px - color: Background #cdcda7


21 - Edit > Copy from the Main Tube.
Edit > Paste As New Layer.
 Image > Resize if necessary: the tube used in this tutorial was resized to 55%.
 Position it a little to the left.
 Apply a drop shadow of your choice.


22 - Edit > Copy from Decor01_byRobertaMaver
Edit > Paste As New Layer.
With the Pick Tool, position: Position X: 61 Position Y: 8


23 - Edit > Copy from the Tube Decoração_byRobertaMaver.
Edit > Paste As New Layer.
 Image > Resize if necessary: the tube used in this tutorial was resized to 30%.
 Position it on the right.
 Apply a drop shadow of your choice.


24 - Edit > Copy from Titulo_byRobertaMaver
 Edit > Paste As New Layer.
Position it on the left or as you prefer.

I colorized it with the Foreground color #65885a

Effects > 3D Effects > Drop Shadow: 1 / 1 / 100 /0, Color: Background #cdcda7 or as you prefer.


 25 - Image > Add Borders > Symmetric: 1 px - color: Foreground #65885a


26 - Edit > Copy from the Credito-TradByMarcinha file:

Edit > Paste As New Layer and position it wherever you prefer.
Apply your watermark or signature.

File > Export > JPEG Optimizer...


Credits:
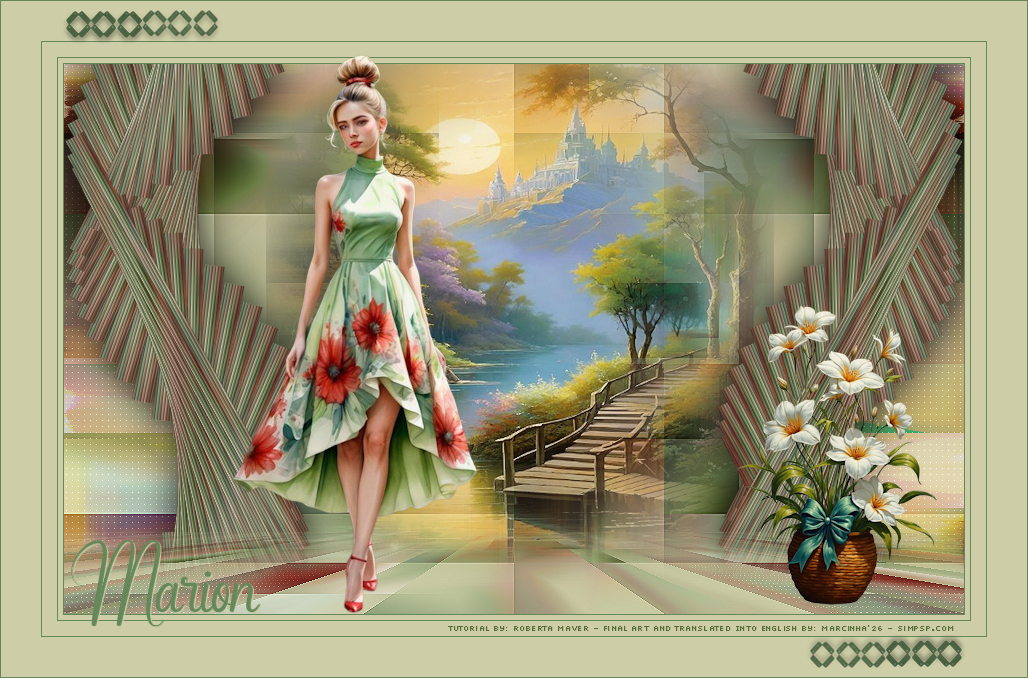
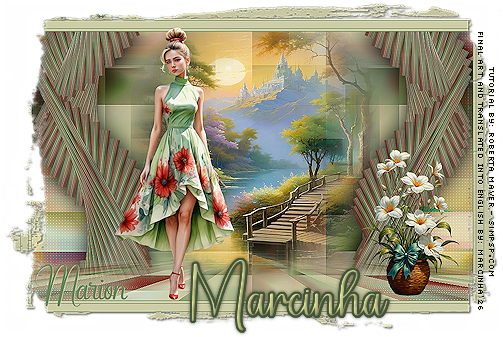
Formatting, Final Artwork, and English Translation by Márcinha

 Tutorial by Roberta Maver - Prints by Roberta Maver
 Main Tube, Decor Tube and  Misted Landscape: Tubes by Roberta Maver


VERSION:


Version credits:

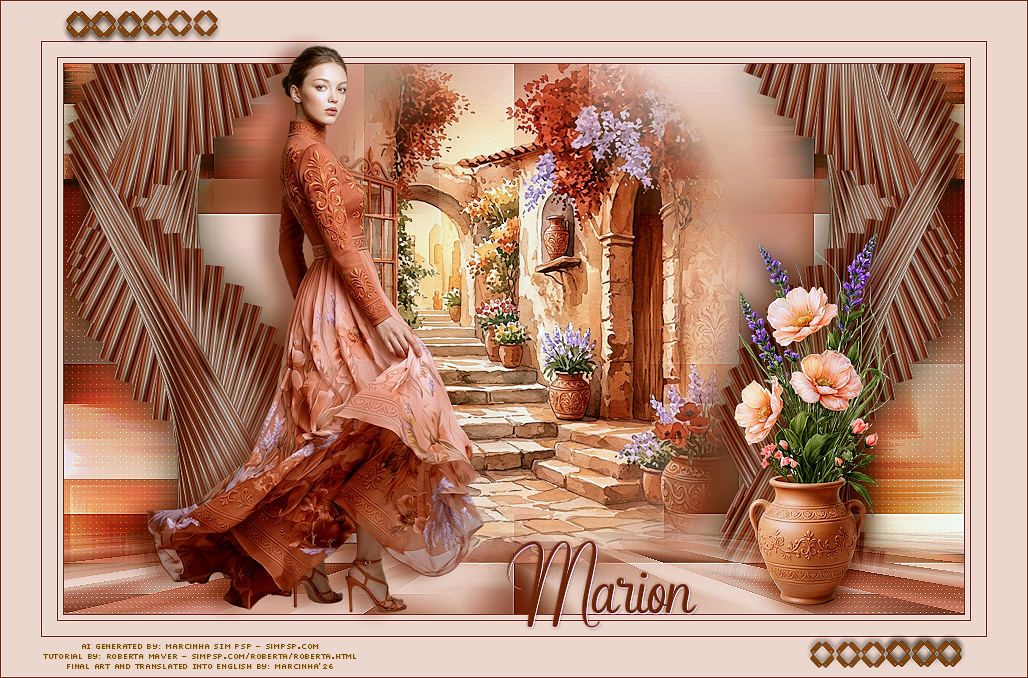
Tubes and Misted: AI-generated by Marcinha - SIM PSP


Feel free to send us your versions.

I will be delighted to publish them on our website.


Send your version to:

robertamaver@gmail.com


SimPSP Social Media


This tutorial was created by Roberta Maver in August 2026, exclusively for the site: https://simpsp.com
Tutorial tested, reviewed, and translated into English by Marcinha in October 2026.
The content of this tutorial is the sole responsibility of the author.
Sim PSP only hosts and shares it for promotional purposes.
Partial or total reproduction without the author's authorization is prohibited.
Respect the credits and encourage the creation of new content!

Arrow to follow the tutorial