|
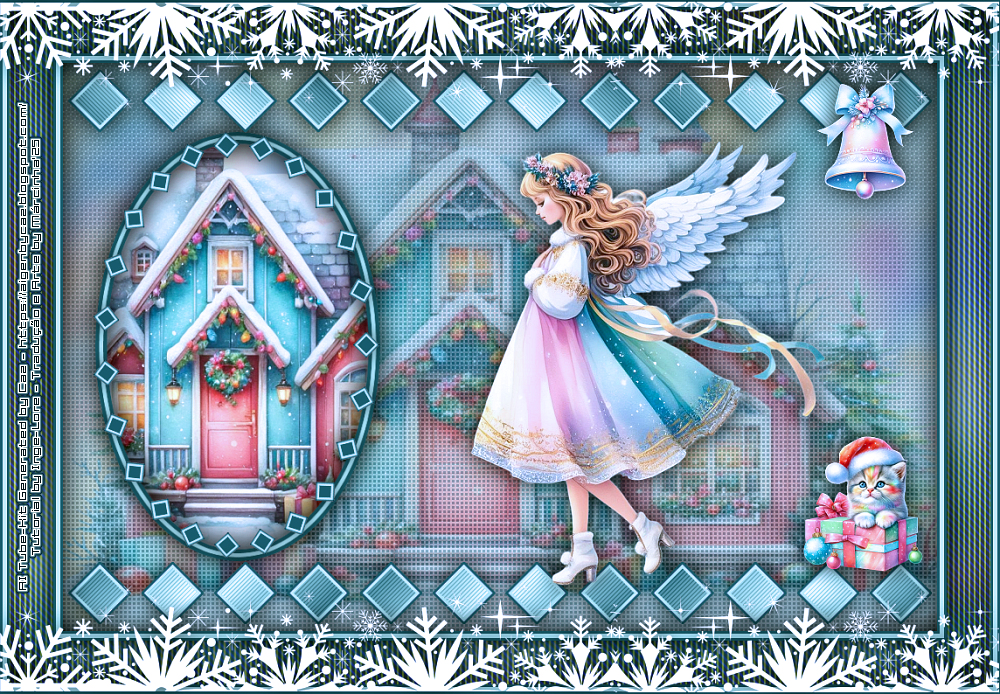
Tutorial "Christmas
Angel" by
Inge-Lore
Nota da autora:
MATERIAL
Carolaine and Sensibility > CS-DLines
CORES Escolha das cores do tube ou imagem
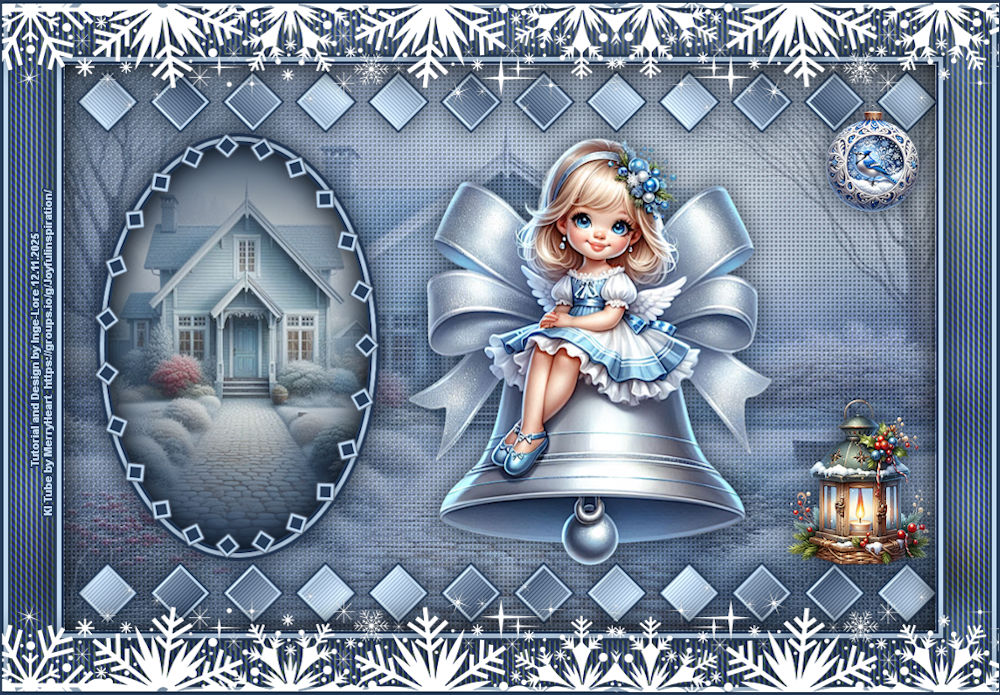
Abra uma imagem transparente de 1000 x 650 pixels.
Selections > Select All. Ative o misted paper_EF (18).
Edit > Copy. Edit > Paste Into Selection. Selections > Select None.
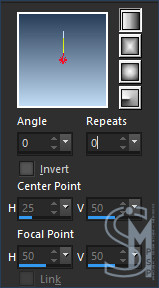
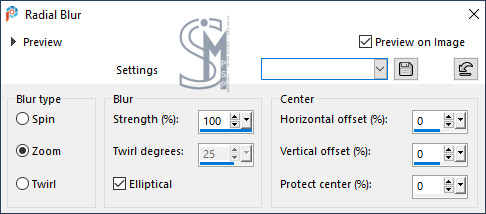
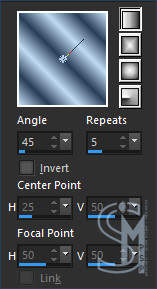
Adjust > Blur > Radial Blur:
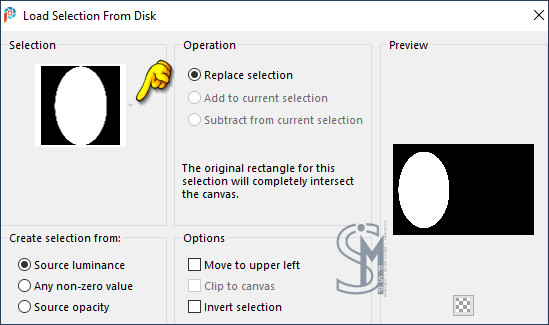
02 - Selections > Load/Save Selections > Load Selection From Disk: christmas-angel
Layers > New Raster Layer.
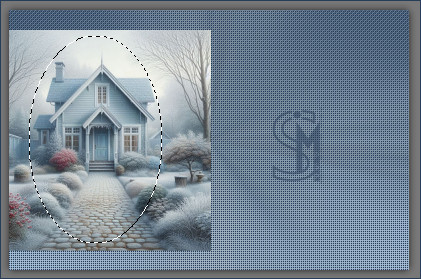
Selections > Modify > Contract: 5 pixels. Mantenha a seleção...
Ative a imagem paper_EF (18).
Edit > Copy. Edit > Paste as New Layer.
03 - Imagem > Resize se necessário, no paper do material foi de 85%. Posicione a parte da imagem dentro da seleção:
Selections > Invert.
Selections > Select None. Pressione a tecla "M" para desativar a "Ferramenta Pick".
04 - Ative a imagem Deko-1.
Edit > Copy. Edit > Paste as New Layer. Ativar a ferramenta Pick e configure: Position X: 6,00 - Position Y: 8,00. Pressione a tecla "M" para desativar a "Ferramenta Pick".
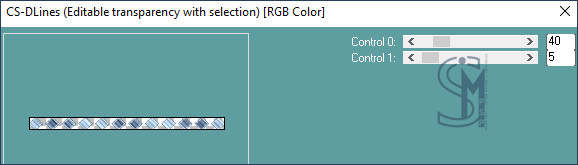
Effects > Plugins > Carolaine and Sensibility > CS-DLines:
Selections > Select None.
Edit > Paste into Selection.
Edit > Copy. Volte a imagem que estamos trabalhando...
Edit > Paste as New Layer.
Ative a imagem AI VISIONS-ORNA BLUEJAY 13.
Edit > Copy. Edit > Paste as New Layer. Ativar a ferramenta Pick e configure: Position X: 873,00 - Position Y: 47,00. Pressione a tecla "M" para desativar a "Ferramenta Pick". Effects > 3D Effects > Drop shadow: 0 / 0 / 90 / 40, color #000000 (preto)
07 - Ative a imagem AI VISIONS-ANTIQUE LANTERN 33.
Edit > Copy. Edit > Paste as New Layer. Ativar a ferramenta Pick e configure: Position X: 827,00 - Position Y: 384,00. Pressione a tecla "M" para desativar a "Ferramenta Pick". Effects > 3D Effects > Drop shadow: 0 / 0 / 90 / 40, color #000000 (preto)
Ativar a layer Raster 2.
Ative a imagem Deko-2.
Edit > Copy. Edit > Paste as New Layer. Ativar a ferramenta Pick e configure: Position X: 35,00 - Position Y: 79,00. Pressione a tecla "M" para desativar a "Ferramenta Pick".
08 - Selections > Select All. Selections > Select None. Effects > 3D Effects > Drop shadow: 0 / 0 / 90 / 40, color #000000 (preto)
Layers > Merge > Merge Down. Effects > 3D Effects > Drop shadow: 0 / 0 / 90 / 40, color #000000 (preto)
09 - Ativar a layer do topo. Selections > Select All.
Layers > New Raster Layer.
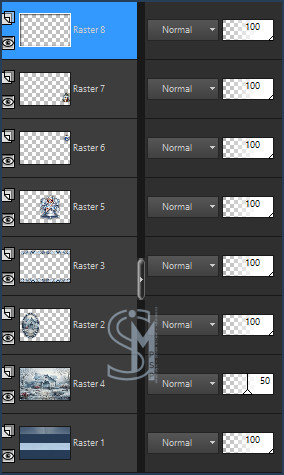
Selections > Select None. Posição das Layers:
Edit > Copy Special > Copy Merged. Image > Add Borders > Symmetric: 5 px - Cor clara do Foreground. Image > Add Borders > Symmetric: 3 px - Cor escura do Background.
10 - Selections > Select All. Image > Add Borders > Symmetric: 50 px - Cor clara do Foreground. Selections > Invert.
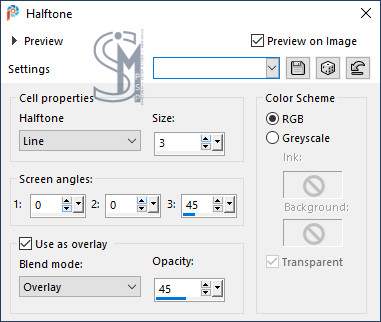
Effects > Artistic Effects > Halftone:
Selections > Select None.
Image > Add Borders > Symmetric: 5 px - Cor clara do Foreground. Image > Add Borders > Symmetric: 3 px - Cor escura do Background.
Ative a imagem Deko-3.
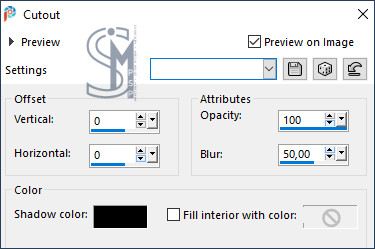
Edit > Copy. Edit > Paste as New Layer. Effects > 3D Effects > Drop shadow: 0 / 0 / 80 / 40, color #000000 (preto)
Layers > Merge > Merge All.
Image > Resize > By Pixel > Width: 1000px, resize all layers marcado. Adjust > Sharpness > Sharpen.
Aplicar marca da autora e tradutora, sua marca d'água ou assinatura. File > Export > JPEG Optimizer...
Formatação, Arte Final e Tradução by Márcinha - SIM PSP Tutorial "Christmas Angel" by Inge-Lore AI Kit e Tube: by MerryHeart Outros Materiais fornecido no tutorial por Inge-Lore
Versão by Marcinha - Owner SIM PSP
Crédtios: Versão e Arte Final by Márcinha Tube-kit AI Generated by Caz Outros Materiais fornecido no tutorial por Inge-Lore
Envie sua versão para o e-mail:
|