|
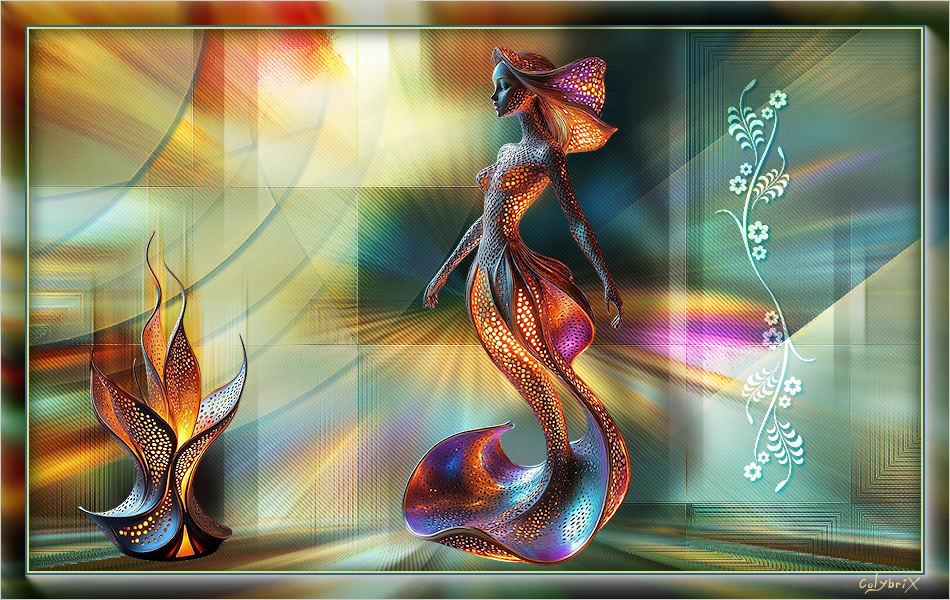
Tutorial "Inspiration" by
Colybrix
Traduzido para o Português por Márcinha do grupo SIM PSP
Tutorial Original:
MATERIAL:

PLUGINS:
Mehdi > Sorting Tiles
Toadies > What Are You?
AAA Frames > Foto Frame
Graphics Plus > Cross Shadow
MuRa's Meister > Perspective Tiling
Carolaine and Sensibility > CS-DLines
CORES:
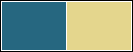
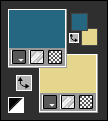
Configure o Foreground:
#266780 - Background: #e4d68d
Tutorial Traduzido no PSP
2020
|
 |
TUTORIAL |
 |
|
1- Abra o material no PSP, duplique-o e feche os originais.
*Deletar a Marca D'água de todos os materiais.
Abra uma
nova imagem com 950 x 600 pixels.
Preencha com um gradiente Radial, formado pelas cores em usao:
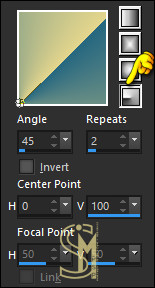
2-
Adjust > Blur > Gaussian Blur: 30
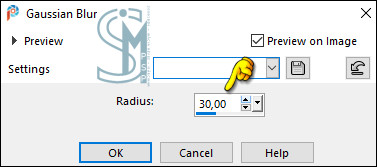
3-
Layers > New Raster Layer.
Selections > Select All.
Ative o tube Statue4-coly
ou um de sua escolha.
Edit > Copy.
Volte para a imagem que
estamos trabalhando...
Edit > Paste Into
Selection.
Selections > Select None.
4- Effects > Image Effects > Seamless Tiling: Default
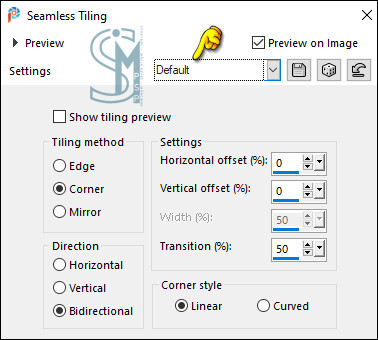
05 - Adjust > Blur > Radial Blur:
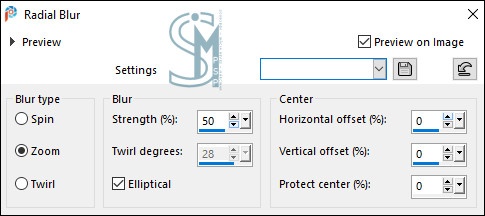
Layers > Properties >
General > Blend Mode:
Hard Light ou outro de sua escolha.
6- Effects > Plugins > Carolaine and Sensibility > CS-DLines:
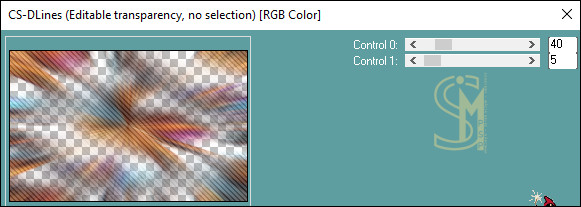
Layers > Merge > Merge Down.
7- Layers > Duplicate.
Effects > Plugins > Mehdi > Sorting Tiles:
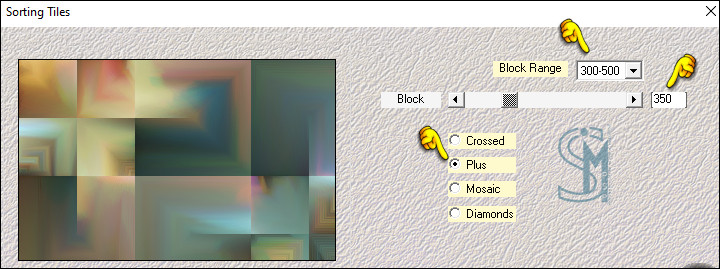
Layers > Properties >
General > Blend Mode:
Overlay
Effects > Edge effects > Enhance por 2 vezes.
8- Layers > New Raster Layer.
Preencha com a cor do Background.
Layers > New Mask Layer > From Image: Catimini_le11zo10
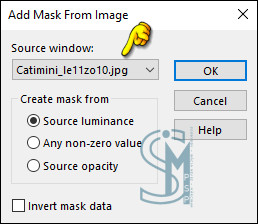
Effects > Edge effects > Enhance.
Layers > Merge > Merge Group
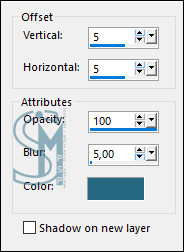
9- Effects > 3D Effects > Drop Shadow: Color: cor do
Foreground.
V: 5 H: 5 Opacity: 100 Blur: 5
10- Ative a layer Raster 1.
Effects > Plugins > Graphics Plus > Cross Shadow
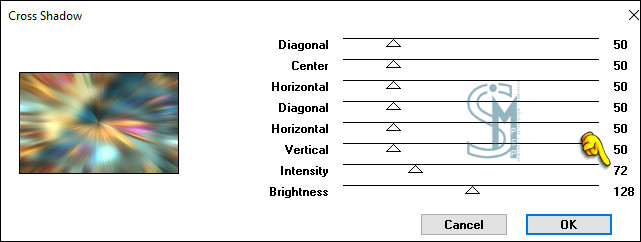
11- Ative a layer Group - Raster 2 (Layer superior).
Ative a ferramenta Selection Tool > Custom Selection:
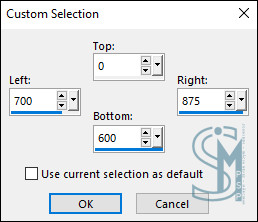
12- Layers > New Raster Layer.
Ative a ferramenta
Flood Fill > Opacity: 60.
Preencha a seleção com a cor #ffffff (Branco).
Layers > Properties > General > Blend Mode: Overlay.
Selections > Select None.
Retorne a Opacity do Flood Fill para 100.
13- Effects > Plugins > Toadies > What Are You?
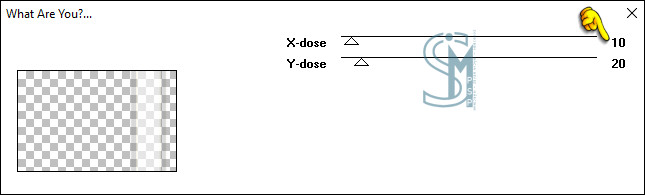
14- Effects > 3D Effects > Inner Bevel:
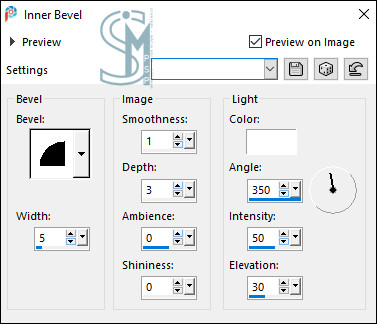
Effects > Image Effects > Seamless Tiling:
15- Edit > Copy Special > Copy Merged.
Edit >
Paste As New Layer.
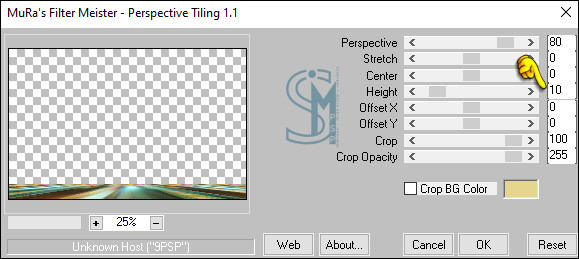
Effects > Plugins > MuRa's Meister > Perspective Tiling:
16- Ative a ferramenta Magic Wand: Tolerance: 0 e Feather: 50:
clique na área transparente da layer para selecionar:
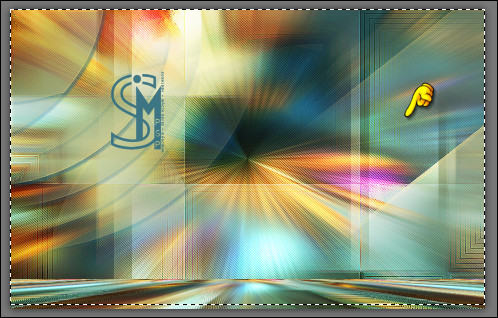
Pressione a tecla
Delete por 3 vezes.
Selections > Select None.
Retorne o para
Feather: 0
Teremos esse resultado:
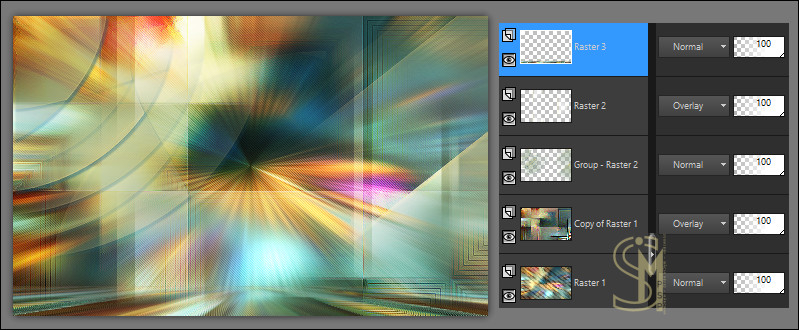
17- Layers > Merge > Merge Visible.
Edit > Copy.
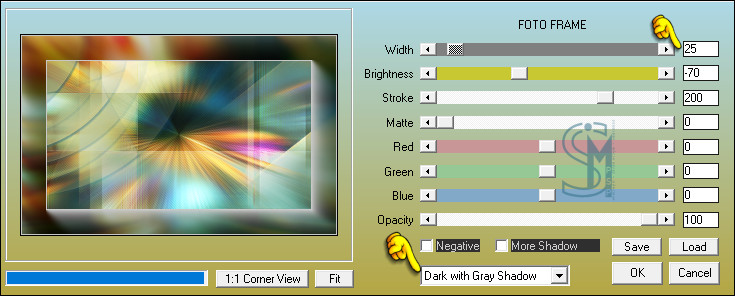
18- Effects > Plugins > AAA Frames > Foto Frame:
Nota: configure primeiro a indicação inferior.
19- Layers > New Raster Layer.
Selections > Select All.
Selections > Modify > Contract: 25
Preencha a seleção com a cor do Foreground..
20- Selections > Modify > Contract: 2
Preencha a seleção com a cor do Background.
Selections > Modify > Contract: 2
Edit > Paste Into Selection. (cópia do passo 17)
Mantenha a seleção...
21- Layers > New Raster Layer.
Effects > 3D Effects > Cutout:
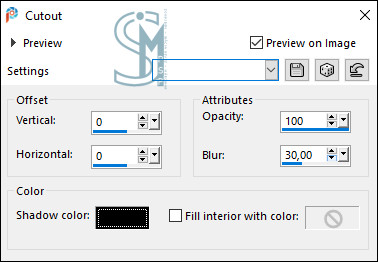
Selection >
Select None.
22- Ative o
arquivo tube
Statue4-coly.
Edit > Copy.
Volte para a imagem que
estamos trabalhando...
Edit > Paste As New Layer.
Image > Resize >
75%, resize all layers desmarcado.
Adjust > One Step Photo Fix (opcional)
Posicione como desejar.
Effects > 3D Effects >
Drop Shadow:
23- Effects > 3D Effects > Drop Shadow:
-30 / 70 / 50 30 color:
#000000
(preto)
24- Ative o
arquivo
Deco 1.
Edit > Copy.
Volte para a imagem que
estamos trabalhando...
Edit > Paste As New Layer.
Posicione com a Pick tool
em: Position X: 710,00 - Position Y: 75,00
Pressione a tecla "M" para desativar a "Ferramenta
Pick".
Layers > Properties > General > Blend Mode: Overlay
Effects > 3D Effects > Drop Shadow: 2 / 2 / 100 / 3
color: cor do Foreground
25- Ative o
arquivo
decos61-coly.
Edit > Copy.
Volte para a imagem que
estamos trabalhando...
Edit > Paste As New Layer.
Image > Resize >
60%, resize all layers desmarcado.
Posicione à esquerda.
Layers > Duplicate.
26- Ative a layer que está logo abaixo (Raster 5)
Adjust > Blur > Motion Blur: por 2 vezes
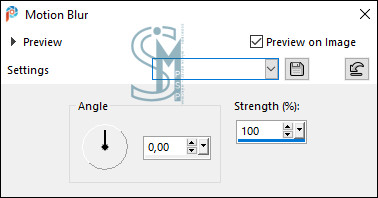
Effects > Edge effects > Enhance.
Layers > Properties > General > Blend Mode: Overlay.
27- Aplicar a marca dos
créditos:

e sua marca d'água ou assinatura.
Layers > Merge > Merge
All.
File > Export > JPEG Optimizer...
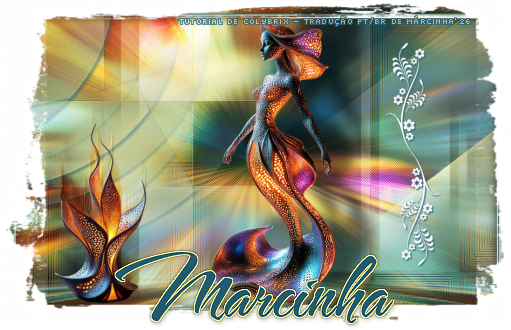
CRÉDITOS:
Tutorial
"Tropical" by
Colybrix
Tradução, Formatação e Arte Final por Márcinha
SIM PSP
Tubes: by
Colybrix
Versão by
Marcinha
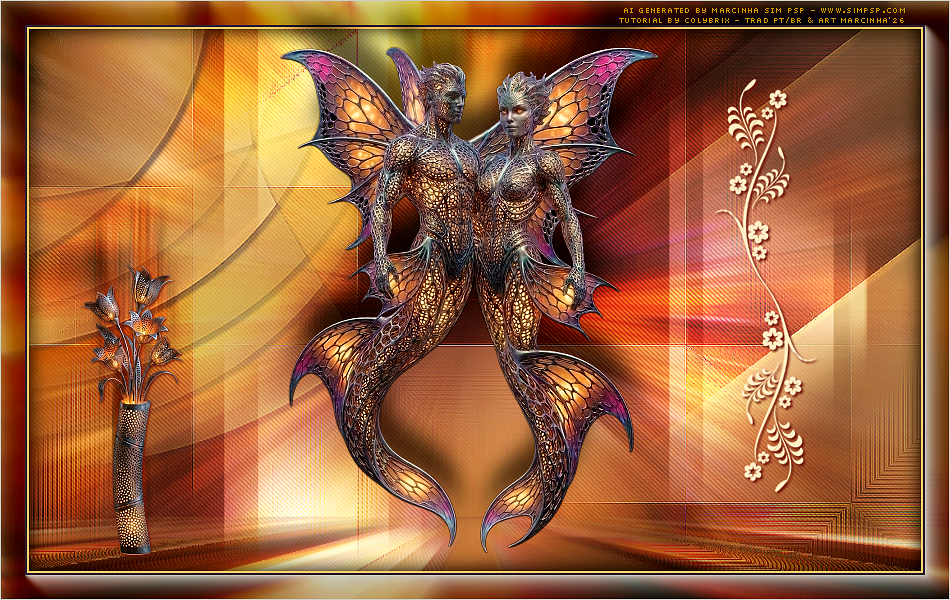
Créditos:
Tube
Personagem e
Tube
Vaso Floral: AI Generated by
Marcinha SIM PSP
Sinta-se à vontade para enviar suas versões para a autora
no e-mail abaixo:
colybrix@hotmail.com
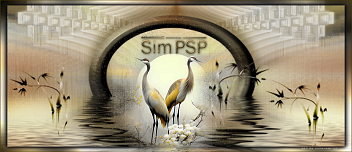
SimPSP Redes Sociais


| |
|
|
|
|
|
Tutorial criado por
Colybrix, em
julho/026.
Traduzido com autorização da
autora para o português em julho/2026, por Márcinha
para o
SIM-PSP.
Não poderá ser
copiado, retirado de seu lugar, traduzido ou utilizado
em listas de aprendizados ou grupos sem o consentimento
prévio da autora. |
|
|
| |
|
|
|