  , ,TRADUÇÕES:
Obrigada aos nossos Tradutores
Este tutorial foi escrito por Inácia Neves.
Qualquer semelhança é mera coincidência.
MATERIAL: Tube Principal Word Art: wa_sim6_in Decor 715a3e3b
PLUGINS: L en K > Paris Unlimited 2.0 > Paper Textures > Hemp Paper 1
Efeitos do Corel Paint Shop Pro 2022 Ultimate
Roteiro
1- Abrir o material no PSP, duplique e feche os originais. Eu escolhi as cores:
Foreground: #8c2909 Background: #e0b895
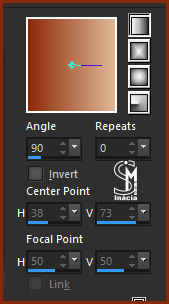
2- Formar um gradiente: Style: Linear > Angle: 90 > Repeats: 0.
3- Abrir uma transparência 1000 x 600 px. Pintar com o gradiente. Layers > New Raster Layer. Selections > Select All.
4- Ativar o tube escolhido. Edit > Copy. Edit > Paste > Into Selection, no trabalho. Selections > Select None.
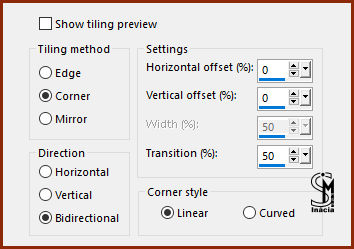
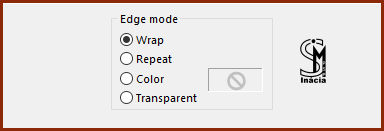
5- Effects > Image Effects > Seamless Tiling > Default.
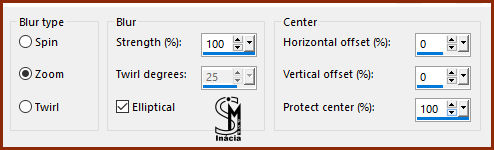
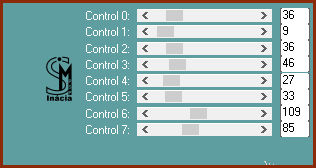
Adjust > Blur > Radial Blur:
Effects > Edge Effects > Enhance More. Layers > Properties > General > Blend Mode: Hard Light > Opacity: 100%.
6- Layers > Duplicate. Effects > Plugin > L en K > Paris: Layers > Properties > General > Blend Mode: Hard Light > Opacity: 100%.
7- Layers > New Raster Layer. Pintar com o gradiente de uso.
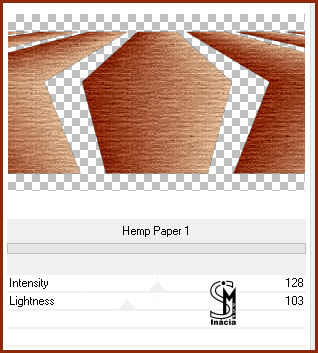
Image > Resize > 80% > All Layers desmarcado. Effects > Geometric Effects > Pentagon:
8- Effects > Plugin > ICNet Software > Unlimited 2.0 > Paper Textures > Hemp Paper 1: Adjust > Sharpness > Sharpen. Selections All. Selections > Float. Selections > Defloat.
9- Ativar o tube escolhido. Edit > Copy. Edit > Paste as New Layer no trabalho. Reduzir se necessário. O tube do trabalho eu reduzi 55%. Posicionar a gosto dentro da seleção. Selections > Invert. Clicar Delete. Selections > Invert. Ativar a Layer Raster 3. Selections > Modify > Select Selection Borders:
10- Promote Selection to Layer. Effects > Texture Effects > Emboss. Effects > 3D Effects > Drop Shadow:
Layers > Properties > General > Blend Mode: Hard Light > Opacity: 100%. Selections > Select None. Ativar a Layer Raster 4 (layer do tube) Aplicar Drop Shadow ao seu gosto.
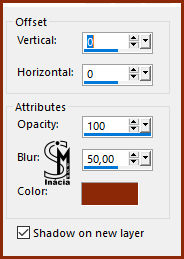
11- Ativar a Layer Raster 3. Effects > 3D Effects > Drop Shadow > cor escura e New Layer marcado: Layers > Properties > General > Blend Mode: Hard Light > Opacity: 100%.
12- Ativar a Layer Promoted Selection. Clicar, com a ferramenta Magic Wand > Tolerance e Feather: 0, no centro do efeito. Selection > Modify > Expand:
Selection >
Invert.
Ativar a Layer Raster 4 (layer do tube). Clicar em Delete. Selections > Select None.
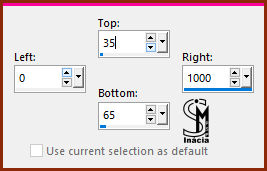
13- Layers > New Raster Layer. Ferramenta Selection > Custon Selection:
Pintar com a cor escura do Foreground: #8c2909 Selection > Select None.
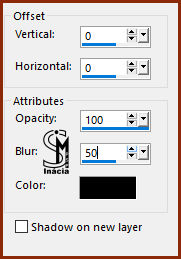
14- Layers Duplicate. Image > Mirror > Mirror Vertical. Layers > Merge > Merge Down. Effects > 3D Effects > Drop Shadow > cor Preta e New Layer desmarcado:
15- Ativar a o título wa_sim6_in. Edit > Copy. Edit > Paste as New Layer no trabalho. Pick Tool > Position X: 40.00 > Position Y: 157.00. Aplicar Drop Shadow ou efeitos ao seu gosto.
16- Ativar o Decor 715a3e3b. (Usando a ferramenta Color Changer, poderá trocar a cor das borboletas, para a cor usada no seu trabalho). Edit > Copy. Edit > Paste as New Layer no trabalho. Image > Resize > 40% > All Layers Desmarcado. Adjust > Sharpness > Sharpen.
17- Pick Tool > Position X: 3.00 > Position Y: 28.00 Layers > Duplicate. Image > Mirror > Mirror Horizontal. Image > Mirror > Mirror Vertical. Layers > Merge > Merge Down.
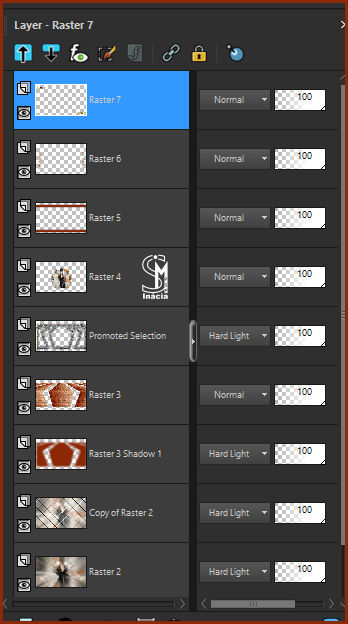
18- As Layers deverão estar assim:
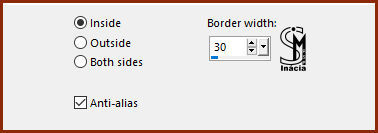
19- Selections > Select All. Image > Add Borders > 30 px - symmetric - com a cor escura do Foreground #8c2909. Effects > 3D Effects > Drop Shadow, cor Preta, new layer desmarcado:
Selection > Select None. 20- Finalizar com: Image > Add Borders > 1 px - symmetric - color: Preto (#000000).
21- Se desejar redimensione o trabalho. Aplicar sua marca d'água ou assinatura. File > Export > JPEG Optimizer.
Versão:
Créditos: Tube e wa_sim6_in: Inácia Neves Decor: Recebido em Grupos de Trocas em autoria. Tutorial, Arte e Formatação de Inácia Neves Alvorada-RS, Junho/2025
Sinta-se à vontade para enviar suas versões. Terei todo o prazer em publicá-las em nosso site.
|