|
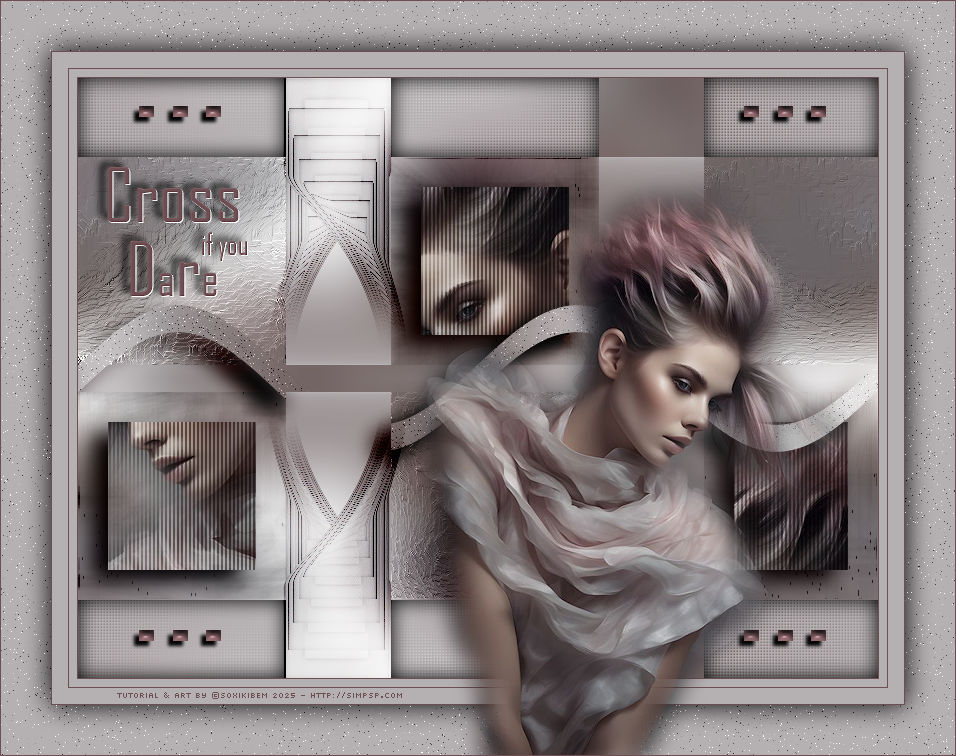
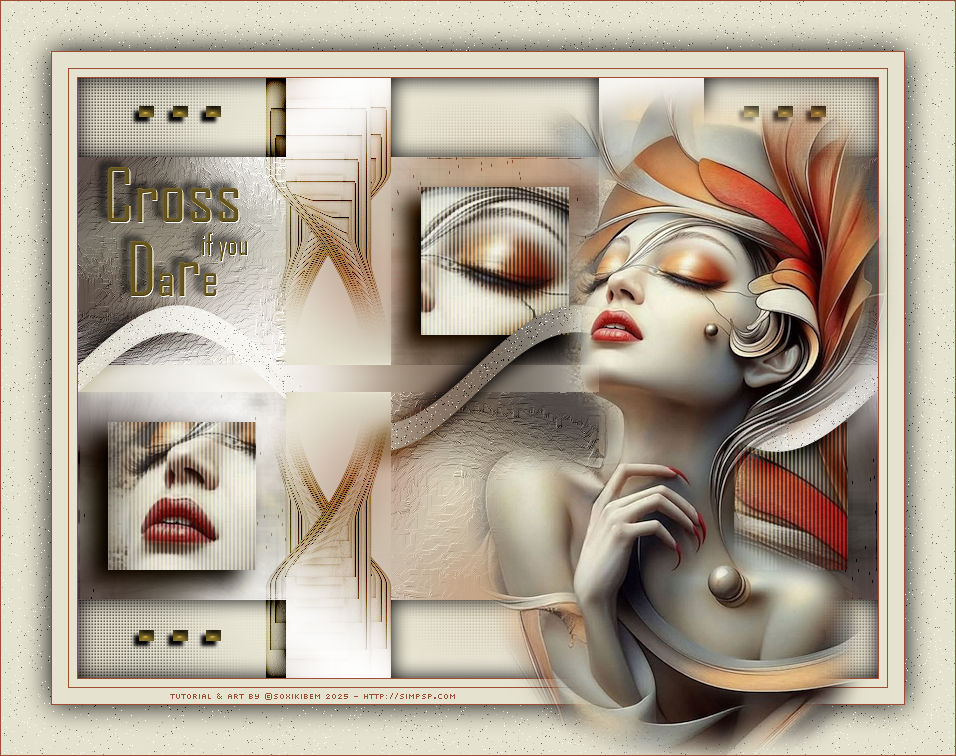
Há caminhos que poucos escolhem percorrer. Se realmente deseja atravessar, vá em frente. Mas saiba que nem tudo é tão simples quanto parece.
TRADUÇÕES: Obrigada aos nossos Tradutores
MATERIAL: 1 Tube Principal ou Personagem à sua escolha Outros Materiais by Soxikibem
PLUGINS: Sem Plugins
Este Tutorial foi escrito
por Soxikibem, qualquer semelhança é mera coincidência.
VÍDEO AULA
Se preferir acompanhar em vídeo, clique no link
abaixo: Se este tutorial te inspirou: Deixe seu like Ative o sininho Compartilhe com outros amantes do PSP E deixe um comentário contando o que achou!
2 - Abra uma imagem
transparente de 800x600px. Edit > Copy no Misted Personagem. Edit > Paste Into Selection. Selections > Select None.
3 - Effects > Image Effects > Seamless Tiling: Default. Layers > Merge > Merge All Adjust > Blur > Gaussian Blur: 30. Effects > Texture Effects > Weave, com a cor do Background.
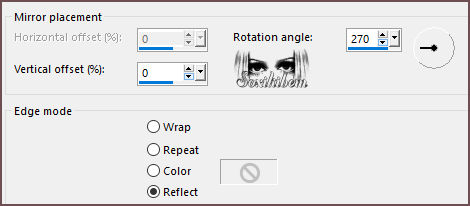
4 - Effects > Reflection Effects > Rotating Mirror.
5 - Selections > Load/Save Selections > Load Selection From Disk: 286_Xiki_1. Selections > Promote Selection to Layer. Edit > Copy no Misted Personagem. Edit > Paste Into Selection. Adjust > Blur > Radial Blur.
6 - Effects > Edge Effects > Enhance. Edit > Repeat Enhance Edges. Selections > Modify > Select Selection Borders.
7 - Layers > New Raster Layer. Effects > 3D Effects > Cutout.
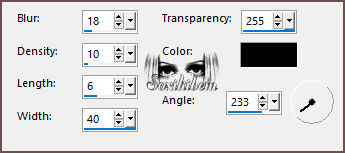
8 - Selections > Select None. Layers > Merge > Merge Down. Effects > Reflection Effects > Feedback.
9 - Effects > Distortion Effects > Warp. Layers > Duplicate. Image > Flip > Flip Horizontal. Pick Tool: Position X: 205, Position Y: 0. Layers > Merge > Merge Down.
10 - Selections > Load/Save Selections > Load Selection From Disk: 286_Xiki_7. Edit > Cut ou a tecla Delete. 2 vezes. Selections > Select None. Layers > Properties > General > Blend Mode: Burn
11 - Ativar a Layer Background. Selections > Load/Save Selections > Load Selection From Disk: 286_Xiki_3. Selections > Promote Selection to Layer. Selections > Select None. Effects > Distortion Effects > Wave.
12 - Selections > Load/Save Selections > Load Selection From Disk: 286_Xiki_2. Edit > Cut ou a tecla Delete. Selections > Select None. Selections > Load/Save Selections > Load Selection From Disk: 286_Xiki_1. Edit > Cut ou a tecla Delete. Selections > Select None.
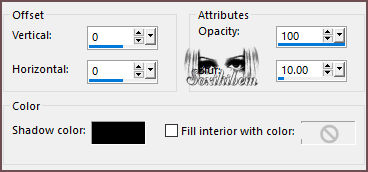
13 - Adjust > Add/Remove Noise > Add Noise. Effects > 3D Effects > Drop Shadow: cor #000000 (Preto) Com a Layer Promoted Selection 1 Shadow 1 ativada... Layers > Properties > General > Blend Mode: Overlay.
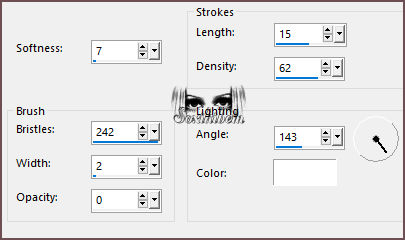
14 - Ativar a Layer Background. Selections > Load/Save Selections > Load Selection From Disk: 286_Xiki_4. Effects > Art Media Effects > Brush Strokes. Selections > Select None.
15 - Selections > Load/Save Selections > Load Selection From Disk: 286_Xiki_5. Effects > Texture Effects > Straw Wall.
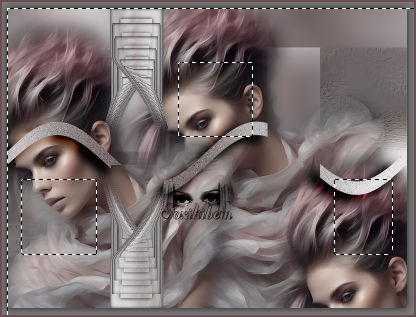
16 - Selections > Modify > Contract: 30 Selections > Invert. Edit > Copy no Misted Personagem. Edit > Paste as New Layer. Com a ferramenta Move Tool mover e posicionar partes do misted dentro da seleção. *Eu copiei e colei três vezes para pegar as partes que eu queria, em seguida uni essas layer aplicando Merge Dawn, antes de dar o Delete.
Edit > Cut ou aperte a tecla Delete. Selections > Select None.
17 - Aplique Crop Tool > Merged Opaque.
18 - Selections > Load/Save Selections > Load Selection From Disk: 286_Xiki_5. Selections > Modify > Contract: 30. Effects > 3D Effects > Drop Shadow: cor #000000 (Preto) Com a layer Promoted Selection 1 Shadow 1 ativada. Layers > Properties > General > Blend Mode: Luminance (L).
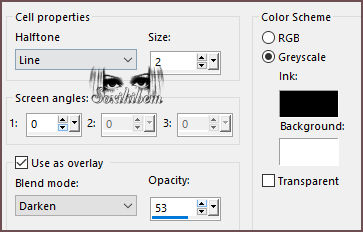
19 - Ativar a Layer Raster 1 (a layer dos quadradinhos com as imagens). Effects > Artistic Effects > Halftone. Selectoins > Select None.
20 - Ativar a Layer Background. Selections > Load/Save Selections > Load Selection From Disk: 286_Xiki_6. Effects > Texture Effects > Blinds. Com a cor do Background. Repetir o Blinds clicando em Horizontal.
21 - Layers > New Raster Layer. Effects > 3D Effects > Cutout. Selections > Select None.
22 - Edit > Copy no DecorCIYD_Xiki. Edit > Paste as New Layer. Pick Tool: Position X: 52, Position Y: 28.
23 - Image > Add Borders > Symmetric: 1px com a cor do Foreground 8px com a cor do Background 1px com a cor do Foreground 16px com a cor do Background 1px com a cor do Foreground Selections > Select All 50px com a cor do Background
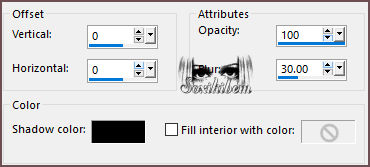
24 - Effects > 3D Effects > Drop Shadow: 0, 0, 100, 40, cor #000000 (Preto). *Shadow on new layer desmarcado. Selections > Invert. Adjust > Add/Remove Noise > Add Noise. Selections > Select None.
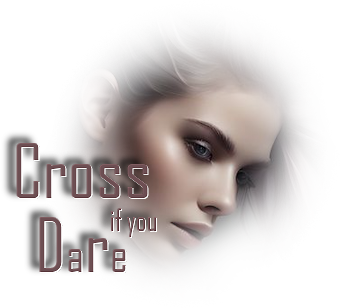
25 - Edit > Copy no TituloCIYD_Xiki. Edit > Paste as New Layer. Pick Tool: Position X: 90, Position Y:153.
26 - Edit > Copy no Tube Personagem. Edit > Paste as New Layer. Posicione e aplique Drop Shadow como preferir.
27 - Image > Add Borders > Symmetric: 1px com a cor do Foreground.
28 -
Aplicar sua marca d'água ou assinatura.
VERSÃO:
Créditos: Formatação, Arte Final e Tutorial by Soxikibem Tube Principal: Tubed by Pqna&Alice Outros Materiais: by Soxikibem
Sinta-se à vontade para enviar suas versões. Terei todo o prazer em publicá-las em nosso site.
|
