|
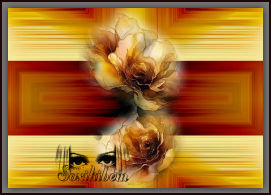
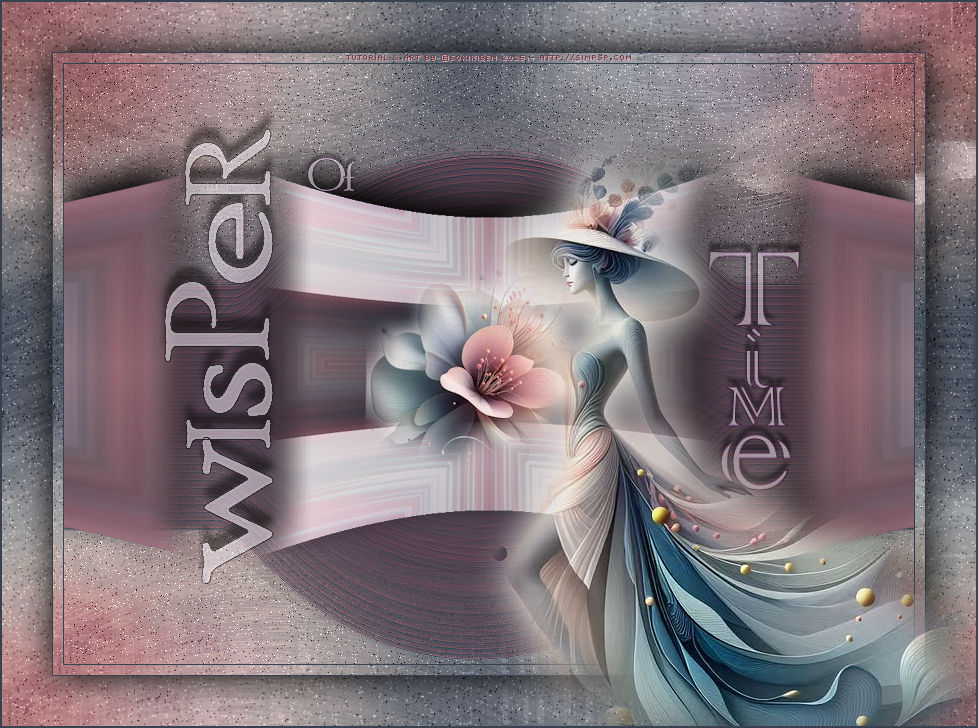
Entre sombras e luz, o tempo sussurra segredos esquecidos. Em cada brisa suave, um eco de memórias perdidas dança no silêncio. O passado e o presente se entrelaçam em murmúrios etéreos, guiando corações que ainda sonham.
Between shadows and light, time whispers forgotten secrets. In every gentle breeze, an echo of lost memories dances in the silence. The past and present intertwine in ethereal murmurs, guiding hearts that still dream.
TRADUÇÕES:
Obrigada aos nossos Tradutores
MATERIAL: 1 Tube ou Misted Personagem à sua escolha 1 Misted Floral à sua escolha Outros Materiais by Soxikibem
PLUGINS: Mehdi > Sorting Tiles Mura;s Meister > Copies MV's Plugins > Pano Warp VM Tool Box > Blast Xero > Super Smooth
Este Tutorial foi escrito
por Soxikibem, qualquer semelhança é mera coincidência.
Cor 3: #95380d
2 - Abra uma imagem
transparente de 850x600px. Selections > Select All. Edit > Copy no Misted Floral. Edit > Paste Into Selection. Selections > Select None.
3 - Effects > Image Effects > Seamless Tiling: Default. Plugin VM Tool Box > Blast: 228.
4 - Effects > Distortion Effects > Wave.
5 - Effects > Image Effects > Seamless Tiling.
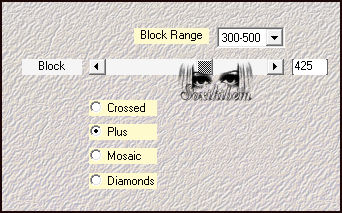
6 - Layers > Duplicate. Plugin Mehdi > Sorting Tiles.
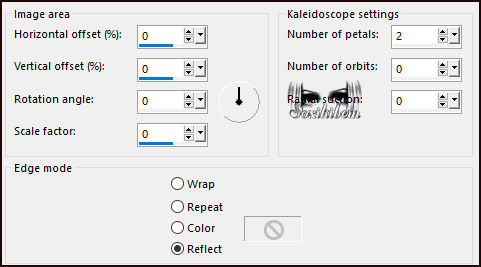
7 - Effects > Reflection Effects > Kaleidoscope.
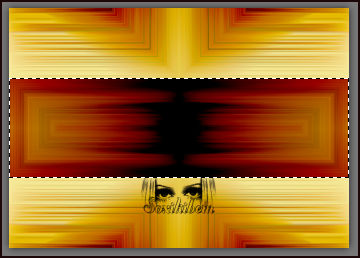
8 - Layers > Duplicate. Layers > Properties > General > Blend Mode: Burn. * Na Segunda versão eu usei o Blend Hard Light. Layers > Merge > Merge Down. Selection Tool > Tolerance & Feather: 0, selecione o efeito retângulo. Selections > Promote Selection to Layer. Selections > Select None.
9 - Fechar a visibilidade da Layer Promoted Selection. Ativar a Layer Copy of Raster 1. Edit > Copy no Misted Floral. Edit > Paste as New Layer.
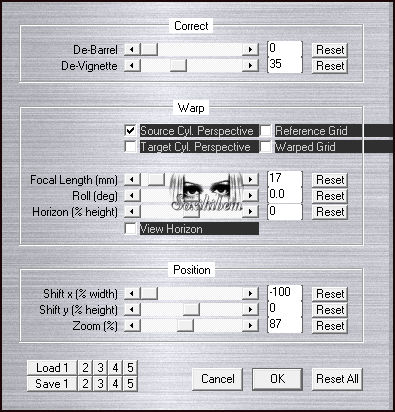
10 - Layers > Merge > Merge Down. MV's Plugins > Pano Warp.
11 - Image Resize: 70%, all layers desmarcado. Selection Tool > Custom Selection. Ativar a Layer Raster 1. Layers > New Raster Layer. Pintar a seleção com a cor 3. Selections > Select None.
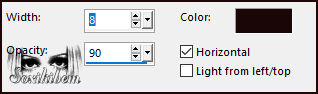
12 - Effects > Texture Effects > Blinds, com a cor do Foreground.
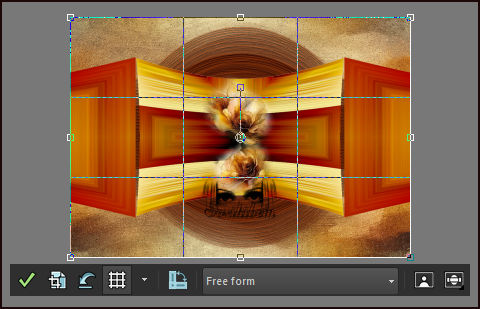
13 - Effects > Distortion Effects > Warp.
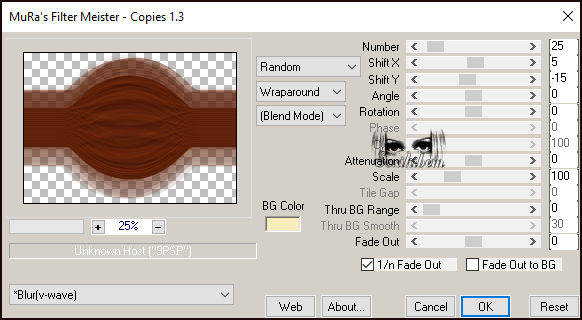
14 - Plugin Mura's Meister > Copies.
15 - Effects > Edge Effects > Enhance. Ativar a Layer Raster 1. Plugin Xero > Super Smooth
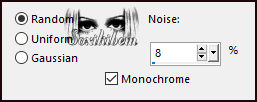
16 - Adjust > Add/Remove Noise > Add Noise.
17 - Ativar e abrir a visibilidade da Layer Promoted Selection. MV's Plugins > Pano Warp.
18 - Pick Tool: Position X: -96, Position Y: 100. Layers > Duplicate. Mirror > Mirror Horizontal. Layers > Merge > Merge Down.
19 - Crop Tool > Merge Opaque Layer.
20 - Layers > Merge Down. Selections > Load/Save Selections > Load Selection From Disk: 284_Xiki_1. Pressione a tecla Delete por 5 vezes. Selections > Select None.
21 - Effects > 3D Effects > Drop Shadow: cor #000000 (Preto)
22 - Edit > Copy no TituloWOT_Xiki. Edit > Paste a New Layer. Pick Tool: Position X: 93, Position Y: 43.
23 - Ativar a Layer Raster 1. Edit > Copy.
24 - Image > Add Borders > Symmetric: 1px na cor do Foreground Selections > Select All. Image > Add Borders > Symmetric: 10px com qualquer cor Selections > Invert. Edit > Paste Into Selection. Selections > Select None.
25 - Image > Add Borders > Symmetric: 1px cor Foreground Selections > Select All. Image > Add Borders > Symmetric: 50px com qualquer cor. Selections > Invert. Edit > Paste Into Selection.
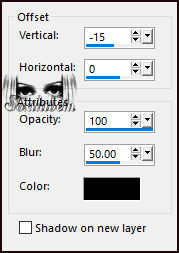
26 - Selections > Invert. Effects > 3D Effects > Drop Shadow: 0, 0, 100, 50, cor #000000 (Preto). Selections > Select None.
27 - Image > Add Borders > Symmetric: 2px cor Foreground.
28 - Edit > Copy no Tube Personagem. Edit > Paste as New Layer. Posicione e aplique Drop Shadow como preferir.
29 -
Aplicar sua marca d'água ou assinatura.
VERSÃO:
Créditos: Formatação, Arte Final e Tutorial by Soxikibem Tube Principal & Misted: Tubed by Pqna&Alice Outros Materiais: by Soxikibem
Sinta-se à vontade para enviar suas versões. Terei todo o prazer em publicá-las em nosso site.
|