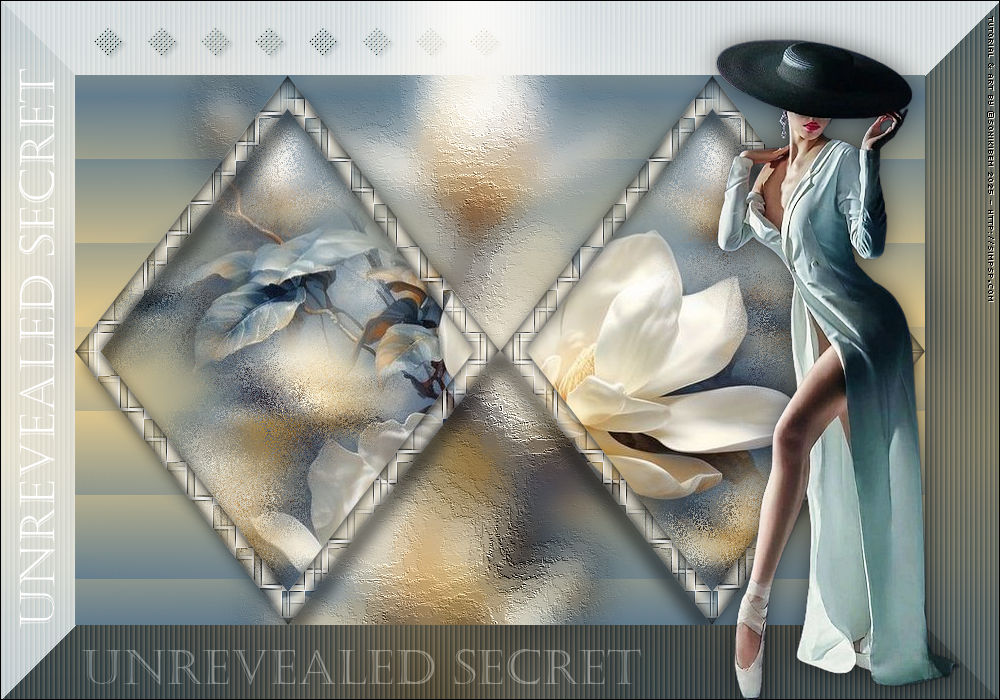
|
Há segredos que sussurram no silêncio, ocultos entre palavras nunca ditas. Eles vivem nas entrelinhas de olhares desviados, no peso suave de um suspiro contido. Não precisam de cadeados, pois sua força está no que nunca é exposto, no que permanece intocado pelo tempo.
There are secrets that whisper in silence, hidden between words never spoken. They live in the spaces between averted gazes, in the gentle weight of a stifled sigh. They need no locks, for their strength lies in what is never exposed, in what remains untouched by time.
TRADUÇÕES:
Obrigada aos nossos Tradutores
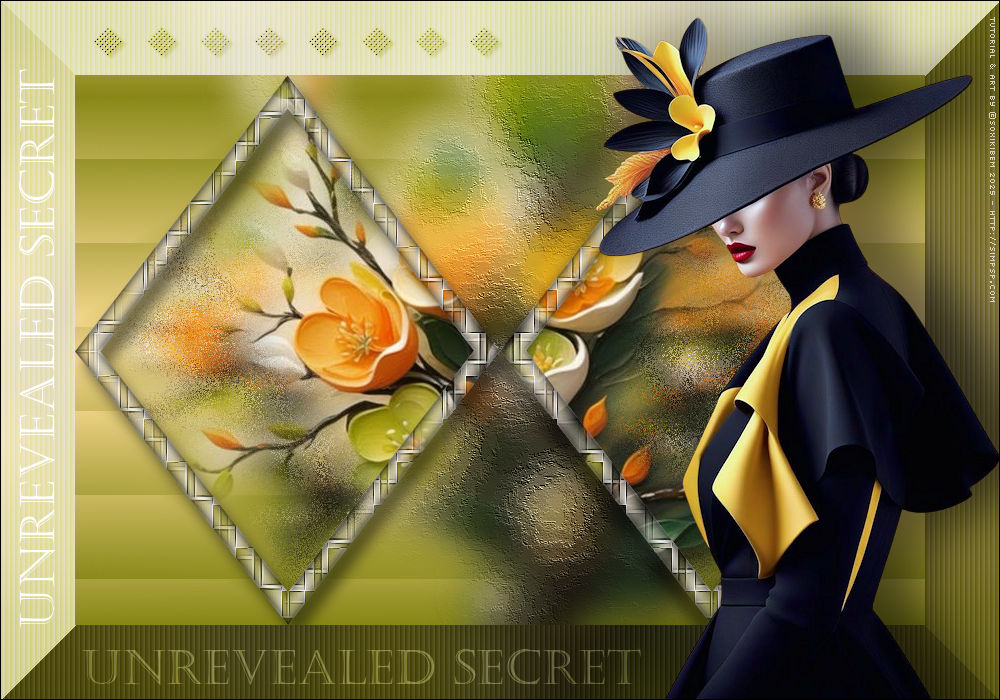
MATERIAL: 1 Tube Principal ou Personagem à sua escolha 1 Misted Paisagem à sua escolha 1 Tube Decorativo à sua escolha 1 mask: Narah_Mask Outros Materiais by Soxikibem
PLUGINS: Toadies: Bitches Crystal, Blur'em, Weaver, Sucking Toad Bevel II.2
Este Tutorial foi escrito por Soxikibem, qualquer semelhança é mera coincidência. Tutorial testado e revisado por Inácia Neves.
Cor 3: #dad3c3
2 - Abra uma imagem
transparente de 850x550px.
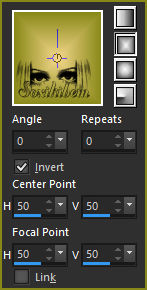
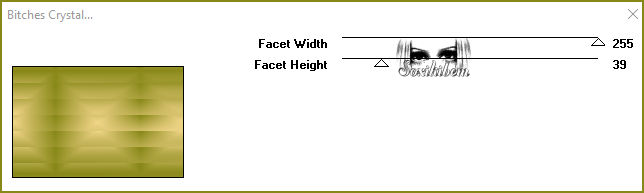
3 - Plugin Toadies > Bitches Crystal.
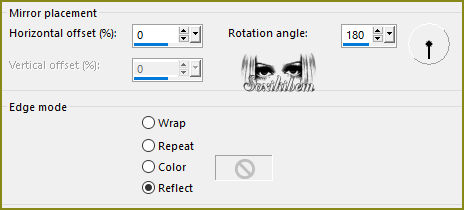
4 - Effects > Reflection Effects > Rotating Mirror.
5 - Layers > New Raster Layer. Selections > Load/Save Selections > Load Selection From Disk: 281_Xixi1. Edit > Copy no Misted Floral. Edit > Paste Into Seletion. Adjust > Sharpness > Sharpen.
6 - Plugin Toadies > Blur'em.
7 - Selections > Modify > Select Selection Borders.
8 - Layers > New Raster Layer. Pintar a seleção com a cor 3. Plugin Toadies > Weaver.
9 - Effects > Edge Effects > Enhance More. Layers > New Raster Layer. Effects > 3D Effects > Cutout.
10 - Layers > Merge > Merge Down. Effects > 3D Effects > Drop Shadow. Selections > Select None.
11 - Ativar a Layer Raster 2. Layers > Duplicate. Image > Mirror > Mirror Horizontal. Layers > Merge > Merge Down.
12 - Ativar a Layer Raster 3. Layers > Duplicate. Image > Mirror > Mirror Horizontal. Layers > Merge > Merge Down.
13 - Ativar a Layer Raster 2. Edit > Copy no Misted Floral. Edit > Paste as New Layer.
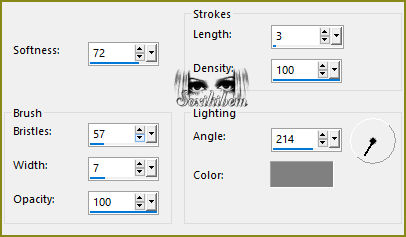
14 - Selections > Load/Save Selections > Load Selection From Disk: 281_Xixi2. Adjust > Blur > Gaussian Blur: 10. Selections > Promote Selection to Layer. Effects > Art Media Effects > Brush Strokes. Com a cor #808080. Selections > Select None.
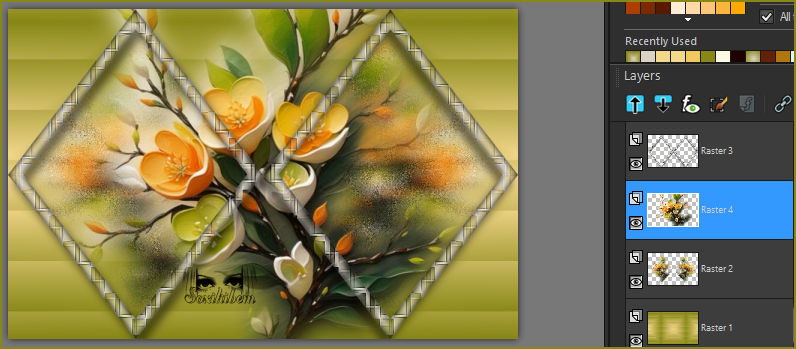
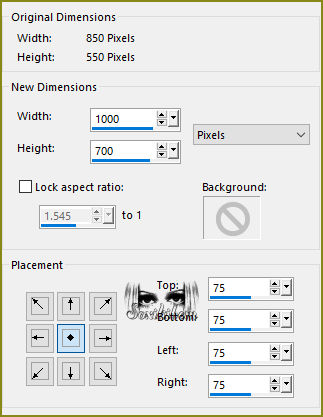
15 - Layers > Merge > Merge Visible. Edit > Copy. Image > Canvas Size.
16 - Layers > New Raster Layer. Selections > Select All. Edit > Paste Into Selection. Selections > Select None. Layers > Arrange > Move Down. Adjust > Blur > Gaussian Blur: 30.
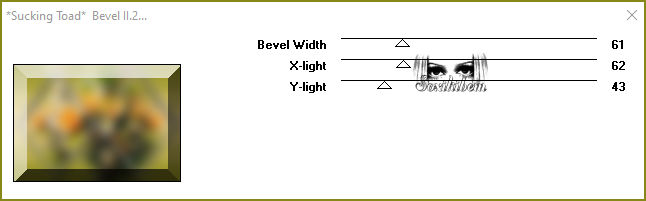
17 - Plugin Toadies > Sucking Toad Bevel II.2.
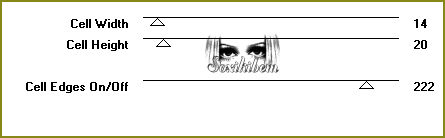
18 - Layers > New Raster Layer. Selections > Load/Save Selections > Load Selection From Disk: 281_Xixi3. Pintar a seleção com a cor 3. Effects > Texture Effects > Blinds. Layers > Properties > General > Blend Mode: Soft Light. Selections > Select None.
19 - Ativar a Layer do topo (Merged). Layers > New Raster Layer. Pintar a layer com a cor #000000 (Preto). Selections > Select All. Selections > Modify > Contract: 1. Edit > Cut ou aperte a Tecla Delete. Selections > Select None.
20 - Edit > Copy no Tube Personagem. Edit > Paste as New Layer. Posicionar à direita. Aplique Drop Shadow como preferir.
21 - Edit > Copy no Titulo_US_Xiki. Edit > Paste as New Layer. Pick Tool: Position X: 81, Position Y: 649. Layers > Properties > General > Blend Mode: Soft Light.
22 - Layers > Duplicate. Image > Free Rotate. Pick Tool: Position X: 19, Position Y: 69. Layers > Properties > General > Blend Mode: Normal.
23 - Edit > Copy no DecorUS_Xiki. *Lembre-se de Deletar minha marca d'agua. Edit > Paste as New Layer. Pick Tool: Position X: 92, Position Y: 26. Layers > Properties: Blend Mode Burn.
24 -
Aplicar sua marca d'água ou assinatura.
Versão:
Créditos: Formatação, Arte Final e Tutorial by Soxikibem Versão 1 - Tube Principal & Misted Floral: Tubed by Pqna&Alice Versão 2 - Tube Principal by Inacia Neves - Misted Floral by Pqna&Alice Outros Materiais: by Soxikibem
Sinta-se à vontade para enviar suas versões. Terei todo o prazer em publicá-las em nosso site.
|