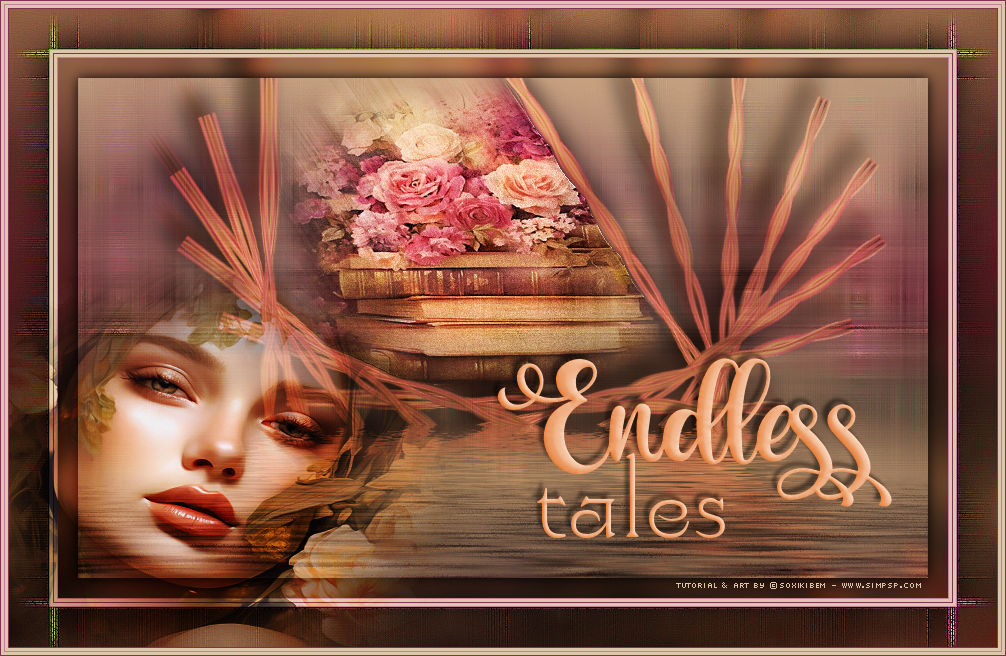
|
Em um mundo onde o tempo parece se estender infinitamente, as histórias nunca acabam. Cada página vira uma nova jornada, onde personagens, sonhos e mistérios se entrelaçam em um ciclo eterno de descobertas. “Endless Tales” é um convite para mergulhar em narrativas que se desdobram sem fim, levando o leitor a lugares onde a imaginação não conhece limites. Cada conto é um portal, cada palavra, um eco de uma aventura por vir. Aqui, as histórias são eternas, e quem se aventura nelas, nunca deixa de explorar.
In a world where time seems to stretch infinitely, the stories never end. Each page turns into a new journey, where characters, dreams, and mysteries intertwine in an eternal cycle of discoveries. Endless Tales is an invitation to dive into narratives that unfold endlessly, taking the reader to places where imagination knows no limits. Each tale is a portal, each word, an echo of an adventure yet to come. Here, stories are eternal, and those who venture into them never stop exploring.
TRADUÇÕES:
Obrigada aos nossos Tradutores
MATERIAL: 1 Tube Principal ou Personagem à sua escolha 1 Misted Paisagem à sua escolha Outros Materiais by Soxikibem
PLUGINS: AAA Filters > Scatter Flaming Pear > Flood Mehdi > Weaver Mura's Meister > Copies
Este Tutorial foi escrito por Soxikibem, qualquer semelhança é mera coincidência. Tutorial testado e revisado por Inácia Neves. Cor 3: #fff0bb
2 - Abra uma imagem
transparente de 850x500px. Selections > Select All.
3 - Edit > Copy no Misted Livros ou Paisagem, como preferir. Edit > Paste Into Selection. Selections > Select None.
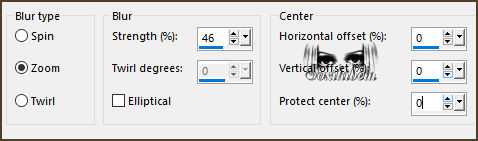
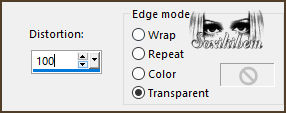
4 - Adjust > Blur > Radial Blur.
5 - Effects > Edge Effects > Enhance. Plugin Mehdi > Weaver.
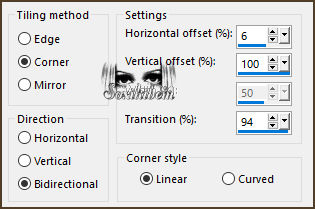
6 - Effects > Edge Effects > Enhance. Effects > Image Effects > Seamless Tiling: Side by Side.
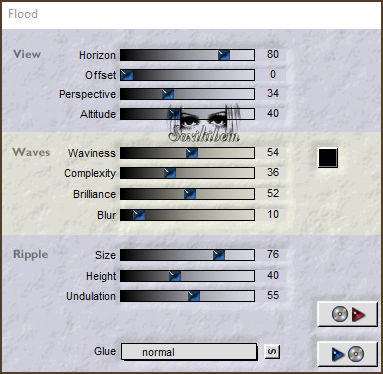
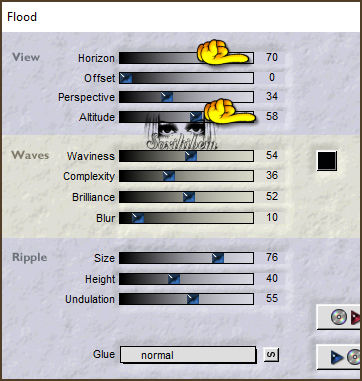
7 - Plugin > Flaming Pear > Flood.
8 - Layers > New Raster Layer. Selections > Select All. Edit Copy no Misted que estas usando. Edit > Paste Into Selctions. Selections > Select None.
9 - Effects > Image Effects > Seamless Tiling: Default. Adjust > Blur > Gaussian Blur: 20.
10 - Effects > Geometric Effects > Perspective - Vertical. Repetir o efeito Perspective - Vertical mudando o valor para -100.
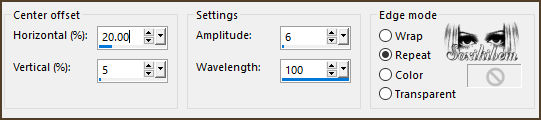
11 - Layers > Duplicate. Layers > Merge > Merge Down. Effects > Distortion Effects > Ripple.
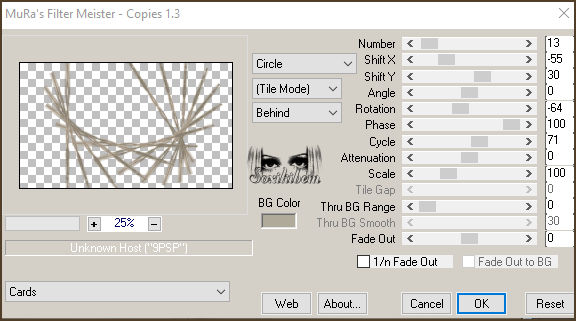
12 - Layers > Duplicate. Image > Mirror > Mirror Horizontal. Layers > Merge > Merge Down. Plugin > Mura's Meister > Copies.
13 - Plugin > Flaming Pear > Flood.
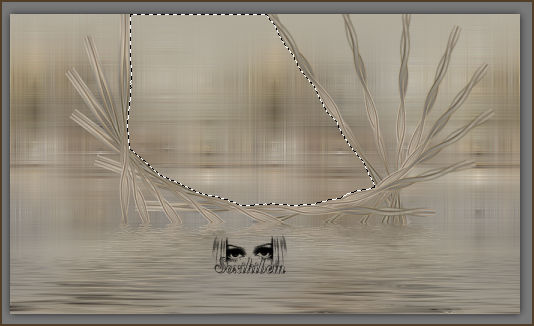
14 - Com a ferramenta Magic Wand: Tolerance e Feather em 0, clique no meio do efeito como no exemplo:
15 - Layers > New Raster Layer. Edit > Copy no Misted em uso. Edit > Paste Into Selection. Adjust > Sharpness > Sharpen. Layers > Duplicate.
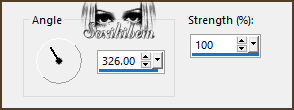
16 - Ativar a Layer Raster 3. Ajudst > Blur > Motion Blur. Effects > Edge Effects > Enhance. Layers > Properties > General > Blend Mode: Overlay.
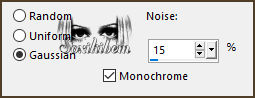
17 - Ativar a Layer Copy of Raster 3. Adjust > Add/Remove Noise > Add Noise. Selections > Select None. Layers > Properties > General > Blend Mode: Hard Light.
18 - Ativar a Layer Raster 2. Layers > Duplicate. Novamente ativar a Layer Raster 2 Ajudst > Blur > Motion Blur. Layers > Properties > General > Blend Mode: Overlay.
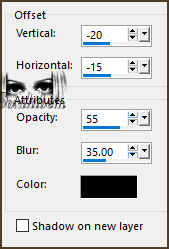
19 - Ativar a Layer Copy of Raster 2. Effects > 3D Effects > Drop Shadow: color: #000000 (preto) Layers > Properties > General > Blend Mode: Hard Light.
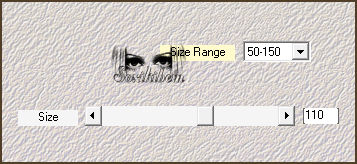
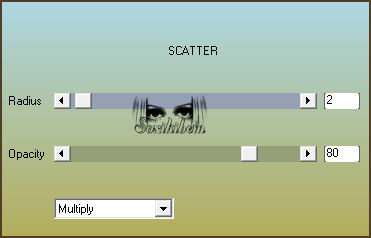
20 - Ativar a Layer Raster 1. Plugin AAA Filters > Scatter.
21 - Layers > Merge > Merge All. Selections > Select All. Edit > Copy.
22 - Image > Add Borders > Symmetric: 20px com qualquer cor. Selections > Invert. Edit > Paste Into Selection. Adjust > Blur > Gaussian Blur: 10. Plugin AAA Filters > Scatter.
23 - Selections > Invert. Effects > 3D Effects > Drop Shadow: 0, 0, 100, 20, color: #000000 (preto). Selections > Select None.
24 - Image > Add Borders > Symmetric: 1px na cor 3 3px cor Background 1px cor Foreground 3px cor Background 1px na cor 3
25 - Selections > Select All. Image > Add Borders > Symmetric: 40px com qualquer cor. Selections > Invert. Edit > Paste Into Selection. Adjust > Blur > Gaussian Blur: 10.
26 - Plugin Mehdi > Weaver. Effects > Edge Effects > Enhance. Edit > Repeat Enhance Edges.
27 - Plugin AAA Filters > Scatter. Selections > Invert. Effects > 3D Effects > Drop Shadow: 0, 0, 100, 50, color: #000000 (preto). Selections > Select None.
28 - Edit > Copy no Tube Personagem. Edit > Paste as New Layer. Posicione à esquerda do trabalho. Aplique Drop Shadow que preferir.
29 - Edit > Copy no TituloEndless_Xiki. Edit > Paste as New Layer. Posicione à direita do trabalho.
30 - Image > Add Borders > Symmetric: 1px cor Foreground 3px cor Background 1px na cor cor 3 3px cor Background 1px cor Foreground
31 - Se você desejar
redimensione seu trabalho.
Versão:
Créditos: Formatação, Arte Final e Tutorial by Soxikibem Tube Principal & Misted: Tubed by Pqna&Alice Outros Materiais: by Soxikibem
Sinta-se à vontade para enviar suas versões. Terei todo o prazer em publicá-las em nosso site.
|