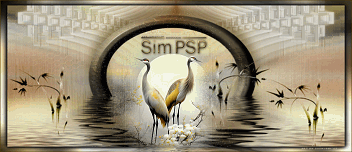
|
TRADUÇÕES: Obrigada aos nossos Tradutores
MATERIAL: 1 Tube Principal ou Personagem à sua escolha 1 Misted Paisagem à sua escolha Outros Materiais by Soxikibem
PLUGINS: Frischluft: Mosaic Plane Mehdi: Sorting Tiles Penta.com: Dot and Cross
Este Tutorial foi escrito por Soxikibem, qualquer semelhança é mera coincidência. Tutorial testado e revisado por Inácia Neves.
Tutorial elaborado no PSP 2022 Cor 3: #ffffff
2 - Abra uma imagem
transparente de 900x600px. Selections > Select All.
3 - Edit > Copy no Misted Paisagem. Edit > Paste Into Selections. Selections > Select None.
4 - Effects > Image Effects > Seamless Tiling: Default.
5 - Adjust > Blur > Radial Blur.
6 - Effects > Plugins > Mehdi > Sorting Tiles.
7 - Selections > Load/Save Selections > Load Selection From Disk: WhisperingPetals_Xiki1. Selections > Promote Selection to Layer. Selections > Select None. Effects > Plugins > Frischluft > Mosaic Plane.
8 - Effects > Plugins > Penta.com > Dot and Cross. Layers > Properties > General > Blend Mode: Burn - Opacity: 80%.
*Na segunda versão eu usei o Blend Mode: Overlay - Opacity: 100%
9 - Ativar a Layer Raster 1. Selections > Load/Save Selections > Load Selection From Disk: WhisperingPetals_Xiki2. Selections > Promote Selection to Layer. Selections > Select None. Adjust > Add/Remove Noise > Add Noise. Adjust > Sharpness > Sharpen.
10 - Ativar a Layer Raster 1. Selections > Load/Save Selections > Load Selection From Disk: WhisperingPetals_Xiki3. Selections > Promote Selection to Layer. Edit > Copy no Misted Paisagem. Edit > Paste as New Layer. Com a Move Tool posicione a imagem como preferir.
11 - Selections > Invert. Edit > Cut. Selections > Invert. Adjust > Sharpness > Sharpen More. Adjust > Add/Remove Noise > Add Noise.
12 - Layers > Merge > Merge Down. Selections > Modify > Select Selection Borders.
13 - Adjust > Bur > Gaussian Blur: 10. Effects > 3D Effects > Inner Bevel.
14 - Selections > Select None. Ativar a Layer Promoted Selection 1. Layers > Merge > Merge Down. Layers > Duplicate. Image > Mirror > Mirror Horizontal. Image > Mirror > Mirror Vertical. Image > Flip > Flip Vertical.
15 - Ativar a Layer Raster 1. Selections > Load/Save Selections > Load Selection From Disk: WhisperingPetals_Xiki4. Selections > Promote Selection to Layer. Effects > Texture Effects > Weave, com a cor 3: #ffffff Selections > Select None. Layers > Properties > General > Blend Mode: Hard light.
16 - Ativar a Layer Raster 1. Edit > Copy no Misted Paisagem. Edit > Paste as New Layer. Layers > Properties > General > Blend Mode: Soft Light.
17 - Confira as Layers.
18 - Ativar a Layer Promoted Selection. Edit > Copy no DecorWisperingPetals. Apague a minha marca d'agua. Edit > Paste as New Layer. Pick Tool: Position X: 21 - Position Y: 0.
19 - Edit > Copy no TituloWP_Xiki. Edit > Paste as New Layer. Pick Tool: Position X: 605 - Position Y: 4. Layers > Properties > General: Blend Mode Luminance (L).
20 - Image > Add Borders > Symmetric: 1px cor Foreground 20px cor branca 1px cor Foreground 5px cor branca 1px cor Foreground
21 - Selections > Select All. Image > Add Borders > Symmetric: 50px cor branca Effects > 3D Effects > Drop Shadow com a cor do Foreground.
22 - Selections > Select None. Image > Add Borders > Symmetric: 1px cor Foreground 20px cor branca
23 - Edit > Copy no Tube Personagem. Edit > Paste as New Layer. Posicione e aplique efeitos como preferir.
24 - Image > Add Borders > Symmetric: 1px cor Foreground.
25 - Se você desejar
redimensione seu trabalho.
Versão:
Créditos: Formatação, Arte Final e Tutorial by Soxikibem Tube Principal: Tubed by Pqna&Alice Outros Materiais: by Soxikibem
Sinta-se à vontade para enviar suas versões. Terei todo o prazer em publicá-las em nosso site.
|


