|
TRADUÇÕES:
Obrigada aos nossos Tradutores
MATERIAL: 1 Tube Personagem à sua escolha 1 Misted Paisagem à sua escolha NarahsMasks_1771 Outros Materiais by Soxikibem
Plugins: AAA Frames > Foto Frame Art Effects > JazzMan's Fast Blur (download aqui) Mehdi > Wavy Lab 1.1 Filters Unlimited 2.0 > VM Extravaganza
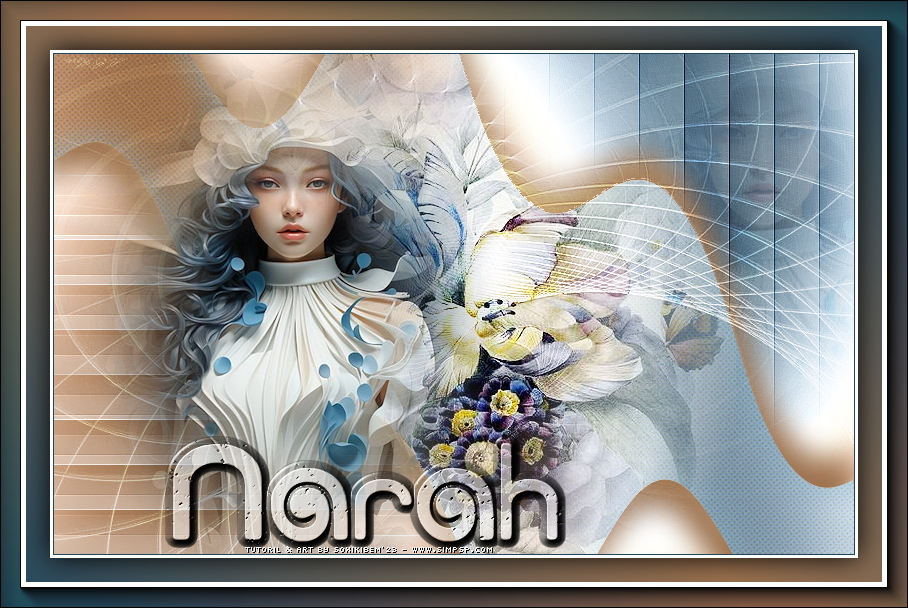
Este Tutorial foi escrito por Soxikibem, qualquer semelhança é mera coincidência.
Tutorial testado e revisado por Inácia Neves. Cor 3: #a6caca cor 4: #ffffff: #ffffff
2 - Abra o Alpha_Narah_BySoxikibem. Sequência das cores: Background, Foreground, Cor 3, cor 4: #ffffff.
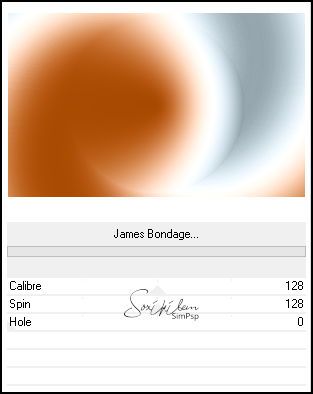
3 - Filters Unlimited 2.0 > VM Extravaganza > James Bondage.
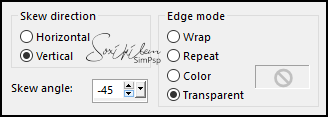
4 - Layers > Duplicate. Effects > Geometric Effects > Skew.
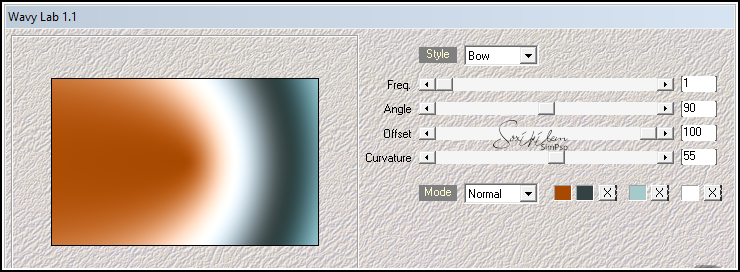
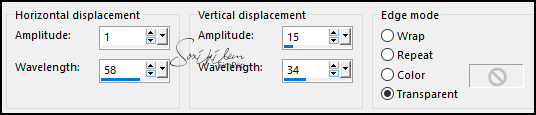
5 - Effects > Distortion Effects > Wave.
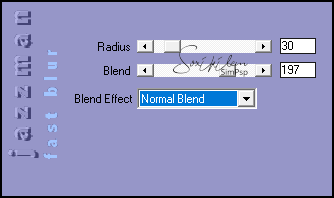
6 - Plugins > Art Effects > JazzMan's Fast Blur.
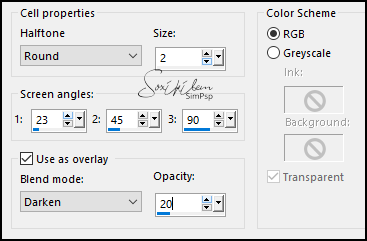
7 - Effects > Artistic Effects > Halftone.
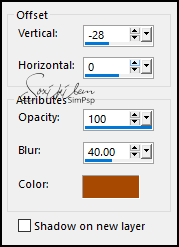
8 - Effects > 3D Effects > Drop Shadow, com a cor do Background.
9 - Effects > 3D Effects > Drop Shadow, com a cor do Background.
10 - Selections > Load/Save Selections > Load Selection From Alpha Channel: Selection #4. Edit > Copy no Misted Paisagem. Edit > Paste as New Layer. Selections > Invert. Aperte a tecla Delete. Selections > Select None. Adjust > Sharpness > Sharpen. Layers > Merge > Merge Down.
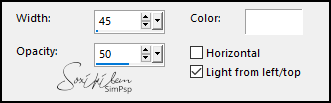
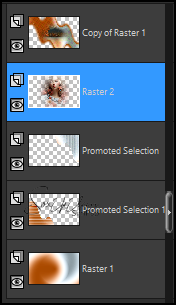
11 - Ativar a Layer Raster 1. Selections > Load/Save Selections > Load Selection From Alpha Channel: Selection #2. Selections > Promote Selection to Layer. Effects > Texture Effects > Blinds, com a cor 4: #ffffff (branco).
12 - Effects > Edge Effects > Enhance More. Layers > Properties > General> Blend Mode: Multiply. Selections > Select None.
13 - Ativar a Layer Raster 1. Selections > Load/Save Selections > Load Selection From Alpha Channel: Selection #3. Selections > Promote Selection to Layer. Effects > Texture Effects > Blinds, com a cor 4: #ffffff (branco).
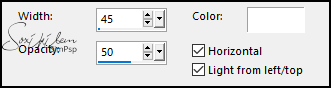
14 - Effects > Texture Effects > Blinds, com a cor do Background.
Effects > Edge Effects > Enhance. Selections > Select None. Layers > Properties > General> Blend Mode: Lighten.
15 - Edit > Copy no Misted Personagem. Edit > Paste as New Layer Layers > Arrange > Move Up.
16 - Posicione à direita do trabalho no topo. Layers > Properties: Blend Mod Soft Light, Opacity 50%.
17 - Ativar a Layer do topo. Paste as New layer o Misted Personagem. Resize se necessário, se estiver usando o do material, o resize foi de 70%. Adjust > Sharpness > Sharpen. Posicione à esquerda como no trabalho apresentado.
18 - Layers > New Raster Layer. Pintar com a cor 4: #ffffff (branca) Layers > New Mask Layer > From Image: NarahsMasks_1771 Effects > Edge Effects > Enhance. Layers Merge > Merge Group.
19 - Layers > Arrange > Move Down. Layers > Properties > General> Blend Mode: Overlay.
20 - Image > Add Borders > Symmetric: 1px - cor Foreground 3px cor 4- : #ffffff (branca) Selections > Select All.
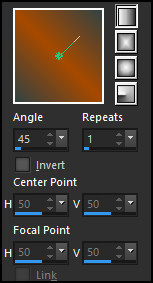
21 - Image > Add Borders > Symmetric: 50px com qualquer cor. Selections > Invert. Pintar com um gradiente Linear, formado pelas cores do Foreground e Background: Angle 45, Repeats 1, invert desmarcado
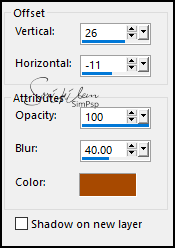
22 - Selections > Invert. Effects > 3D Effects > Drop Shadow: 0, 0, 100, 40, cor #000000 (preta).
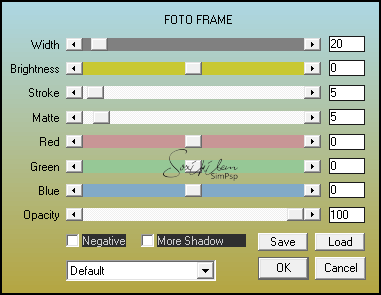
23 - Selections > Invert. Plugins > AAA Frames > Foto Frame.
Selections > Select None.
24 - Edit > Copy no TituloNarah_ByXiki. Edit > Paste as New Layer. Pick Tool: Position X: 165, Position Y: 435. Layers > Properties > General > Blend Mode: Luminance (L) ou outro que preferir.
25 - Se você desejar
redimensione seu trabalho.
Versão:
Créditos: Formatação, Arte Final e Tutorial by Soxikibem Tube Principal: Tubed by Pqna&Alice Mask: by Narah Outros Materiais: by Soxikibem
Sinta-se à vontade para enviar suas versões. Terei todo o prazer em publicá-las em nosso site.
|