|
TRADUÇÕES:
Obrigada aos nossos Tradutores
MATERIAL: 1 Misted Personagem à sua escolha Outros Materiais by Soxikibem
Plugins: AAA Filter > Foto Frame Graphics Plus > Cross Shadow Mura's Seamless > Emboss at Alpha Simple > Top Left Mirror Textures > Craquelure, Patchwork
Este Tutorial foi escrito por Soxikibem, qualquer semelhança é mera coincidência. Tutorial testado e revisado por Inácia Neves.
Cor 3: #000000
2 - Abra o Alpha_AngelStar, Duplicar e fechar o original. Selections > Select All. Edit > Copy no Misted Personagem. Edit > Paste Into Selection. Selections > Select None.
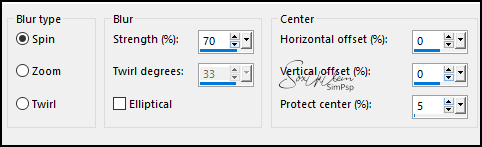
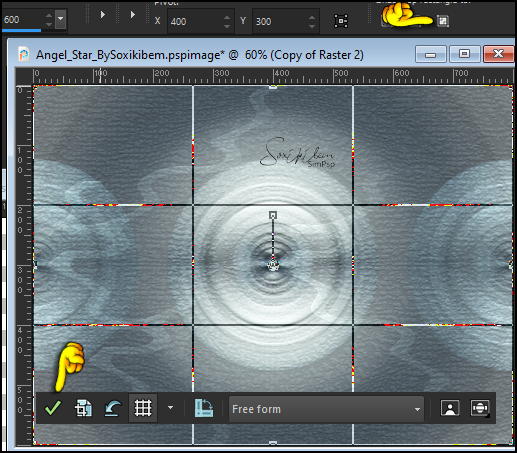
3 - Effects > Image Effects > Seamless Tiling: Default. Adjust > Blur > Radial Blur.
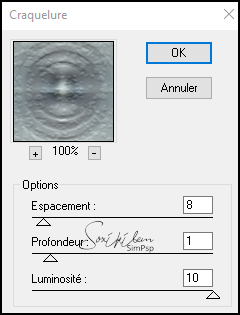
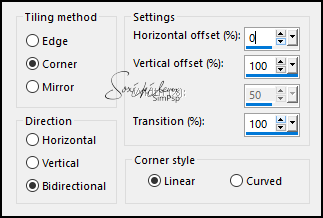
4 - Plugins > Simple > Top Left Mirror. Plugins > Textures > Craquelure.
5 - Selections > Load/Save Selections > Load Selection From Alpha Channel: Selection #1. Selections > Promote Selection to Layer. Selections > Select None.
6 - Effects > Image Effects > Seamless Tiling.
Layers > Properties > General > Blend Mode: Overlay.
7 - Ativar a Layer Raster 1. Selections > Load/Save Selections > Load Selection From Alpha Channel: Selection #2. Layers > New Raster Layer. Ferramenta Flood Fill: Opacity 20%. Pintar com a cor do Background. Selections > Select None.
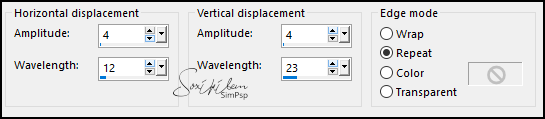
8 - Selections > Load/Save Selections > Load Selection From Alpha Channel: Selection #3. Aperte a tecla Delete. Selections > Select None. Effects > Distortion Effects > Wave..
9 - Effects > Image Effects > Seamless Tiling.
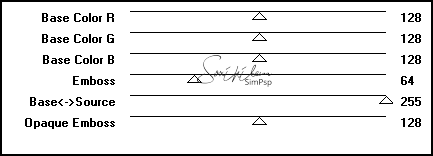
10 - Plugins > Mura's Seamless > Emboss at Alpha: Default.
Edit > Repeat Emboss at Alpha. Layers > Properties > General > Blend Mode: Dodge.
11 - Layers > Duplicate. Pick Tool: Position X: -284, Position Y: 160. Ferramenta Crop Tool > Merged Opaque
12 - Layers > Duplicate. Image > Mirror > Mirror Horizontal. Image > Mirror > Mirror Vertical.
13 - Ativar a Layer do topo. Edit > Copy no DecorAS_BySoxikibem. Edit > Paste as New Layer. Plugins > Mura's Seamless > Emboss at Alpha: Default.
14 - Effects > Image Effects > Seamless Tiling.
15 - Selections > Load/Save Selections > Load Selection From Alpha Channel: Selection #4. Layers New Raster Layer. Edit > Copy no Misted Personagem. Edit > Paste Into Selection. Adjust > Sharpness > Sharpen. Selections > Select None.
16- Layers > Duplicate. Effects > Image Effects > Seamless Tiling.
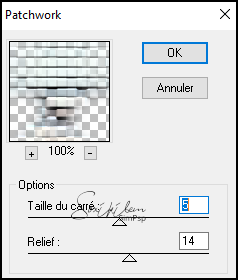
17 - Plugins > Textures > Patchwork.
Layers > Arrange > Move Down. Layers > Properties > General > Opacity: 70%. Effects > Edge Effects > Enhance.
18 - Ativar a Layer do topo. Edit > Copy no DecorAS_BySoxikibem2. Edit > Paste a New Layer.
19 - Ativar a Layer Raster 1. Edit > Copy no DecorAS_BySoxikibem3. Pick Tool: Position X: 36, Position Y: 0.
20 - Edt > Copy no DecorAS_BySoxikibem4. Edit > Paste a New Layer. Pick Tool: Position X: 181, Position Y: 9.
21 - Layers > Merge Visibile. Layers > Duplicate. Image > Resize: 90%, all layers desmarcado.
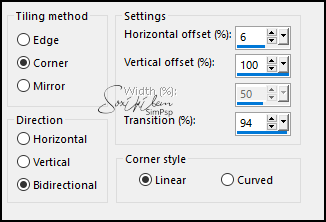
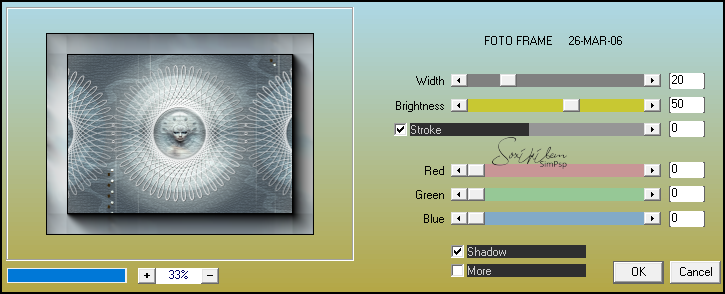
22 - Ativar a Layer Merged. Plugins > AAA Filter > Foto Frame.
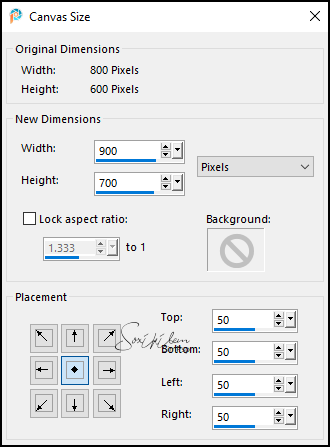
23 - Edit > Copy Special > Copy Merged. Image > Canvas Size: 900x700.
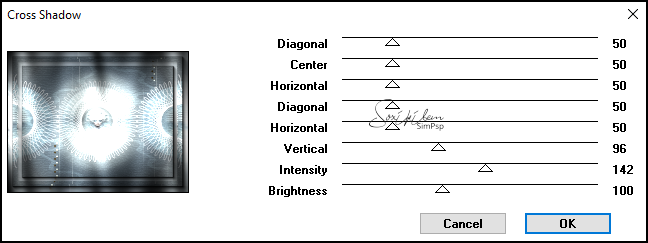
24 - Com a ferramenta Magic Wand selecione a parte transparente. Edit > Paste Into Selection. Plugins > Graphics Plus > Cross Shadow.
Selections > Select None.
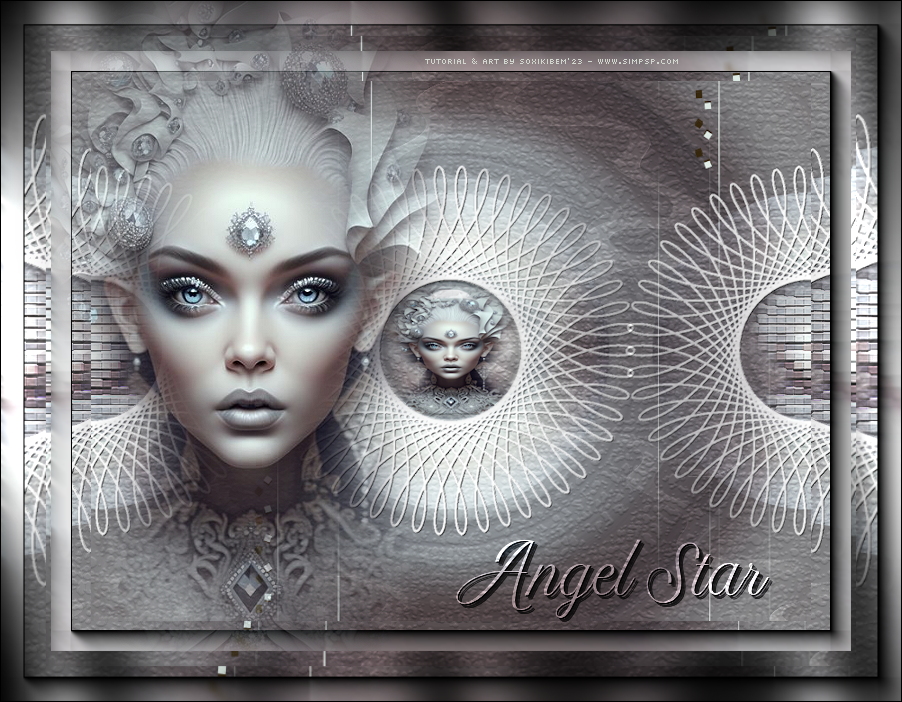
25 - Ativar a Layer do topo. Edit > Copy no tube Personagem. Edit > Paste as New Layer. Se estiver usando o tube do Material posicionar com a ferramenta Pick Tool: Position X: -29, Position Y: -163.
26 - Edit > Copy no Titulo_AS_ByXiki. Edit > Paste as New Layer. Pick Tool: Position X: 455, Position Y: 538. Effects > 3D Effects > Drop Shadow: 1, 1, 100, 0, cor #000000 (preto). Effects > 3D Effects > Drop Shadow: 3, 3, 50, 0, cor #000000 (preto). Layers > Properties > General > Blend Mode: Overlay.
27 - Image > Add Borders > Symmetri: 1px cor 3 #000000 (preto)
28 - Se você desejar
redimensione seu trabalho.
Versão:
Créditos: Formatação, Arte Final e Tutorial by Soxikibem Tube Principal: Tubed by Pqna&Alice Outros Materiais: by Soxikibem
Sinta-se à vontade para enviar suas versões. Terei todo o prazer em publicá-las em nosso site.
|