|
TRADUÇÕES:
Obrigada aos nossos tradutores!
MATERIAL 1 Tube Principal à sua escolha Narah_mask_Abstract104 DecorBea1BySoxikibem TituloBeaByXiki Selections (Salvar as seleções na pasta Selections do PSP) SelectionBea1ByXiki SelectionBea2ByXiki SelectionBea3ByXiki SelectionBea4ByXiki
PLUGINS AP 01 [Innovations] > Lines - SilverLining Filters Unlimited 2.0 > Plugin AB 21: Wave Flying Simple > Diamonds Simple > Quick Tile Toadies > Weaver Toadies > What Are You
Este Tutorial foi escrito por
Soxikibem, qualquer semelhança é mera coincidência. Tutorial elaborado no PSP 2022
O meu agradecimento as Tubeiras pelos Tubes e Masks
Fique à vontade para mudar os Blends das layers, pois, dependendo das cores e imagens o resultado poderá mudar.
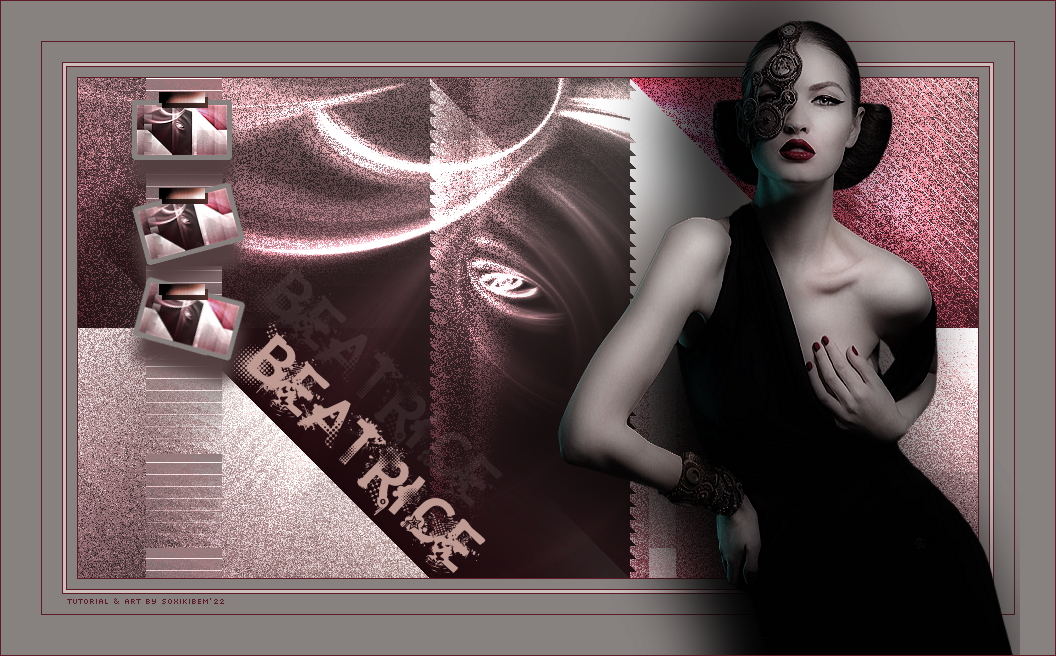
TUTORIAL
1 - Abrir o material no PSP, duplique e feche os originais. Escolha três cores para trabalhar. Foreground: #4f555f Background: #c69899 Cor 3: #d1dde1
2 - Abra uma transparência de 900x500px. Pintar com um gradiente Linear formado pelas cores do Foreground e Background:
3 - Effects > Plugins > Simple > Diamonds.
4 - Effects > Plugins > Simple > Quick Tile.
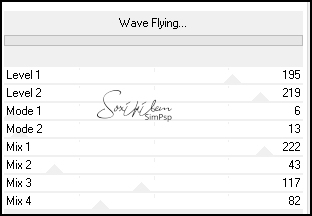
5 - Layers > Duplicate. Effects > Plugins > Filters Unlimited 2.0 > Plugin AB 21 > Wave Flying:
Layers > Properties > General > Blend Mode: Luminance - Opacity 70%.
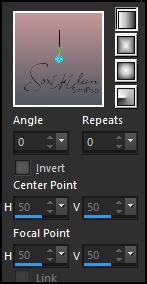
6 - Layers > New Raster Layer. Pintar com a cor #ffffff (branca). Layers > New Mask Layer > From Image: Narah_mask_Abstract104. Layers > Merge > Merge Group. Image > Mirror > Mirror Vertical. Layers > Properties > General > Blend Mode: Dodge.
7 - Layers > New Raster Layer. Selections > Load/Save Selections > Load Selections from Disk: SelectionBea1ByXiki. Pintar a seleção com a cor 3. Selections > Select None. Effects > Plugins > Toadies > What Are You?...: 45, 45.
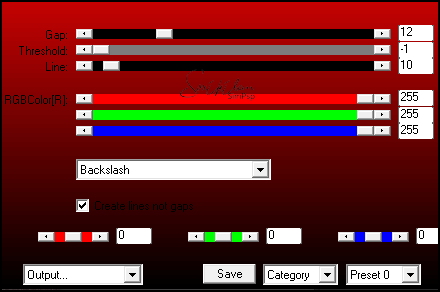
8 - Effects > Plugins > AP 01 [Innovations] > Lines - SilverLining:
Layers > Properties > General: Blend Mode: Dodge - Opacity 80%.
9 - Layers > New Raster Layer. Selections > Load/Save Selections > Load Selection From Disk: SelectionBea2ByXiki. Pintar a seleção com a cor 3. Selections > Select None. Effects > Plugins > Toadies > Weaver:
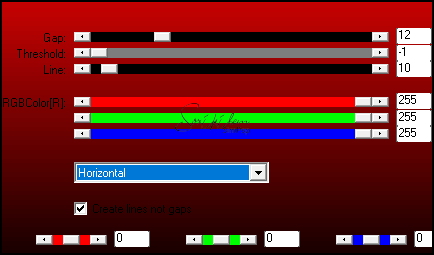
10 - Effects > Plugins > AP 01 [Innovations] > Lines - SilverLining:
Layers > Properties > General > Blend Mode: Luminance (L).
11 - Layers > New Raster Layer. Selections > Load/Save Selections > Load Selection From Disk: SelectionBea3ByXiki. Pintar a seleção com a cor 3. Selections > Select None. Effects > Plugins > Toadies > Weaver:
Layers > Properties > General > Blend Mode: Screen. Layers > Duplicate. Image > Mirror > Mirror Vertical. Layers > Merge > Merge Down.
12 - Selections > Load/Save Selections > Load Selection From Disk: SelectionBea4ByXiki. Pressionar uma vez a tecla Delete do teclado. Selections > Select None.
13 - Edit > Copy Special > Copy Merged. Edit > Paste as New Layer. Image > Resize: 10%, all layers desmarcado. Adjust > Sharpness > Sharpen. Selections > Select All. Selections > Float. Selections > Defloat.
14 - Selections > Modify > Expand: 5. Layers > New Raster Layer. Pintar a seleção com a cor 3. Selections > Select None. Layers > Arrange > Move Down. Ativar a layer de cima (layer da miniatura). Layers > Merge > Merge Down.
15 - Pick Tool: Position X 54, Position Y 22. Layers > Duplicate. Image > Free Rotate: Left, Free 15, All layers desmarcado. Pick Tool: Position X 54, Position Y 104. Layers > Duplicate. Image > Free Rotate: Right, Free 30, All layers desmarcado. Pick Tool: Position X 54, Position Y 198. Layers > Merge Down: 2 vezes. Effects > 3D Effects > Drop Shadow: 24, 0, 100, 20, com uma cor escura que combine com as suas cores, aqui usei a cor #4d373f.
16 - Edit > Copy no DecorBea1BySoxikibem. (Retirar a marca d'agua) Edit > Paste as New Layer. Pick Tool: Position X 81, Position Y 14.
17 - Edit > Copy no TituloBeaByXiki. Edit > Paste as New Layer. Pick Tool: Position X 151, Position Y 241. Effects > 3D Effects > Drop Shadow: -66, 17, 10, 0, Color: cor do Backgorund.
18 - Image > Add Borders > Symmetric: 1px - Color: cor do Foreground. 10px - Color: com a cor 3. 1px - Color: cor do Foreground. 3px - Color: cor do Background. 1px - Color: cor do Foreground 20px - Color: com a cor 3. 1px - Color: cor do Foreground 40px - Color: com a cor 3.
19 - Edit > Copy no Tube Personagem. Edit > Paste as New Layer. Posicionar à direita do trabalho. Aplique Drop Shadow ou efeito como desejar.
20 - Image > Add Borders > Symmetric: 1px - Color: cor do Foreground.
21 - Aplicar sua marca d'água ou assinatura. File > Export > JPEG Optimizer.
VERSÃO:
CRÉDITOS: Versão 1 & 2 Criação - Formatação e Art Final by Soxikibem Tube Personagem & Misted: Tubed by Pqna&Alice
Sinta-se à vontade para enviar suas versões. Terei todo o prazer em publicá-las em nosso site.
|