TRADUÇÕES: Obrigada aos nossos tradutores!
MATERIAL 1 Tube Principal à sua escolha 1 Misted Paisagem à sua escolha 004DecorByPqnaAlice AlphaChannel_TrudyBySoxikibem
PLUGINS
Mura's Seamless > Seamless by Mirror
Tutorial elaborado no PSP 2022
TUTORIAL
1 - Abrir o material no PSP, duplique e feche os originais. Escolha duas cores para trabalhar. Foreground: #4d4f4a Background: #a3ada2
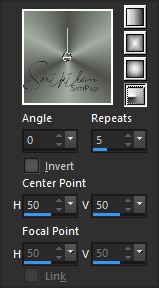
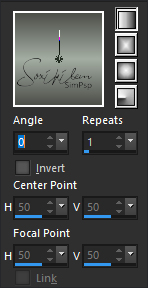
2 - Abra o AlphaChannel_TrudyBySoxikibem. Pintar a transparência com um gradiente Radial, formado pelas cores escolhidas:
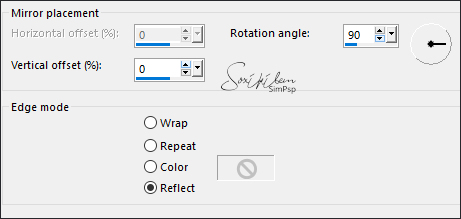
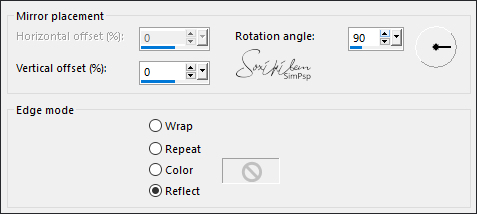
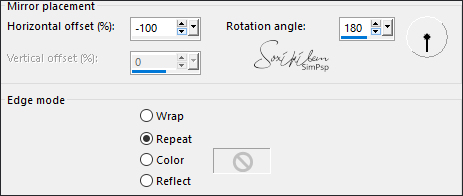
3 - Effects > Reflection Effects > Rotating Mirror:
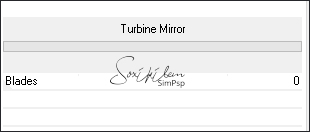
4 - Effects > Plugins > Filters Unlimited 2.0 > BKg Designers sf10 III > Turbine Mirror:
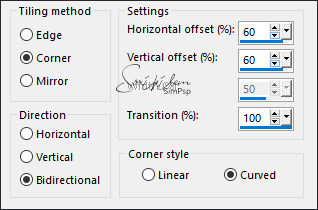
5 - Effects > Image Effects > Seamless Tiling:
6 - Edit > Copy. Layers > New Raster Layer. Selections > Load/Save Selections > Load Selection From Alpha Channel: Selection #1. Edit > Paste Into Selection. Effects > Plugins > Filters Unlimited 2.0 > BKg Designers sf10 III > SIM 4 Way Average. Selections > Select None.
7 - Effects > Plugins > Italian Editors Effect > Effetto Fantasma:
8 - Effects > Plugins > Italian Editors Effect > Bordo con Luci:
9 - Effects > Plugins > Mura's Seamless > Emboss at Alpha: Default
Edit > Repeat Emboss at Alpha.
10 - Ativar a Layer Raster 1. Selections > Load/Save Selections > Load Selection From Alpha Channel: Selection #2. Selections > Promote Selection to Layer. Selections > Select None. Effects > Plugins > Filters Unlimited 2.0 > BKg Designers sf10 III > SW Hollow Dot.
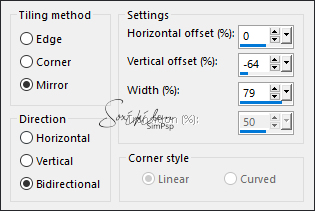
11 - Effects > Plugins > Mura's Seamless > Seamless by Mirror:
Layers > Duplicate. Image > Mirror > Mirror Horizontal. Layers > Properties > General > Blend Mode: Difference - Opacity: 70%.
12 - Ativar a Layer Promoted Selection. Effects > Plugins > Italian Editors Effect > Effetto Fantasma:
13 - Effects > Reflection Effects > Rotating Mirror:
14 - Layers > Duplicate. Effects > Reflection Effects > Rotating Mirror.
15 - Effects > Plugins > Mura's Seamless > Emboss at Alpha: Default
Edit > Repeat Emboss at Alpha. Layers > Properties > General > Blend Mode: Difference - Opacity: 55%.
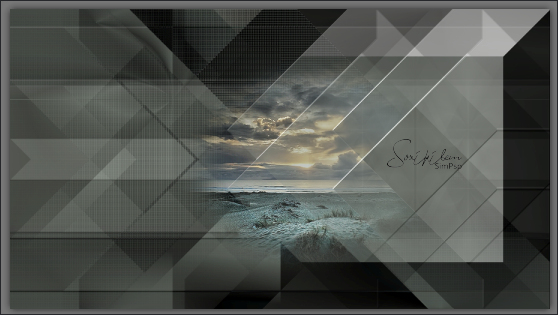
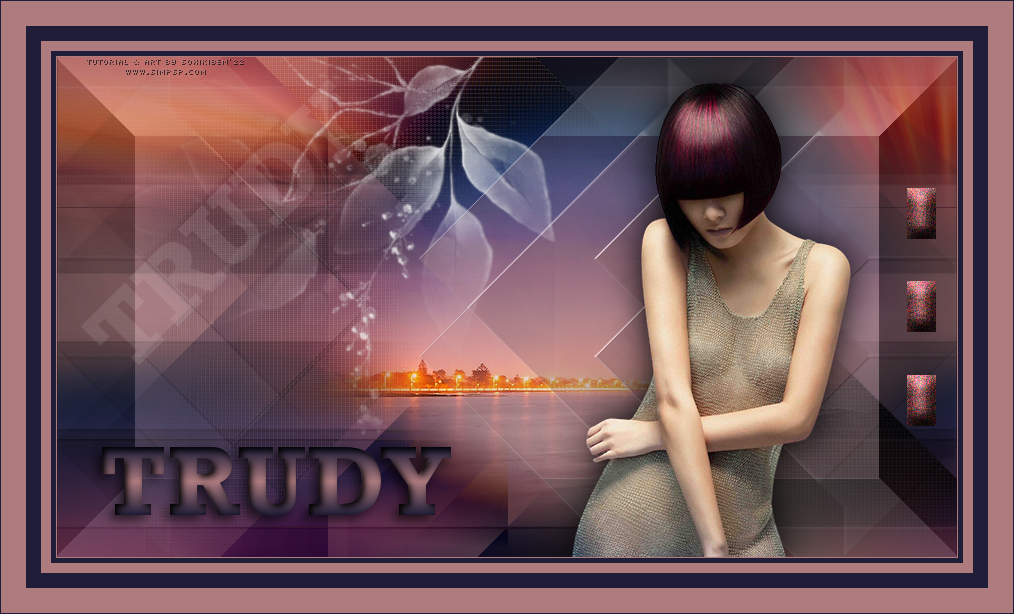
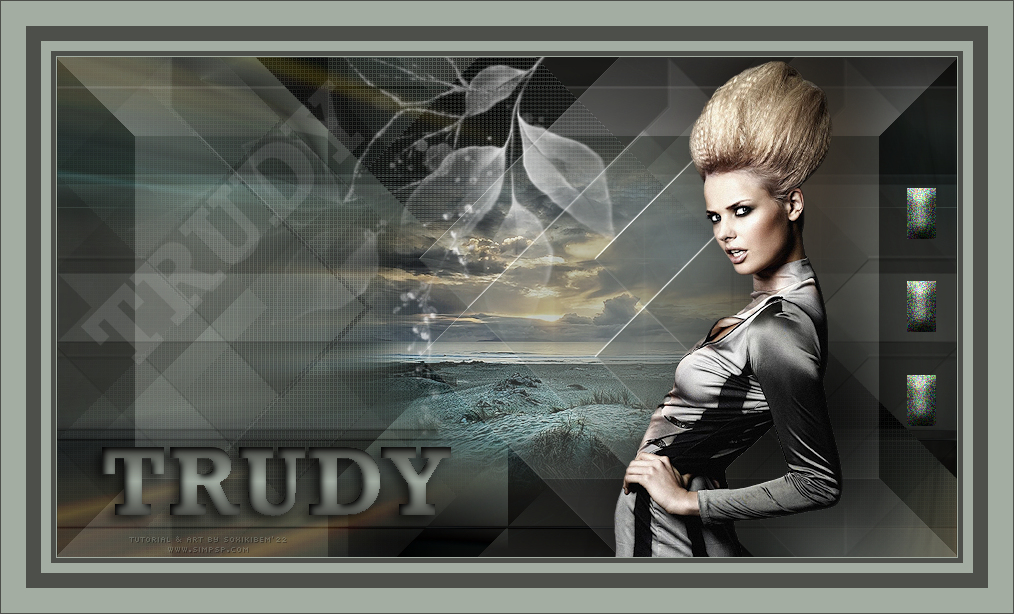
16 - Ativar a Layer Copy of Promoted Selection. Edit > Copy no Miste Paisagem. Edit > Paste a New Layer. Image > Resize se for necessário, aqui eu dei um resize de 70%. Adjust > Sharpness > Sharpen. Posicione conforme o exemplo:
17 - Layers > Duplicate. Effects > Image Effects > Seamless Tiling: Default. Adjust > Blur > Radial Blur:
Layers > Arrange > Move Down. Layers > Properties > General > Blend Mode: Hard Light.
18 - Ativar a Layer do topo (Raster2). Layers > New Raster Layer. Selections > Load/Save Selections > Load Selection From Alpha Channel: Selection #3. Pintar esta seleção com a cor #ffffff (branco). Selections > Select None. Layers > Properties > General > Opacity: 10%.
19 - Layers > New Raster Layer. Selections > Load/Save Selections > Load Selection From Alpha Channel: Selection #4. Pintar esta seleção com um gradiente Linear, formado pelas cores em uso:
20 - Layers > New Raster Layer. Effects > 3D Effects > Cutout:
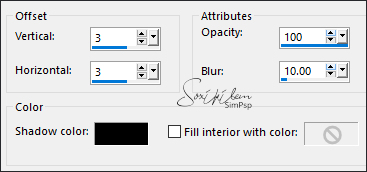
Selection > Select None. Layers > Merge > Merge Down. Effects > 3D Effects > Drop Shadow: 5, -5, 60, 15, Color: #000000 (preto)
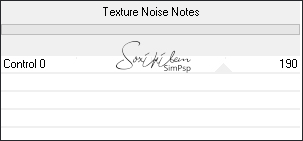
21 - Selections > Load/Save Selections > Load Selection From Alpha Channel: Selection #5. Layers > New Raster Layer. Pintar a seleção com a cor do background. Filters Unlimited 2.0 > BKg Designers sf10 III > Texture Noise Notes:
Selections > Select None.
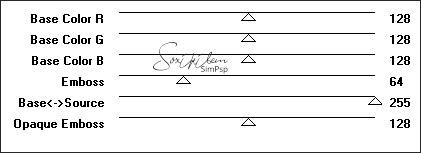
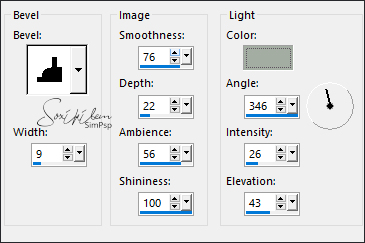
22 - Effects > 3D Effects > Inner bevel: Color: com a cor do background
23 - Edit > Copy no arquivo 004DecorByPqnaAlice. Edit > Paste a New Layer. Ferramenta Pick Tool: Position X 68, Position Y -40.
24 - Edit > Copy no Tube Principal. Edit > Paste as New Layer. Posicionar à direita. Resize se for necessário, no tube que usei dei um resize de 70%. Adjust > Sharpness > Sharpen. Aplique Drop Shadow ou efeito que desejar no tube.
25 - Ativar a layer Raster2. Effects > Image Effects > Seamlessn Tiling:
26 - Image > Add Borders > Symmetric: 1px - com a cor do Background 5px - com a cor do Foreground 10px - com a cor do Background 15px - com a cor do Foreground 25px - com a cor do Background 1px - com a cor do Foreground
27 - Aplicar sua marca d'água ou assinatura. File > Export > JPEG Optimizer.
CRÉDITOS: Criação - Formatação e Art Final by Soxikibem Tubes Principais - Misteds Paisagem e Decor: Tubed by Pqna&Alice
Sinta-se à vontade para enviar suas versões. Terei todo o prazer em publicá-las em nosso site.
|
