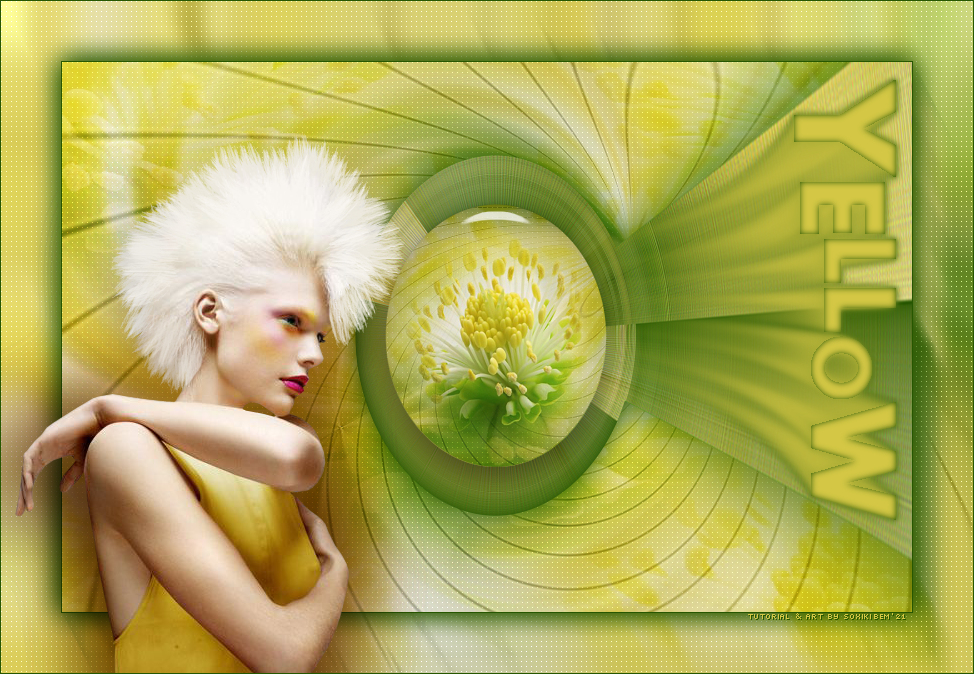
|
TRADUÇÕES:
Obrigada aos nossos tradutores!
MATERIAL 1 Tube Principal à sua escolha 1 Misted Floral à sua escolha Selection: Yellow1Soxiki* *(Salvar na pasta Selection do PSP) Preset Alien Skin Eye Candy 5 - Impact: yellowBySoxiki.f1s - MotionYellowSoxiki.f1s ** ** De dois cliques no arquivo para instalar e importar para dentro do plugin
PLUGINS
UnPlugged Tools > Interlace
Execução
1 - Abrir o material no PSP, duplique e feche os originais. Escolha duas cores para trabalhar. Foreground: #81450a Background: #fbce43
2 - Abra uma Transparência de 850x550. Pintar com a cor do background. Selections > Select All.
3 - Edit > Copy no Misted Floral. Edit > Paste Into Selection. Selections > Select None.
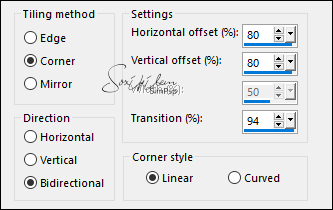
4 - Effects > Image Effects > Seamless Tiling: Default.
5 - Adjust > Blur > Radial Blur:
Effects > Edge Effects > Enhance.
6 - Layers > Duplicate. Fechar a visibilidade da Layer Copy of Raster 1. Ativar a layer Raster 1.
7 - Effects > Plugins > UnPlugged Tools > Interlace:
Adjust > Sharpness > Sharpen.
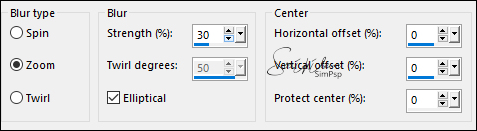
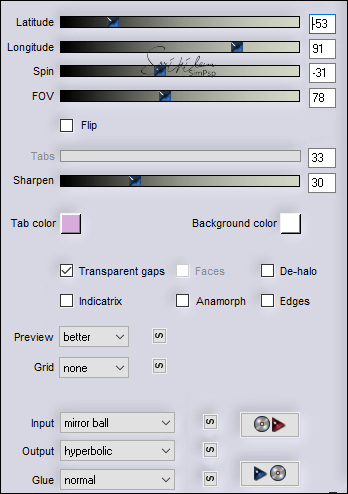
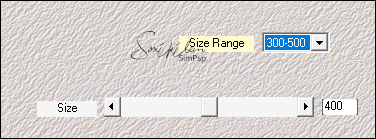
8 - Effects > Plugins > Flaming Pear > Flexify 2:
9 - Effects > Plugins > Penta.com > color dot:
10 - Layers > New Raster Layer. Selections > Select All. Edit > Copy no Misted Floral. Edit > Paste Into Selection. Selections > Select None. Effects > Image Effects > Seamless Tiling: Default. Layers > Properties > General > Blend Mode: Soft Light. Adjust > Sharpness > Sharpen.
11 - Ativar e abrir a visibilidade da Layer Copy of Raster 1. Effects > Image Effects > Seamless Tiling:
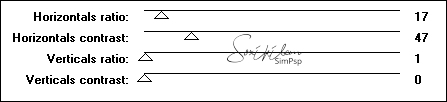
12 - Effects > Plugins > Mehdi > Weaver:
Effects > Edge Effects > Enhance. Edit > Repeat Enhance Edges.
13 - Selections > Select All. Selections > Modify > Contract: 75. Pressionar a tecla Delete do teclado. Selections > Select None.
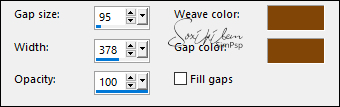
14 - Effects > Texture Effects > Weave: Weave color: cor do foreground.
Effects > 3D Effects > Drop Shadow: 0, 0, 100, 60, Color: cor do foreground.
15 - Effects > Plugin > Flaming Pear > Flexify 2:
16 - Image > Mirror > Mirror Horizontal. Com a Magic Wand: Tolerance e Feather: 0, selecionar dentro do circulo. Layers > New Raster Layer.
17 - Edit > Copy no Misted Floral. Edit > Paste Into Selection. Adjust > Sharpenss > Sharpen.
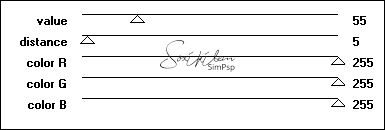
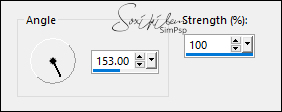
18 - Layers > New Raster Layer. Selections > Modify > Expand Selection: 1. Effects > Plugins > Alien Skin Eye Candy 5 - Impact > Glass: Settings: yellowBySoxiki. Ou Settings: Clear e configure o Basic como no exemplo:
Selections > Select None.
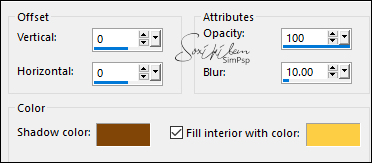
19 - Layers > New Raster Layer. Selections > Load/Save Selection > Load Selection From Disk: Yellow1Soxiki. Effects > 3D Effects > Cutout. Shadow color: cor do Foreground, Fill interior with color: cor do Background.
Selections > Select None.
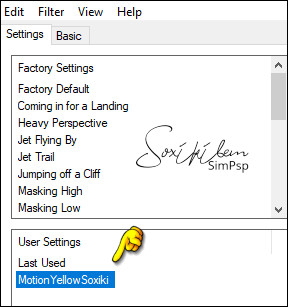
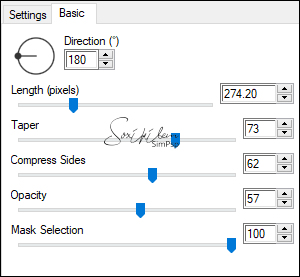
20 - Effects > Plugins > Alien Skin Eye Candy 5 - Impact > Motion Trail: Settings: MotionYellowSoxiki.
ou configure o Basic como no exemplo:
Effects > 3D Effects > Drop shadow: 0, 0, 100, 5, Color: cor do Foreground.
21 - Ativar a layer Raster1. Edit > Copy. Image > Add Borders > Symmetric: 1px - Color: cor do Foreground.
22 - Selections > Select All. Image > Add Borders > Symmetric: 60px com qualquer cor. Selections > Invert. Edit > Paste Into Selection.
23 - Adjust > Blur > Motion Blur:
Edit > Repeat Motion Blur.
24 - Effects > Plugins > Penta.com > color dot:
Edit > Repeat color dot.
25 - Selections > invert. Effects > 3D Effects > Drop Shadow: 0, 0, 100, 40, Color: cor do Foreground. Edit > Repeat Drop Shadow. Selections > Select None.
26 - Edit > Copy no tube principal. Edit > Paste As New Layer. Posicione à esquerda. Effects > 3D Effects > Drop Shadow à sua escolha.
27 - Image > Add Borders > Symmetric: 1px - Color: cor do Foreground.
28 - Aplicar sua marca d'água ou assinatura. File > Export > JPEG Optimizer.
CRÉDITOS Versão1: Criação - Formatação e Art Final by Soxikibem Tube Principal: Tubed by Karine Dreams Misted Paisagem: by Nicole Créditos Versão 2: Tube Principal e Misted Paisagem: by Nicole
Sinta-se à vontade para enviar suas versões. Terei todo o prazer em publicá-las em nosso site.
|