|
TRADUÇÕES:
Obrigada aos nossos tradutores!
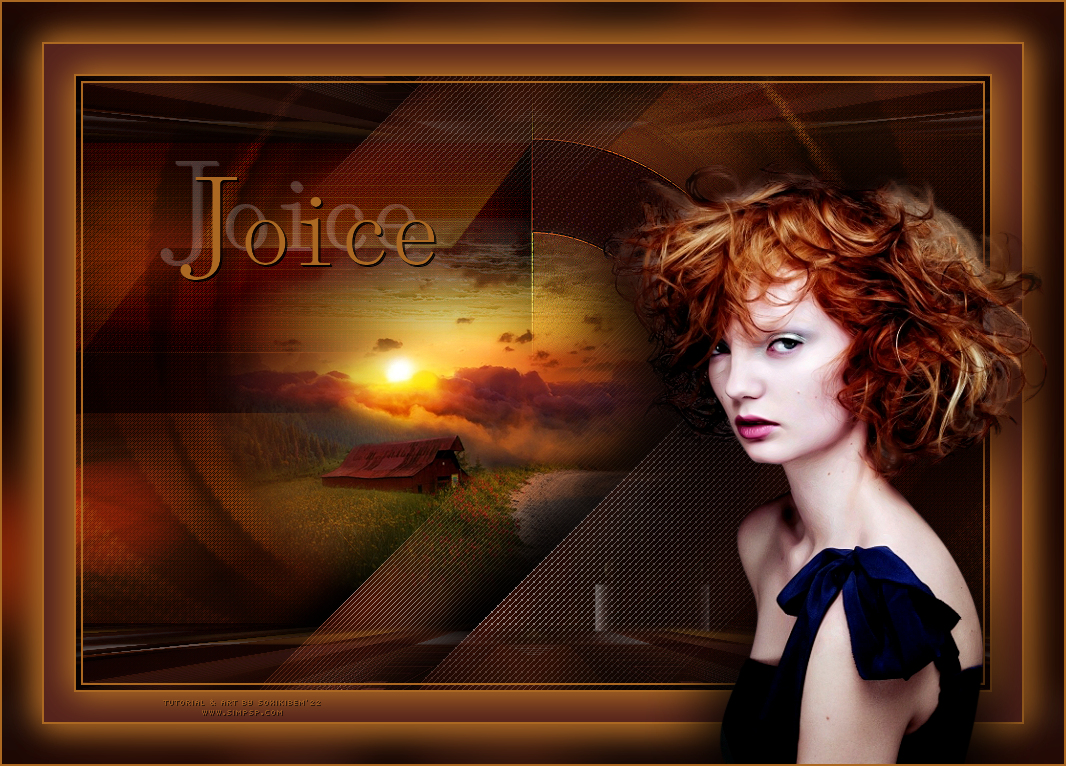
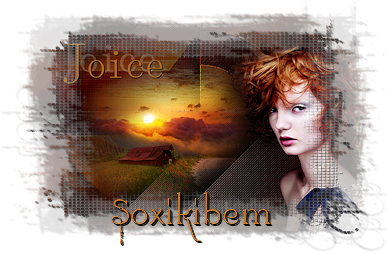
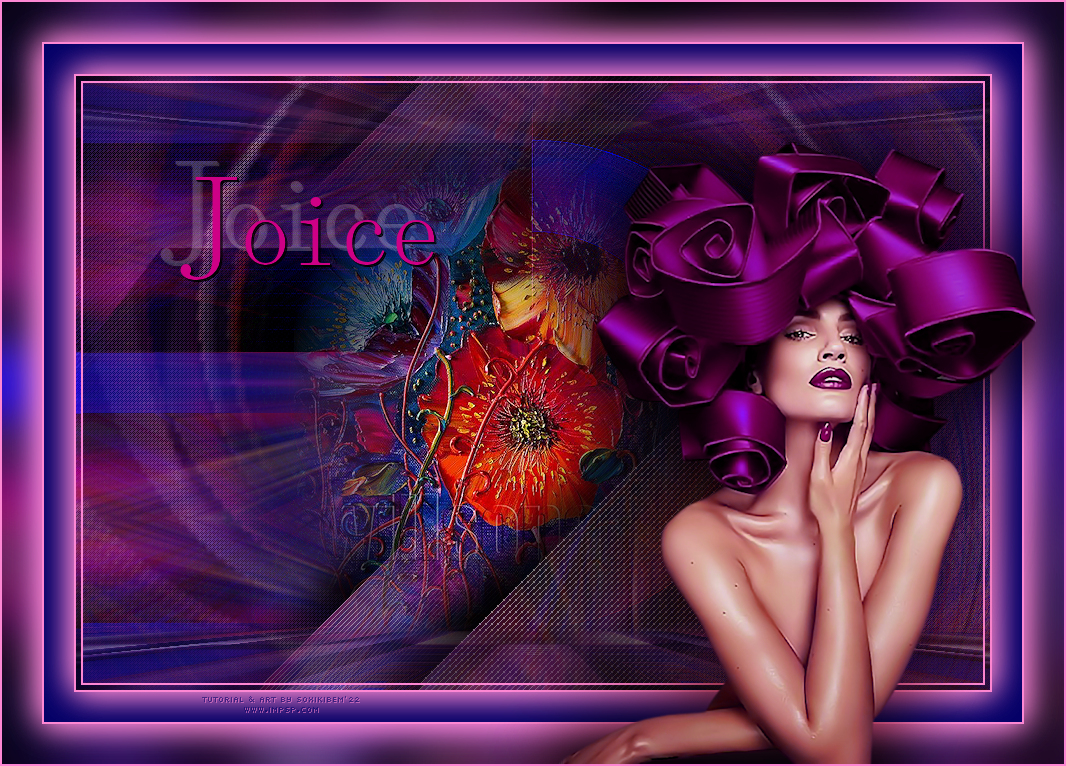
MATERIAL 1 Tube Principal à sua escolha 1 Misted Paisagem à sua escolha TituloJoiceBySoxikibem Selections: Selection1Xiki - Selection2Xiki **(Salvar a seleção na pasta Selections do PSP)
PLUGINS Mehdi > Sorting Tiles Crescent Moon > Stripe Tile Crescent Moon > Terracotta AP [Lines] > Lines - SilverLining Mura's Meister > Pole Transform Mura's Meister > Perspective Tiling Graphics Plus > Cross Shadow
Filters Unlimited 2.0 > &<Sandflower Specials > Pool
Spotlight Tutorial criado no PSP 2022
Nota: Mudar os Blends se for necessário para combinar com as cores que estiver usando
Execução
1 - Abrir o material no PSP, duplique e feche os originais. Escolha duas cores para trabalhar: Foreground: #55231c Background: #ab6822
2 - Abra uma Transparência de 900x600px. Pintar com a cor do Foreground. Selections > Select All. Edit > Copy no Misted Paisagem. Edit > Paste into Selection. Selections > Select None.
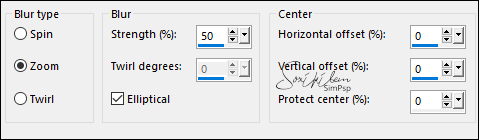
3 - Effects > Image Effects > Seamless Tiling: Default. Adjust > Blur > Radial Blur:
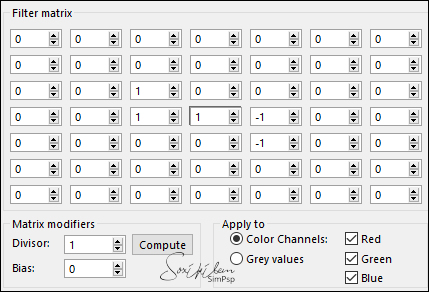
4 - Effects > User Defined Filter: Emboss_3
5 - Layers > Duplicate. Effects > Plugins > Crescent Moon > Stripe Tile:
6 - Layers > Duplicate. Image > Mirror > Mirror Vertical. Layers > Properties > General > Blend Mode: Multiply. Layers > Merge > Merge Down.
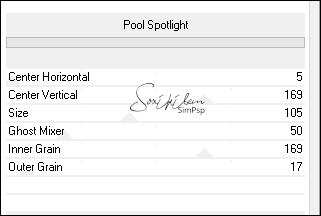
7 - Effects > Plugins > Filters Unlimited 2.0 > &<Sandflower Specials > Pool Spotlight:
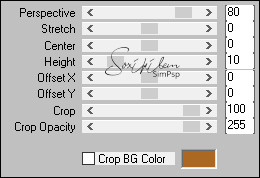
8 - Layers > Duplicate. Effects > Plugins > Mura's Meister > Pole Transform:
Image > Mirror > Mirror Horizontal. Effects > Edge Effects > Enhance. Edit > Repeat Enhance Edges.
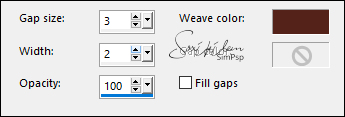
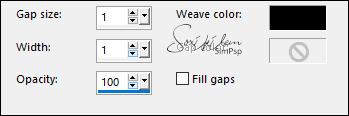
9 - Effects > Texture Effects > Weave. Weave color: cor do Foreground.
10 - Ativar a Layer Copy of Raster 1. Selections > Load/Save Selections > Load Selection From Disk: Selection1Xiki. Selections > Promote Selection to Layer.
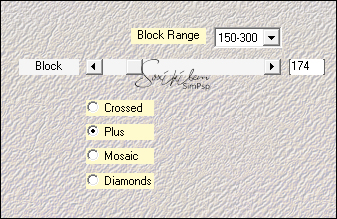
11 - Effects > Plugins > Crescent Moon > Terracotta:
Effects > Edge Effects > Enhance. Edit > Repeat Enhance Edges. Layers > Properties > General > Blend Mode: Screen.
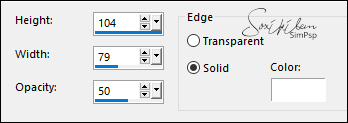
12 - Mantenha a seleção... Layers > New Raster Layer. Effects > 3D Effects > Buttonize:
Layers > Properties > General > Blend Mode: Burn. Selections > Select None.
13 - Ativar a Layer Copy of Raster1. Selections > Load/Save Selections > Load Selection From Disk: Selection2Xiki. Selections > Promote Selection to Layer.
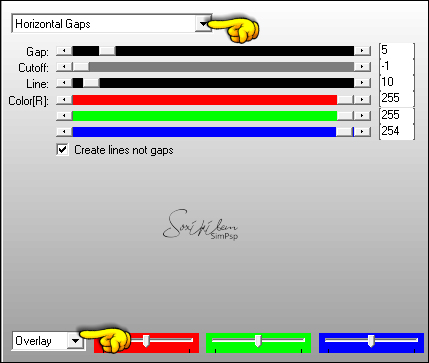
14 - Selections > Select None. Layers > Arrange > Bring to Top. Effects > Plugins > AP [Lines] > Lines - SilverLining:
Selections > Select None.
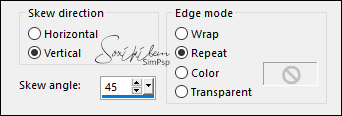
15 - Effects > Geometric Effects > Skew:
Effects > 3D Effects > Drop Shadow: -20, -20, 100, 50, Color: #000000.
16 - Layers > Duplicate. Effects > Image Effects > Seamless Tiling.
17 - Edit > Copy no Misted Paisagem. Edit > Paste As New Layer. Se estiver usando o Misted do material: Resize em 50% - all layers desmarcado. Image > Flip > Horizontal Pick Tool: Position X 124, Position Y 135. Adjust > Sharpness > Sharpen. Layers > Arrange > Move Down.
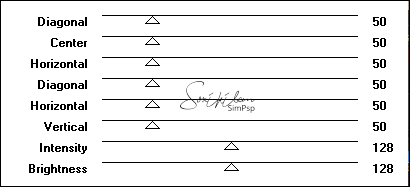
18 - Ativar a Layer do Topo. Edit > Copy Special > Copy Merged. Edit > Paste As New Layer. Effects > Plugins > Mehdi > Sorting Tiles:
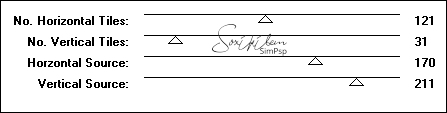
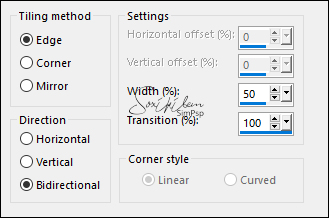
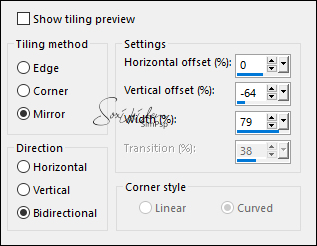
19 - Effects > Plugins > Mura's Meister > Perspective Tiling:
Effects > Reflection Effects > Rotating Mirror: Default.
19 - Com a Magic Wand: Tolerance 0, Feather 20, clique na parte transparente desta layer. Pressionar a tecla Delete do teclado 5 vezes. Selections > Select None.
20 - Effects > Image Effects > Seamless Tiling: Mirror ghost
Layers > Duplicate.
21- Effects > Plugins > Mura's Meister > Pole Transform:
22 - Effects > Texture Effects > Weave. Weave color: #000000
Layers > Arrange > Move Down. Layers > Properties > General > Blend Mode: Overlay.
23 - Edit > Copy Special > Copy Merged. Image > Add Borders > Symmetric: 2px - Color: cor do Background Selections > Select All. Image > Add Borders > Symmetric: 5px com qualquer cor Selections > Invert. Edit > Paste Into Selections.
24 - Effects > Plugins > Graphics Plus > Cross Shadow: Default.
Selections > Select None.
25 - Image > Add Borders > Symmetric: 2px - Color: cor do Background Selections > Select All. Image > Add Borders > Symmetric: 30px - Color: cor do Foreground Effects > 3D Effects > Drop Shadow: 0, 0, 100, 50, Color: cor do Background. Edit > Repeat Drop Shadow. Selections > Select None.
26 - Image > Add Borders > Symmetric: 2px - Color: cor do Background Selections > Select All. Image > Add Borders > Symmetric: 40px com qualquer cor. Selections > Invert. Edit > Paste Into Selections.
27 - Adjust > Blur > Gaussian Blur: 20. Effects > Plugins > Graphics Plus > Cross Shadow: Default.
28 - Selections > Invert. Effects > 3D Effects > Drop Shadow: 0, 0, 100, 50, Color: cor do Background. Edit > Repeat Drop Shadow. Selections > Select None.
29 - Edit > Copy no Tube Principal. Edit > Paste As New Layer. Posicionar à direita. Effects > 3D Effects > Drop Shadow à sua escolha.
30 - Edit > Copy no TituloJoiceBySoxikibem. Edit > Paste As New Layer. Pick Tool: Position X: 158, Position Y: 159.
31 - Image > Add Borders > Symmetric: 2px - Color: cor do Background.
32 - Aplicar sua marca d'água ou assinatura. File > Export > JPEG Optimizer.
CREDITOS Tube Principal by Nikita - Misted by Verlaine
VERSAO 2
CREDITOS Tube Principal & Misted by SuizaBella
Sinta-se à vontade para enviar suas versões. Terei todo o prazer em publicá-las em nosso site.
|